
Until now, the local PC transfer, also known as the PC-to-PC Migration feature, was one of the most convenient ways to transfer files and settings directly from an old Windows 11 computer to a new one. It allowed users to connect both computers over a local network and move their data without manually copying everything. However, Microsoft has marked this feature as no longer available and recommends using Windows Backup and Restore instead.
The change is being rolled out through the mandatory KB5127648 update, released this month. In this guide, we will see how to transfer files and settings to a new Windows 11 PC using Windows Backup, along with other available methods.
How to transfer Files and Settings to a new Windows 11 PC
The steps to transfer files and settings from an old PC to a new Windows 11 PC using Windows Backup are pretty easy. However, before you begin, keep the following points in mind:
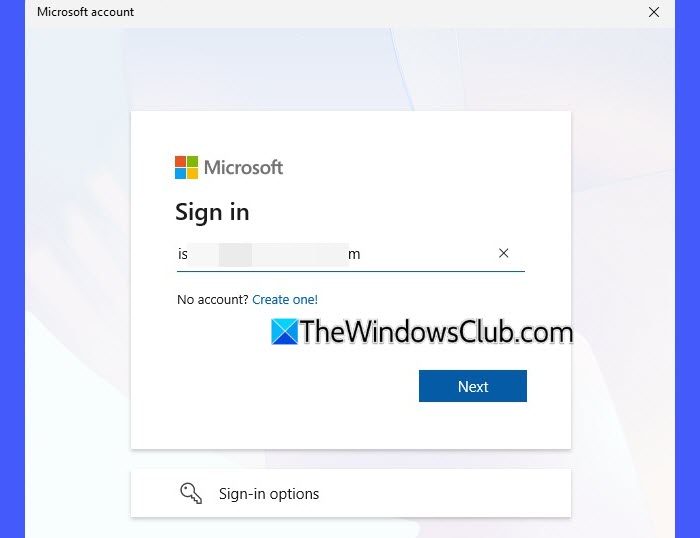
- Windows Backup requires a Microsoft account: You must sign in with your Microsoft account on both computers to back up and restore supported files and settings using Windows Backup. The feature is primarily designed for personal Microsoft accounts. Work or school accounts are not currently supported for this backup experience.
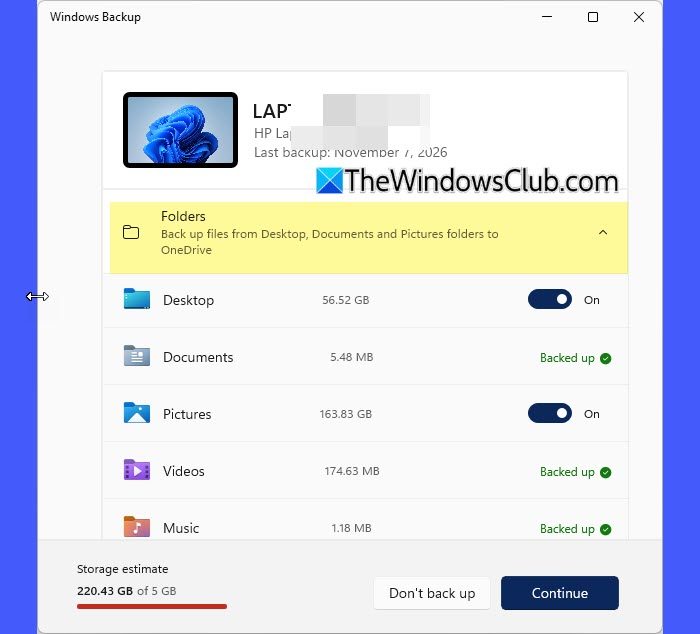
- OneDrive storage is limited: Windows Backup uses OneDrive to back up your selected folders. A free Microsoft account includes only 5 GB of OneDrive storage. If your files exceed this limit, you may need to purchase additional storage or use another transfer method.
- Your data passes through Microsoft’s cloud: Unlike the old PC-to-PC Migration feature, which transferred data directly over your local network, Windows Backup uploads supported files to OneDrive before they can be restored on the new PC. This requires an internet connection.
- Not everything gets transferred: Windows Backup does not create an exact copy of your old PC. It backs up supported Windows settings and an app list, but you may need to reinstall desktop applications and manually transfer application-specific data.
- You can still transfer files locally: If you don’t want to use OneDrive or upload your files to the cloud, you can use an external hard drive or USB drive to transfer them between computers.
Now let’s look at the steps you need to follow for the migration process.
Back up your old Windows 11 PC
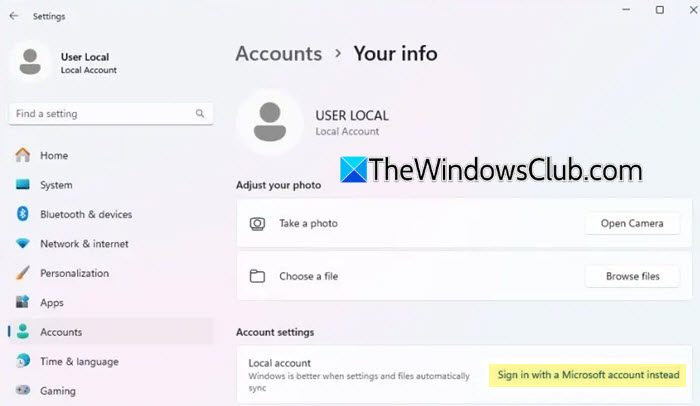
Open Settings (Win + I) and go to Accounts > Your info. If you are using a local account, select Sign in with a Microsoft account instead and complete the sign-in process.
Next, type Windows Backup in the Windows Search bar and launch the app. Expand the Folders section and select the folders you want to back up. You may choose to back up files from your Desktop, Documents, Pictures, Videos, and Music folders. Simply toggle the switch for each folder to On.
Next, expand the Apps, Settings, and Credentials sections to choose which Windows settings and preferences you’d like to back up. The available options include:
- Installed apps
- Accessibility
- Personalization
- Language preferences and dictionary
- Other Windows settings
- Accounts, Wi-Fi network and passwords
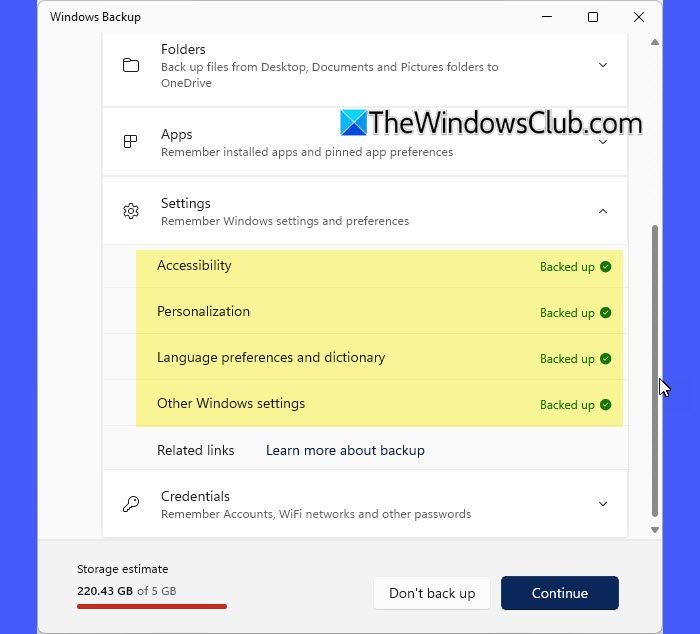
To back up a setting, toggle its corresponding switch to On.
Note:
- Some settings are backed up by default. If a setting has already been backed up, its status will appear as Backed up, and you won’t see a toggle switch for it.
- To back up your Microsoft Edge preferences, sign in to Microsoft Edge and turn on Sync.
Once you have configured the required options, select Back up and allow Windows Backup to synchronize your selected data with your Microsoft account and OneDrive.
Modify backup configuration
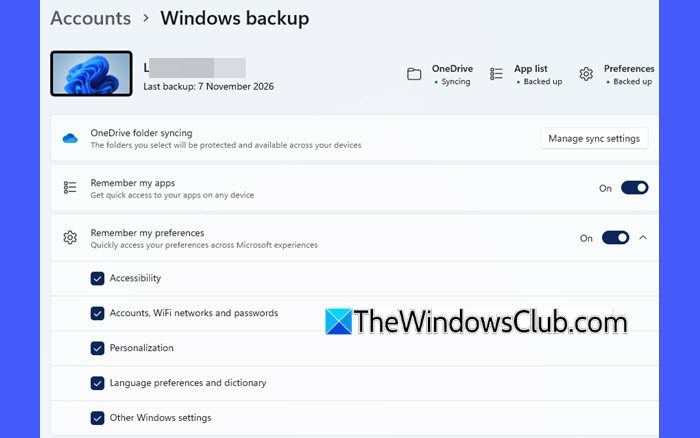
If you want to change which files, apps, or Windows settings are backed up, you can do so from the Settings app.
Open Settings and navigate to Accounts > Windows backup.
- Click Set up syncing next to OneDrive folder syncing. In the pop-up window, use available toggles to select which folders you want to synchronize with OneDrive. Click Save changes to close the pop-up.
- Use the toggle next to Remember my apps to enable or disable app backup.
- Expand Remember my preferences and select or clear the checkboxes for the Windows settings you want to back up.
Restore the backup on your new Windows 11 PC
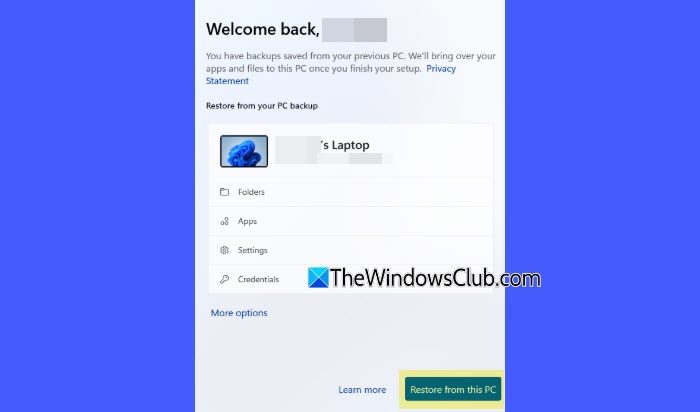
Turn on your new PC and begin the Windows setup process. Connect to the internet and sign in using the same Microsoft account used on your old PC. When prompted, select the backup associated with your old PC.
If multiple backups are available, select More options and choose the correct PC backup. Follow the on-screen instructions to restore your backed-up settings and app list.
Once you reach the desktop, sign in to OneDrive using the same Microsoft account. Allow OneDrive to synchronize your files and verify that the required folders are available.
Other ways to transfer files from one PC to another
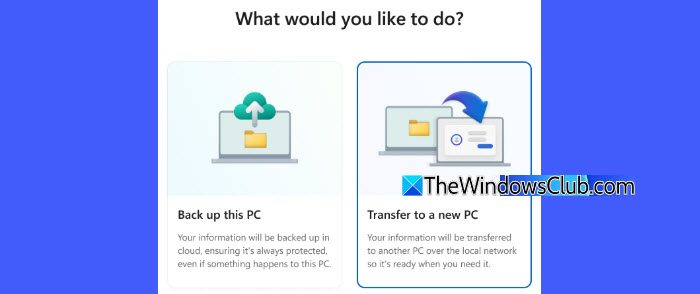
If you don’t want to use Windows Backup or have more data than your available OneDrive storage can accommodate, you can use other methods to transfer files between your old and new Windows 11 PCs.
- Using an external hard drive or USB drive: Copy your files from the old computer to an external storage device and then paste them into the appropriate folders on your new PC. This is useful when transferring large amounts of data without an internet connection.
- Using cloud storage or web-based file transfer services: You may use other third-party cloud storage services such as Google Drive or Dropbox to upload files from your old PC and download them on your new one. Alternatively, web-based file transfer services such as WeTransfer, TransferNow, and FilePizza let you share large files between computers without manually copying them to an external storage device.
- Using Nearby Sharing: Windows 11 includes Nearby Sharing, which lets you send files between nearby Windows PCs over Bluetooth or Wi-Fi. Enable it on both computers and use the Share option in File Explorer to send files.
- Using a network share: If both computers are connected to the same local network (LAN or Wi-Fi), you can set up file sharing to transfer data. This is useful for transferring files without uploading them to cloud storage.
- Using third-party file transfer software: You can also use dedicated file-transfer applications to move files between computers. Some applications support direct transfers over a local network, while others use cloud storage.
I hope you find this useful.
Read: How to transfer files between a virtual machine and a host computer.
How do I transfer Windows 11 settings to a new computer?
You can use the Windows Backup app to transfer supported Windows settings and preferences to a new Windows 11 PC. Sign in with the same Microsoft account on both computers, back up your preferences on the old PC, and restore them during the initial setup of your new PC.
Does Windows 11 have an Easy Transfer tool?
Windows 11 does not include the Windows Easy Transfer tool that was available in earlier Windows versions. Microsoft also discontinued its newer PC-to-PC Migration feature. You can use Windows Backup, OneDrive, an external storage device, or third-party file-transfer services to move your data to a new PC.
Read Next: Windows stops copying files; File Transfer gets stuck halfway.
