
Some users are reporting that their hard drive partition is showing the Full repair needed status message in Windows 11 Settings. This issue is usually associated with the EFI partition. However, other hard drive partitions can also show this error. If your hard drive is showing the Full repair needed message, the solutions provided in this article will help you.
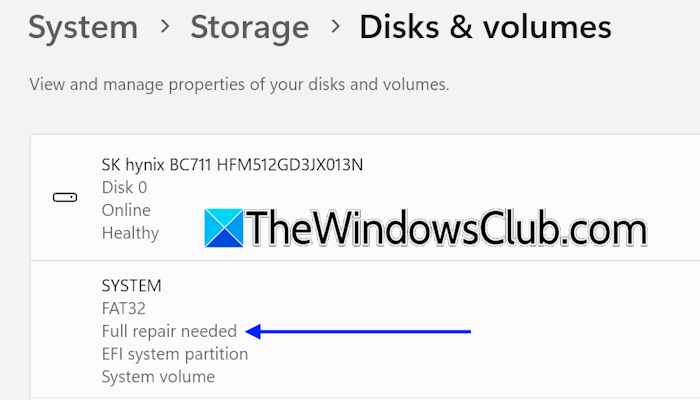
If Windows displays this message on the EFI partition, this means that Windows encountered some issues with the EFI partition, which need to be fixed. If you ignore this message, you may encounter boot issues.
EFI System partition Full repair needed in Windows 11
Use the following solutions if your hard drive partition is showing the Full repair needed message in Windows 11 Settings. Before proceeding, we suggest you check for Windows Update manually. Install the update (if available). If this works, you will save time in advanced troubleshooting.
- Run the Chkdsk scan
- Run full system diagnostics
- Repair your system image files
- Run Startup Repair
- Repair the EFI partition
- Reset your PC or perform a clean installation of Windows
All these fixes are explained in detail below.
1] Run the chkdsk scan
If this issue occurs with a hard drive partition other than the EFI partition, you can use the Chkdsk utility to scan and repair it. Run the chkdsk scan and see if that works.
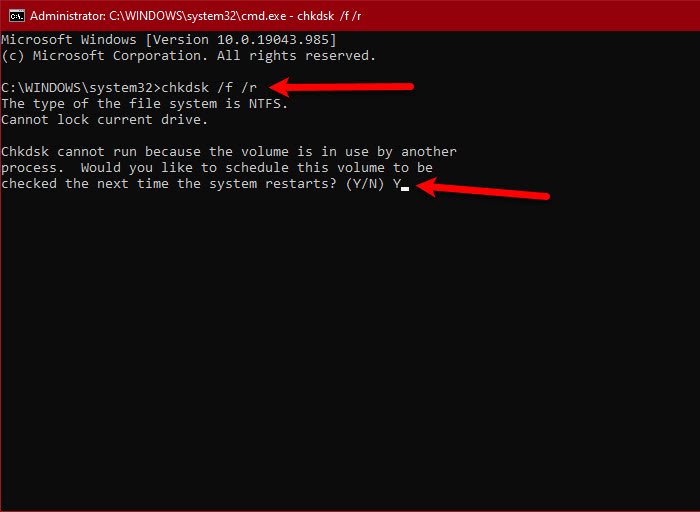
You cannot use the chkdsk utility to scan hard drive partitions without a label. Therefore, if the issue occurs with the EFI partition, you need to assign a drive letter to it to scan it with the chkdsk utility. For that, follow these steps:
- Click on Windows Search.
- Type diskpart.
- Select Diskpart from the search results.
- Click Yes in the UAC prompt.
Once the Diskpart utility appears on your screen, execute these commands one by one:
list disk

select disk #
In the above command, replace # with the correct disk number. After that, run the following command:
list partition
Diskpart shows the EFI partition as the System partition. To select the right partition, open Disk Management and note the size of the EFI partition. The System partition, which shows the exact size in the Diskpart utility, is the EFI partition. Now, type:
select partition #
Replace # with the partition number representing the EFI partition. Now, assign the drive letter. Use the following command:
assign letter=S
You can use another letter in place of S if you want. Diskpart will assign the required letter to the EFI partition. Now, close the Diskpart utility and launch the Chkdsk utility. Scan the EFI partition for errors. If chkdsk finds any issues with the EFI partition, it will repair it.
After performing the chkdsk scan, remove the drive letter from the EFI partition by running the following commands in Diskpart:
list disk

select disk #

list partition

select partition #

remove letter=S

exit
In the above commands, replace # with the correct disk number and EFI drive letter. If you have assigned another letter than S, then type that letter in place of S.
2] Run full system diagnostics
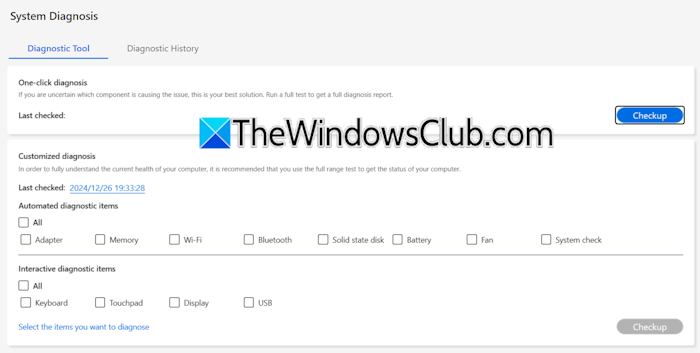
Computer manufacturers provide dedicated software to monitor the computer’s performance. These tools include MyASUS app for ASUS computers, HP Support Assistant for HP computers, Dell SupportAssist for Dell computers, and more. They allow users to run diagnostic tests to fix several issues.
Based on your computer brand, download the required software from your computer manufacturer’s official website. Launch the software and run a full system diagnostics test. The test may take time. Hence, wait till the test is completed. After the test completes, check if the issue is fixed. If not, read the generated report to know the exact cause of the issue, so you can troubleshoot accordingly.
3] Repair your system image files
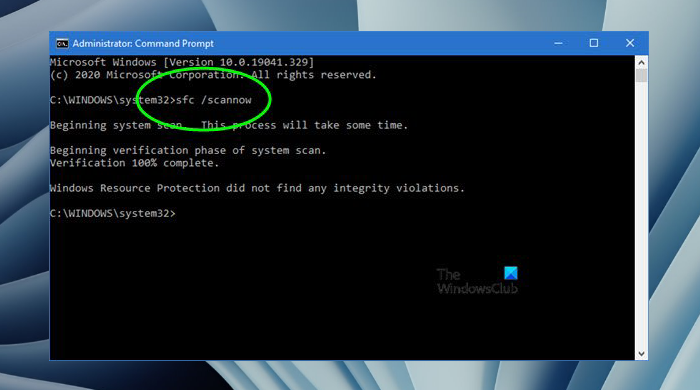
If the issue persists, try repairing your system image files. Use the built-in command-line utilities, System File Checker and DISM, for this purpose. Do not interrupt the scan. After the scan is completed, check if the issue is fixed.
4] Run Startup Repair
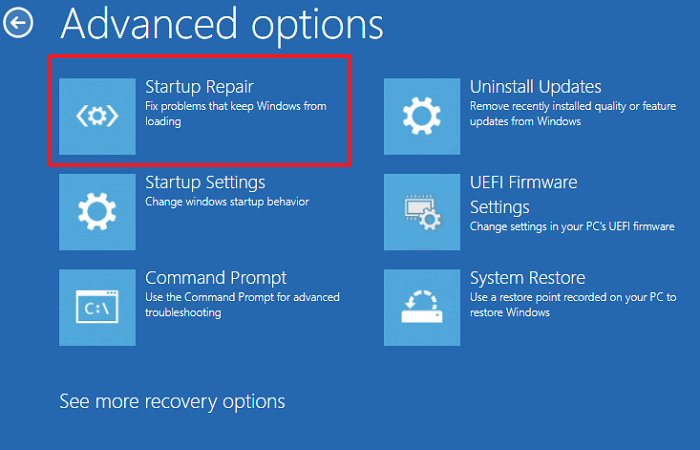
You can also try running the Startup Repair. It is designed to detect and repair the issues related to corrupted boot files, damaged BCD, boot manager problems, and other boot issues. To run this tool, you need to boot into Windows Recovery Environment. After entering the Windows Recovery Environment, go to Troubleshoot > Advanced Options > Startup Repair.
5] Repair the EFI partition
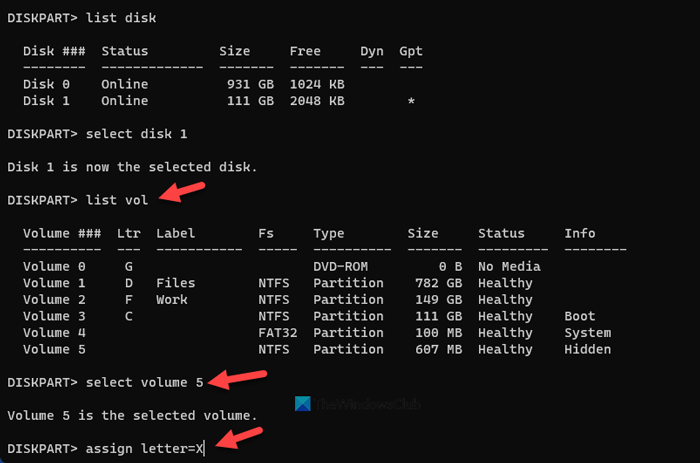
If none of these fixes work, repair the EFI partition. For this, you have to assign a drive letter to the EFI partition, then run the required BCD boot commands.
6] Reset your PC or perform a clean installation of Windows
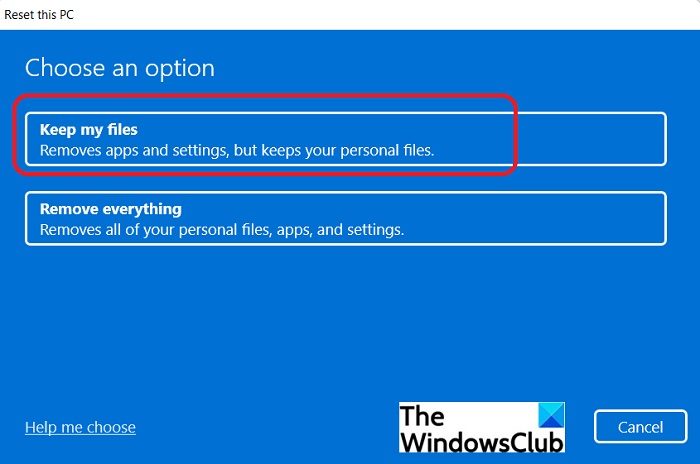
If the issue persists, resetting the PC to factory defaults can help. While performing this action, select the Keep my files option, so Windows won’t erase your data. However, backing up all the important files is always a wise step before proceeding. This step will also uninstall all programs from your system, so you will need to reinstall them from scratch.
If this does not work, the last resort is to perform a clean installation of Windows. This will erase all your data from the partition on the selected hard drive.
I hope this helps.
Is the EFI partition needed?
Yes, an EFI partition is a basic requirement of a Windows operating system. It contains the Boot Configuration Data and boot files. If this partition is deleted or corrupted, you cannot boot into Windows and will encounter an error like Boot device not found.
Is it okay to delete the EFI partition?
No, it is not okay to delete the EFI partition. Doing this will make your system unbootable because it contains boot files. If you are performing a clean installation of Windows, you can delete it and all other partitions from your C drive.
Read next: One of your disks is at risk (SMART Event) on Windows.
