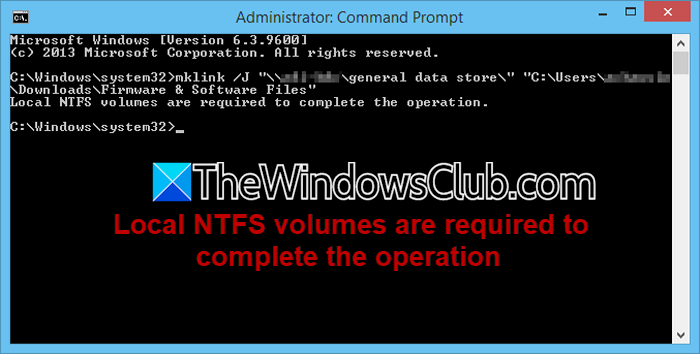
The Local NTFS volumes are required to complete the operation error usually pops up when Windows or an installer attempts advanced system tasks on an unsupported drive. This roadblock occurs when the target lacks critical NTFS features, such as security permissions or hard links. This guide provides five proven solutions to resolve temporary directory conflicts, fix partition issues, and get your installation back on track.
Local NTFS volumes are required to complete the operation mean?
The “Local NTFS volumes are required to complete the operation” error message means Windows cannot find a physical hard drive partition formatted with NTFS to perform the task. The current target lacks the necessary NTFS features, such as security permissions, hard links, and transaction support.
Local NTFS volumes are required to complete the operation
If you encounter the “Local NTFS volumes are required to complete the operation” error message, follow the provided solutions.
- Redirect %TEMP% and %TMP% to a local NTFS folder
- Check System Drive and Windows Partition Drive Letters
- Copy installation sources to a local NTFS drive
- Disable RAM disk software or custom temp drive mapping
- Change the target location in backup or imaging software
Let us get started with the troubleshooting guide.
1] Redirect %TEMP% and %TMP% to a local NTFS folder
%TEMP% and %TMP% are environment variables that tell Windows and applications where temporary files should be stored. The installer cannot use NTFS-specific operations if these folders reside on a network drive, a RAM disk, or a removable FAT32 drive. Redirecting both variables to a dedicated folder on a local NTFS volume ensures that all temporary file operations occur on a supported file system. This resolves the issue by allowing Windows to use the new location for every program that relies on temporary storage.
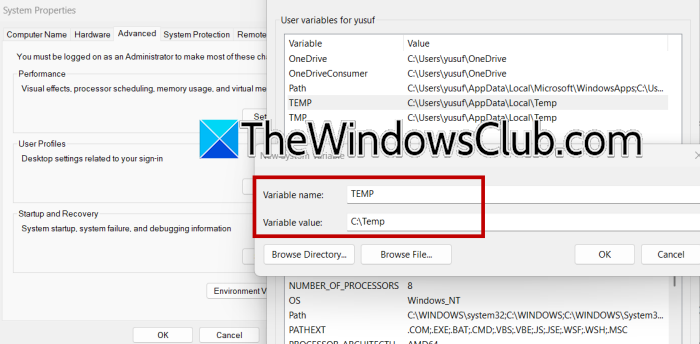
- Click Win + R to open the Run dialogue box, type sysdm.cpl, and press Enter to open System Properties.
- Go to the Advanced tab, and click on Environment Variables. Before changing the environment variables, ensure that the destination folder exists. If C:\Temp is not present, open File Explorer, navigate to the C: drive, and create a new Temp folder.
- Next, find TEMP and TMP under User Variables. If they exist, select each, click Edit, and change their values to C:\Temp. If they do not exist, click New and create them with that path.
- Next, navigate to System Variables, repeat the same process for TEMP and TMP, and click OK on all windows.
Now, reboot the device, and then open a Command Prompt window and run the following commands echo %TEMP% and echo %TMP% to confirm that both variables point to C:\Temp. If this fails, execute the alternate method:
- Click Win + R, type regedit, and press Enter to open Registry Editor.
- Navigate to HKEY_CURRENT_USER\Environment, double-click TEMP and TMP and set their data to C:\Temp.
- Next, go to HKEY_LOCAL_MACHINE\SYSTEM\CurrentControlSet\Control\Session Manager\Environment and repeat step 3 for the system-wide variables.
- Close Registry Editor, sign out and sign back in, and then verify with echo %TEMP% and echo %TMP% in a new Command Prompt.
Verify whether the operation is successful; if it fails, see the next solution.
2] Check System Drive and Windows Partition Drive Letters
The operating system may fail to see any eligible NTFS volume if the boot partition has lost its drive letter, or if the letter has been accidentally changed to a network-mapped letter. We are going to reassign drive letters and restore the standard C: letter to the Windows partition, which allows the installer to correctly enumerate NTFS drives.
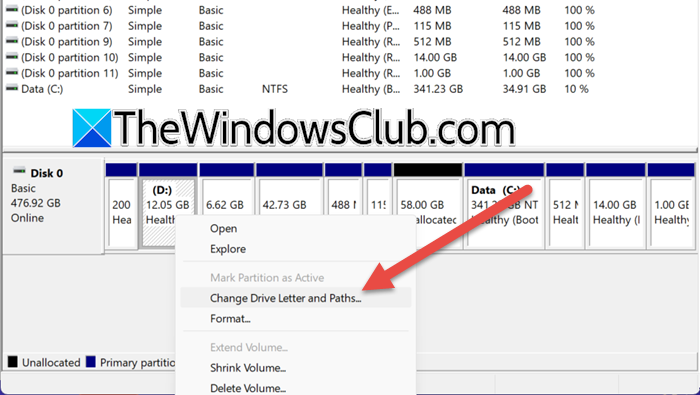
- Right-click the Start button, select Disk Management, and locate the partition that contains the Windows folder.
- Confirm it shows NTFS under File System, and if that partition has no drive letter or uses an unexpected letter, right-click on it and choose Change Drive Letter and Paths option.
- Click Add or Change, and then select a letter, and click OK. If the previous letter was C:, users may need to correct the boot configuration; otherwise, a simple reboot will work fine.
After reboot, retry the operation that gave the error, and move to the next solution if the issue persists.
3] Copy installation sources to a local NTFS drive
When installation files are stored on an external medium such as an ISO, USB drive, or network share, Windows may encounter filesystem or permission limitations when reading them. Copying the necessary files to a local NTFS folder removes those restrictions. Therefore, we are going to copy the required files to a local NTFS folder and run the installation from that location. This forces Windows to now read and write exclusively from a supported volume.
- Insert or mount Windows installation media, note its drive letter, and then create a new folder on the local NTFS drive, for example, C:\WinSources.
- Open Command Prompt as administrator, run xcopy D:\sources\sxs C:\WinSources\sxs /E /I and wait for the copy to finish.
- Now, run the feature installation command. For example, to enable Hyper-V:
DISM /Online /Enable-Feature /FeatureName:Microsoft-Hyper-V /All /Source:C:\WinSources\sxs /LimitAccess
After DISM completes, restart if prompted and test the operation. If this does not resolve the issue, continue with the next solution.
4] Disable RAM disk software or custom temp drive mapping
Some performance optimization tools redirect TEMP folders to a RAM disk or virtual drive, which can cause installers to fail because these virtual locations are incompatible with Windows servicing operations. Temporarily disabling this redirection forces Windows to use a standard physical NTFS location instead.
For that, open the RAM disk software’s control panel, stop the virtual drive, and disable the auto-mount or start-at-boot option. If the software allows it, uninstall it via Settings > Apps, then open the Run dialogue box.
Type sysdm.cpl, go to the Advanced tab, and click on Environment Variables. Change all TEMP and TMP entries to C:\Temp, click OK, and then reboot the device.
After rebooting, open Disk Management to confirm that no RAM disk volume remains, then retry the operation that failed. Proceed to the next solution if this does not resolve the issue.
Read: Make a Linux-formatted NTFS Partition recognized by Windows
5] Change the target location in backup or imaging software
In this solution, we will change the destination drive the backup or disk imaging software writes to. We will select an internal hard disk partition that is confirmed to be NTFS. This satisfies the software’s internal check for a local NTFS volume and allows the backup operation to proceed without giving the error. To do the same, follow the steps mentioned below.
- Open the backup or disk imaging software and locate the Destination or Target settings for the current backup job.
- If it shows a network path, a drive letter for a USB stick or an SD card, click the Browse or Change option and select a local internal hard disk partition formatted as NTFS.
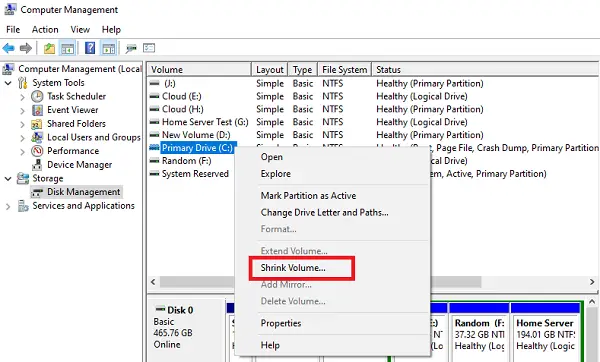
- If it does not have a suitable partition, use Disk Management to shrink an existing NTFS volume and create a new simple NTFS volume.
- Apply the change and run the backup job again. Enable “Check destination before backup” to confirm the volume type, if available.
After completing the steps, run the backup job again and verify that the operation completes successfully, thereby resolving the “Local NTFS volumes are required” error.
Read: How to convert Hard Disk or Partition to NTFS format in Windows
Which algorithm will Windows use by default when a user intends to encrypt files and folders in an NTFS volume?
Windows uses the Advanced Encryption Standard (AES) algorithm by default when a user encrypts files and folders on an NTFS volume using the built-in Encrypting File System (EFS). This process secures file data with a symmetric AES key, which is then wrapped and protected using asymmetric RSA encryption tied to the user’s Windows account.
Read: Format USB to NTFS in Windows 11.