Users of Windows 11/10 may have noticed that it includes a new recovery feature called Automatic Repair. If your Windows 11/10 cannot boot or start up, Automatic Repair, earlier called Startup Repair, will come into action and try to diagnose and fix the issue. It will scan system files, Registry settings, configuration settings, and more and try to fix the problem automatically.
When the computer boots up, the operating system (OS) detects that something is wrong with the files. It will trigger Automatic Startup Repair if it doesn’t, try interrupting the boot process three times in a row. When you do this, Automatic Repair mode will appear.
How to run Automatic Repair in Windows 11/10
If you want to access and run Automatic Repair manually, you need to boot into Advanced Startup options. This will let you start Windows from an external device, change Windows startup settings, or restore Windows from a Factory image.
Windows 11
To carry out Startup Repair in Windows 11, you need to boot to the Advanced Startup Options screen:
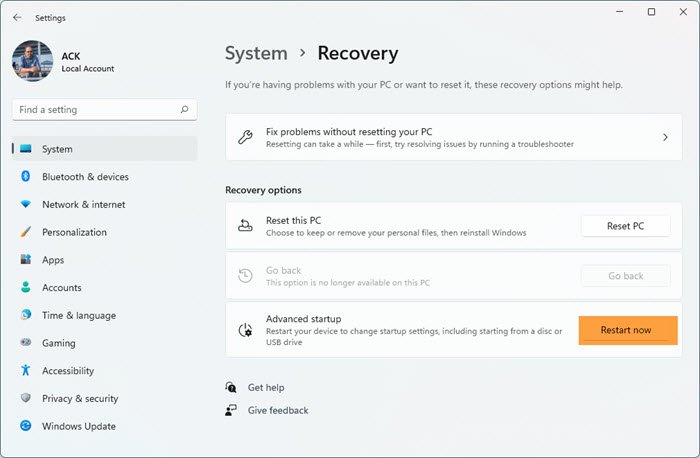
- Open Windows 11 Settings
- Click open System settings
- Scroll down till you see Recovery on the right side, and then click on it
- In the next screen, under Recovery options, you will see Advanced startup
- Click on the Restart now button to initiate the process.
Related: How to repair Windows 11 without losing data or programs
Windows 10

Save your work and open Settings > Update & Security > Recovery > Advanced startup.
Select Restart now.
Windows 11 or Windows 10 users will see the following screen on a restart. 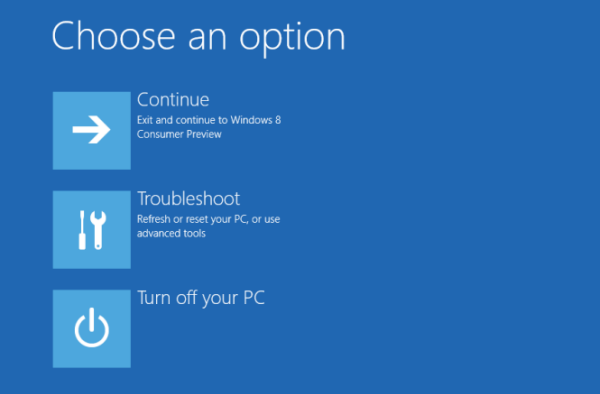
From the WinRE screen, select Troubleshoot > Advanced Options. 

Under Advanced options, select Automatic/Startup Repair. 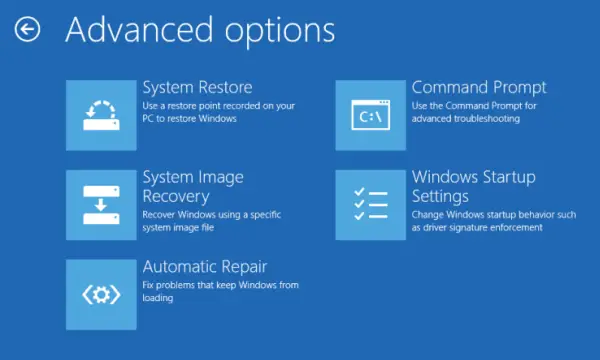 You will be asked to select the User Account to continue. Do so and continue. If asked, enter your password, too, and click on Continue. Windows Automatic Repair will now begin to identify and resolve the problem. This process may take some time, and your system may even boot. Once the process completes successfully, you will see a message.
Read: How to use Quick Machine Recovery in Windows 11
Automatic Startup Repair couldn’t repair your PC
If Startup Repair fails, and you get an error message Automatic Startup Repair couldn’t repair your PC, you may check the log file at:
C:\Windows\System32\Logfiles\Srt\SrtTrail.txt
This log file can provide more information about the issue that caused Automatic Startup Repair to fail and may help you troubleshoot the problem. You can open it and check for details such as session details, test performed, root cause, etc.
What is the SrtTrail.txt file?
SrtTrail.txt is a log file that logs down causes that may have caused Automatic Startup Repair to fail or cause a Blue Screen Stop Error. It is located at C:\Windows\System32\Logfiles\Srt\SrtTrail.txt. It can contain error messages, debugging information, or a record of actions.
What happened to Last Known Good Configuration in Windows 10 or Windows 11?
The “Last Known Good Configuration” (LKGC) feature was officially discontinued after Windows 7 due to reliability issues and changes to the boot process. It was removed from Windows 8 onward, as Microsoft replaced it with newer recovery tools like System Restore, Startup Repair, and Reset/Refresh options.
You may also want to check this post on Windows fails to boot; Automatic Repair, Refresh, Reset PC also fail.