
If you recently moved from BIOS to UEFI and you cannot boot your computer since then, here is how you can repair the EFI bootloader in Windows 11/10. It is pretty easy to repair the EFI bootloader using bcdboot command, and this article shows how you can use the command to get the job done.
What is the EFI bootloader in Windows?
EFI boot loader files are executables on UEFI systems that contain data on how the computer boot process should proceed. If you use a UEFI system instead of BIOS, you can find an additional particular called EFI System Partition. It stores the data of the EFI bootloader, which is primarily composed of .efi files. However, if there are some issues with this partition, you might not be able to boot your computer regularly.
Although the EFI partition doesn’t require a drive letter to remain on your computer and function without errors, it can occasionally cause issues. There are mainly two ways to repair the EFI bootloader in Windows 11: Using the bcdboot command and changing the drive letter. However, the latter solution works only for minor issues. Other than that, you must use the bcdboot command to get rid of any EFI bootloader problem automatically.
How to repair the EFI bootloader in Windows 11
To repair the EFI bootloader in Windows 11 or Windows 10, follow these steps:
- Change drive letter
- Use bcdboot command
You might want to read about the Boot Configuration Data (BCD) Editor before you proceed.
1] Change drive letter
It is the first step to take if you can boot into your computer after switching to the UEFI architecture. You need to open Advanced Recovery Mode.
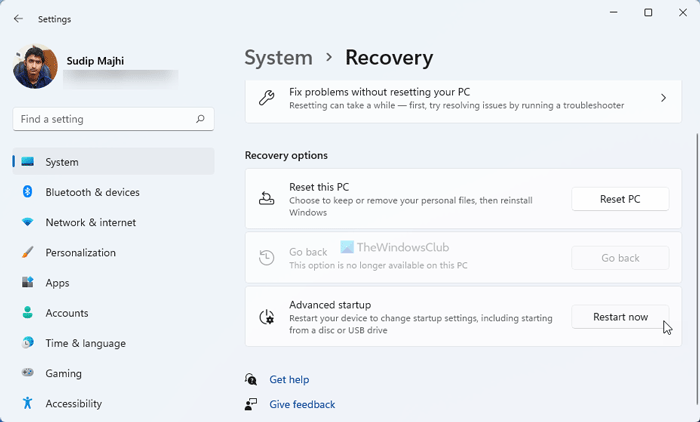
For that, press Win+I to open Windows Settings and go to System > Recovery. Here you can find the Advanced startup option. You need to click the Restart now button.
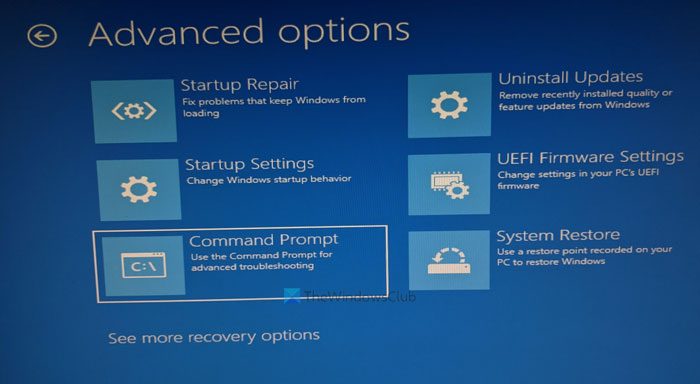
After opening the next window, go to Troubleshoot > Advanced options and select the Command Prompt option.
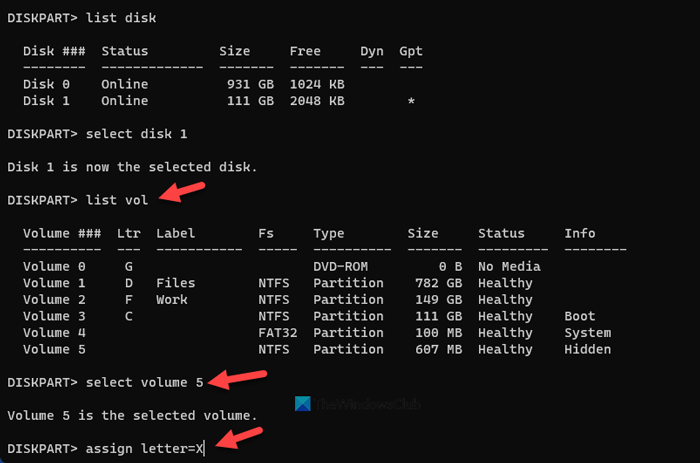
Following that, enter these commands:
diskpart

list vol

select volume 1
You need to select the EFI partition by entering the assigned number.
assign letter=X
Here ‘X’ is to be replaced with your Drive letter.
After that, close the Command Prompt and restart your computer.
If you cannot boot into your computer, you will need to follow alternative methods to access Advanced Recovery Mode. For that, you need to restart your computer 2-4 times within a short period.
After following the steps above, use the bcdboot command to update all boot records.
Read: Windows Boot Manager on wrong drive
2] Use bcdboot command
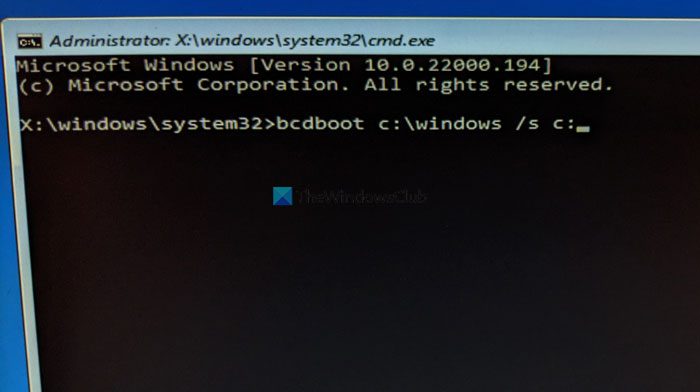
The bcdboot commands help you replace corrupted EFI files with new ones, ensuring your system works flawlessly. For that, you need to enter the following command in the Command Prompt:
bootrec /rebuildbcd
It rebuilds the Boot Configuration Data file or BCD file.
After that, enter this command:
bcdboot c:\windows /s c:
Don’t forget to replace the c with your original system drive’s letter. In most cases, it is named after c. However, if you have assigned something else, you need to enter the drive letter here.
Additionally, we have used the /s parameter, which enables users to select the volume of a system partition. As a result, this command will copy the boot files to the specified volume.
Finally, restart your computer.
That’s all! Hope this guide helped.
Read: GPT header corruption has been detected in Windows 11.
How do I fix GPT boot Windows 11?
GPT and EFI bootloaders are essentially the same thing. That said, you can fix the GPT bootloader using the same steps as the EFI bootloader. You can change the drive letter first to see if it resolves the issue. Following that, you can use the bcdboot command to get the job done.
Read: Windows computer won’t boot after enabling Secure Boot.
