When your Windows 11 system gets stuck on the Gigabyte logo during boot, it typically indicates a failure in the boot process before the operating system can fully load. This can result from hardware issues, firmware settings, corrupted system files, or incompatible updates. In this post, we will explore what you can do if your computer becomes stuck on the Gigabyte log during boot.

Fix Windows 11 Stuck on the Gigabyte logo when booting
Windows may become stuck on the Gigabyte logo due to incompatible BIOS settings, such as Secure Boot or UEFI mode mismatches, corrupted boot files resulting from crashes or updates, recent Windows updates that conflict with firmware, faulty hardware (e.g., drives or RAM), or an incorrect boot order that prioritizes non-bootable devices.
If your computer becomes stuck on the Gigabyte logo during boot, follow the solutions mentioned below.
- Reset BIOS/CMOS Settings
- Adjust BIOS Settings
- Use a Bootable USB for Repair/Clean Install
- Update BIOS
Let us talk about them in detail.
1] Reset BIOS/CMOS Settings
Resetting the BIOS/CMOS reverts all firmware settings to their factory defaults. This can resolve boot failures caused by incorrect configurations, such as a misconfigured boot mode (e.g., UEFI vs. Legacy), unstable overclocks, or Secure Boot conflicts. It also clears temporary corruption in the BIOS memory that may prevent hardware initialization from occurring. By restoring a stable baseline, the system can properly proceed with the boot process. First of all, you need to go ahead and reset the BIOS to its default value and see if that helps. If resetting the BIOS is to no avail, proceed with resetting the CMOS.
2] Adjust BIOS Settings
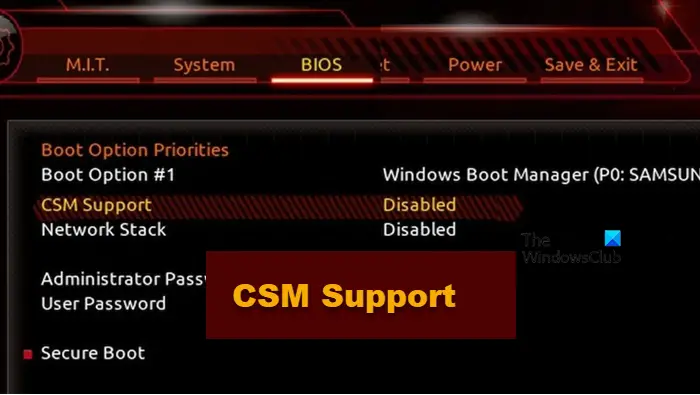
In this solution, we will address a mismatch between the computer’s firmware and the Windows 11 installation. Windows 11 requires UEFI boot mode and GPT partition style. If the BIOS is set to Legacy (CSM) mode, it can’t read a UEFI/GPT installation, causing the system to hang.
Enabling CSM may help a UEFI system load, while disabling Secure Boot removes a verification hurdle during boot. Setting the correct boot priority ensures the BIOS checks the right drive first. However, do keep in mind that there is no certainty when it comes to CSM status; therefore, if enabling didn’t work, try disabling it as well.
Follow the steps below to complete the same task.
- Boot into your BIOS.
- Go to the Boot tab.
- Look for CSM Support or Compatibility Support Module and enable it. If enabling didn’t work, you need to disable it.
- If you cannot find it, your BIOS may have a “Boot Mode” option; ensure it is set to UEFI
- Inside the CSM menu, ensure options are set to UEFI for storage devices, not “Legacy.”
- Now, you need to go ahead and disable Secure Boot.
- Look for Boot Option Priorities and set Boot Option #1to your primary Windows boot drive (e.g., your Samsung 970 EVO NVMe, WD Black SN850, etc.).
- Finally, save and exit from your BIOS.
Hopefully, now you can check if the issue is resolved.
3] Use a Bootable USB for Repair/Clean Install
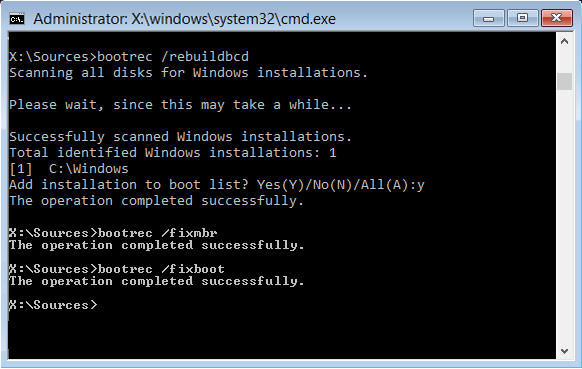
We will repair the Windows bootloader and system files, which are likely corrupted and causing the boot failure. Since you cannot boot into Windows, use a bootable Windows 11 USB drive to access a special recovery environment and perform these repairs. Follow the steps below to complete the same task.
- First of all, create a bootable USB using Windows ISO and boot using it.
- On the Windows Setup screen, select your language and click Next.
- Click Repair your computer in the bottom-left corner.
- Go to Troubleshoot > Advanced Options > Command Prompt. A black command prompt window will open.
- Now, run the following commands one by one.
bootrec /fixmbr
bootrec /fixboot
If the fixboot command fails with “Access is denied,” run the following command.
bootrec /fixboot /force
bootrec /scanos
bootrec /rebuildbcd
chkdsk c: /f /r
sfc /scannow /offbootdir=c:\ /offwindir=c:\windows
If repairing didn’t work, you need to go ahead and perform a clean installation.
4] Update BIOS
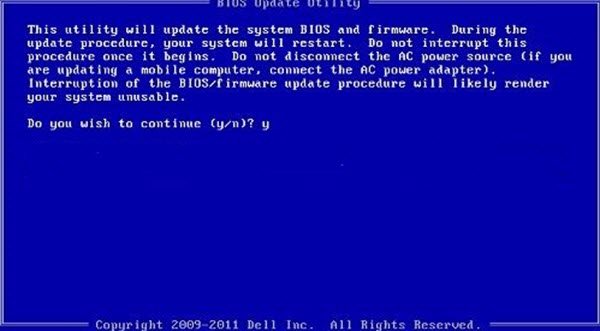
Having multiple drives connected during installation can cause Windows to place essential boot files on the wrong drive. When that drive is disconnected later, the system can’t find the files to boot, causing it to hang on the logo. Updating the BIOS ensures full compatibility, and installing Windows with only the target drive connected forces the installer to put all necessary files in the correct place on that single drive. So, we recommend you go ahead and update the BIOS.
In BIOS, go to the “Boot” tab, ensure CSM Support is disabled, and Boot Mode is set to UEFI.
Perform a Custom/Advanced install. Delete all partitions on your SSD until you have a single block of unallocated space, select it, and click Next. Windows will automatically create the correct partitions.
Hopefully, with the help of these solutions, your issue will be resolved.
Read: Boot failure detected in Windows 11
How to fix Windows 11 stuck on logo?
If Windows 11 is stuck on the logo screen, power down your computer and disconnect any external drives or peripherals. Turn your PC back on and immediately press the appropriate key, such as F11 to access the boot menu and navigate to the Advanced Startup Options. From there, you can select Troubleshoot to use System Restore, Startup Repair, or boot into Safe Mode to uninstall problematic drivers or software and restore your system to a working state. Check our post to know what to do when Windows 11 is stuck on the logo.
Read: Windows computer will not boot up, start or turn on
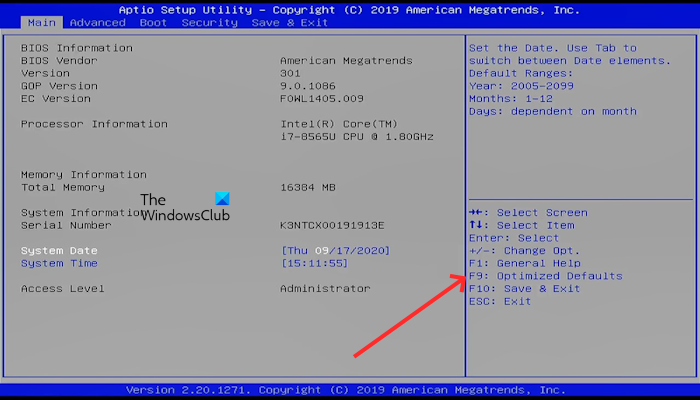
How to exit BIOS mode on Gigabyte?
To exit the BIOS on a Gigabyte motherboard, simply press the F10 key. This will bring up a dialog box asking you to save your configuration changes and exit. Select Yes or OK to confirm. The system will then proceed to restart and attempt to boot into your operating system.
Also Read: Windows stuck on Welcome screen.