
In this post, we will show you how to use the new ‘Virtual Workspaces’ settings in Windows 11. In a recent update, Microsoft has introduced a new Virtual Workspaces page that centralizes the management of virtualization-related features directly within the Settings app.
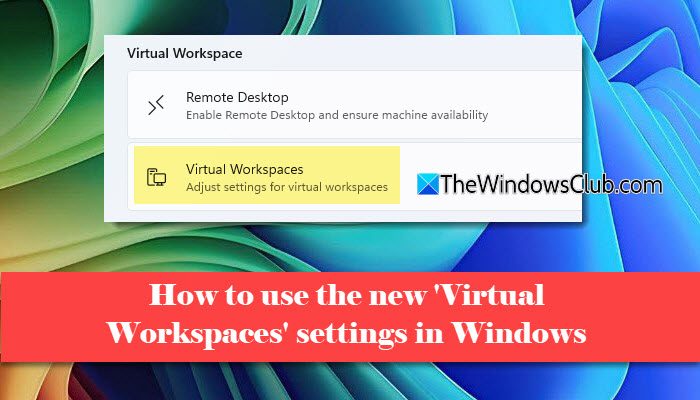
Previously, if you wanted to turn on Hyper-V, Windows Sandbox, and other key virtualization features, you had to use the Windows Features dialog or PowerShell. With Virtual Workspaces, all of these are now in one place in Settings for easier access.
How to use Virtual Workspaces settings in Windows 11
To use the new Virtual Workspaces settings on your Windows 11 PC, press Win + I to open the Settings app. This is where Microsoft is gradually moving advanced system options that were earlier hidden in the Control Panel.
In the Settings window, click on System in the left pane. Scroll down and select Advanced. Under Virtual Workspace, click Virtual Workspaces.
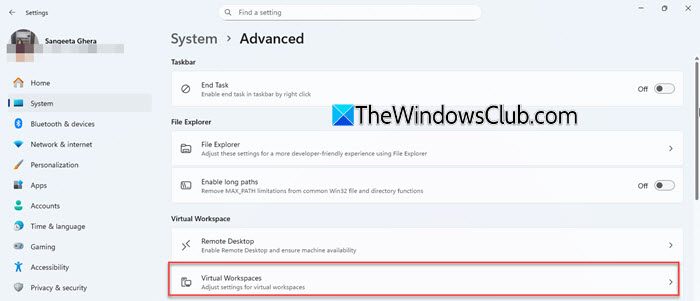
From here, you can easily enable or disable components like Hyper-V or Windows Sandbox using simple toggle switches, without having to open the Windows Features window.
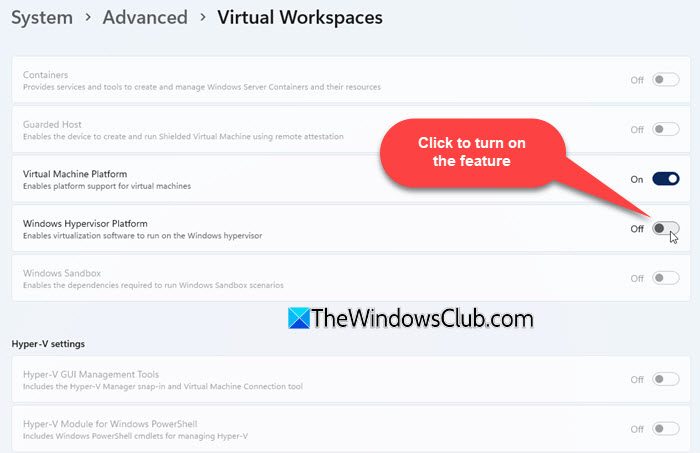
Available Virtual Workspaces settings
Below is a complete overview of the available options:
- Containers: Provides services and tools required to create and manage Windows containers and their resources.
- Guarded Host: Enables the device to create and run Shielded Virtual Machines using remote attestation. This is an advanced security feature intended for enterprise environments and requires compatible hardware, Secure Boot, TPM, and a supported Windows edition.
- Virtual Machine Platform: Enables platform support for virtual machines. This component is required by features such as Windows Subsystem for Linux (WSL 2) and other virtualization-based workloads, even if you are not using Hyper-V directly.
- Windows Hypervisor Platform: Enables virtualization software to run on the Windows hypervisor. This is required by many third-party virtualization tools and development environments that rely on Hyper-V–based virtualization.
- Windows Sandbox: Installs the dependencies required to run Windows Sandbox, a lightweight and isolated desktop environment that lets you test apps or files safely without affecting your main system.
- Hyper-V settings
- Hyper-V GUI Management Tools: Installs graphical management tools such as Hyper-V Manager and the Virtual Machine Connection tool, allowing you to create and manage virtual machines using a graphical interface.
- Hyper-V Module for Windows PowerShell: Adds Hyper-V–specific PowerShell cmdlets, enabling advanced users and administrators to manage virtual machines and Hyper-V resources using scripts and command-line automation.
- Hyper-V Hypervisor: Provides the core Hyper-V hypervisor required to run virtual machines. This component is essential for creating and running Hyper-V virtual machines on your PC.
- Hyper-V Services: Installs background services that allow you to create, configure, and manage virtual machines and their associated resources, such as storage, networking, and checkpoints.
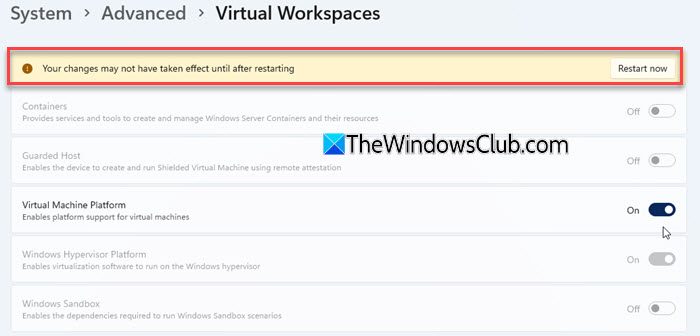
Once you enable a feature, a loading icon appears while Windows installs the required components. After the installation completes, you’ll receive a notification asking you to restart your PC for the changes to take effect. Until you restart, the feature remains greyed out, and you won’t be able to enable or disable it again.
Note:
- Some virtualization features may remain greyed out on your system. Availability of these features depends on your Windows edition, hardware virtualization support, BIOS settings, and whether required dependencies are already enabled.
- Any change you make under Virtual Workspaces requires a system restart. Until you restart, Windows temporarily locks the toggles to prevent configuration issues.
- Even though it is now possible to manage virtualization services from the Settings app, you can still enable or disable virtualization features using the legacy Windows Features dialog or through PowerShell, if you prefer those methods.
- Enabling virtualization features usually has no noticeable impact on everyday performance. However, running virtual machines or containers in the background can use additional CPU and memory.
I hope you find this useful.
Read: How to move windows across Virtual Desktops in Windows.
How do I use virtual desktops in Windows 11?
Virtual desktops is a feature that allows you to create multiple desktops on your system. These desktops can be used for different purposes, such as work or personal use. To add a new desktop, click the Task View button on your taskbar and click the New desktop button. Each desktop can have its own set of open apps, keeping Windows organized without cluttering your main screen.
How do I open a new workspace in Windows 11?
To open a new workspace (virtual desktop), press Win + Tab to open Task View, then select the New desktop option. You can also use the shortcut Win + Ctrl + D to instantly create a new desktop and switch to it.
Read Next: Windows Sandbox cannot be installed, Virtualization support is disabled in the firmware.
