The Windows operating system offers several additional features that most of us may not need. But they are there if you need them! In this post, we will see how to Turn Windows features On or Off via the Control Panel, and how to add, remove or manage some Optional Features using Windows 11/10 Settings. PowerShell and Command Prompt methods have also been discussed here.
Manage Windows Optional Features in Windows 11/10
While the default installation is good for most of us, there may be some features that IT Pro’s, System Administrators or Developers may need. Windows allows you to install and activate such features. You can turn some features on or off using the Control Panel, or you may need to use the Settings app in Windows 11/10 if you need to add some optional features.
What are Optional features?
As the name implies, Windows Optional features are the features that may or may not be required by Windows users. Windows OS has an option to add or remove these features. We have already explained the process to manage Optional features in Windows 11/10 in this article.
How do I add or remove Windows features?
The option to add or remove Windows features is available in the Control Panel or Windows Settings. We have described the process to install Windows features on Windows 11/10 computers above in this post. You can do it in 5 ways.
1] Turn Windows features On or Off using Control Panel
The steps to turn Windows features on or off via Control Panel are the same for both Windows 11 and Windows 10 computers. Hence, it does not matter whether you are a Windows 11 or Windows 10 user; the procedure we explain below applies to both operating systems.
From the Start Menu, open the Control Panel and click on the Programs and Features applet.

Here on the left side, you will see a link – Turn Windows features on or off. Click on it to open the following panel.
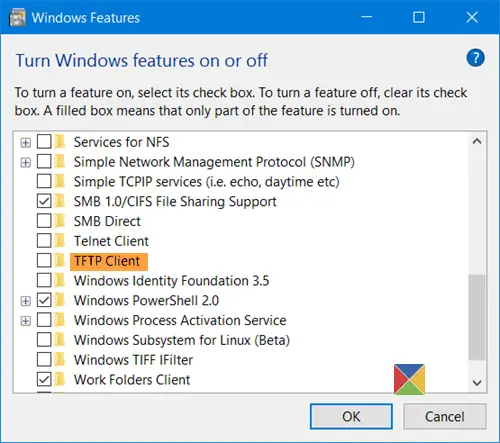
Here you will see the features that are available to you. You may expand a feature by clicking on the ‘+’ sign and select only those features you want to enable. Once you select the feature you want to turn on or deselect one that you want to turn off, click on OK. Windows will start applying the changes and ask you to restart your computer if need be.

On a Windows Pro PC, you will see the following features that you can enable or disable at will.

- .NET Framework 3.5
- .NET Framework 4.6 Advanced Services
- Active Directory Lightweight Services
- Containers
- Data Center Bridging
- Device Lockdown
- Hyper-V
- Internet Explorer 11
- Internet Information Services
- Internet Information Services Hostable Web Core
- Legacy Components like DirectPlay
- Media Features
- Microsoft Message Que Server
- Microsoft Print to PDF
- MultiPoint Connector
- Print and Document Services
- RAS Connection Manager Administration Kit
- Remote Differential Compression API Support
- RIP Listener
- Services for NFS
- Simple Network Management Protocol
- Simple TCPIP services
- SMB 1.0/CIFS Sharing Support
- SMB Direct
- Telnet Client
- TFTP Client
- Windows Identity Foundation 3.5
- Windows PowerShell 2.0
- Windows Process Activation Service
- Windows Subsystem for Linux
- Windows TIFF IFilter
- Work Folders Client
- XPS Services
- XPS Viewer.
See this post if your Turn Windows Features on or off is blank or empty.
2] Manage Optional features via Windows Settings
Windows 11
Windows 11 users must follow the procedure below to manage optional features in Settings.
- Launch Windows 11 Settings app.
- Go to “Apps > Optional features.”
- Install or Optional features as per your requirements.
Let’s discuss these steps in detail.
1] Press Win + I keys to launch the Settings app.
2] In the Settings app, select Apps from the left pane. Now, click on the Optional features tab on the right side.

3] After that, Windows will show you a list of all the optional features installed on your system. If you do not want any of these features, you can uninstall them. To do this, click the down arrow next to the feature you want to remove, then click Uninstall. Don’t worry you can install the uninstalled feature anytime via the Add an optional feature option.

You have to wait till Windows uninstalls that feature.
4] Now, let’s see how you can install an Optional feature in Windows 11. Microsoft has made some features optional in Windows operating system, as they may or may not be required by the users. Notepad and Wordpad are among the optional features in Windows 11/10. This is the reason why some users have found Notepad or Wordpad missing from their computers.

To install an Optional feature in Windows 11, launch the Settings app and go to “Apps > Optional features.” Now, click on the View features button on the top right side. After that, Windows will show you the list of all the available features that are available for installation on your computer. Now, select a feature from the list and click Next. After that, click Install.

You can also view Optional feature history by clicking on the View history button.
Windows 10
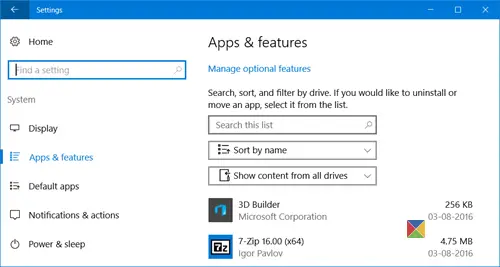
Windows 10 lets you add, remove or manage optional features via its Settings. To access this part, from the WinX Menu, open Settings > System and select Apps & features from the left side.
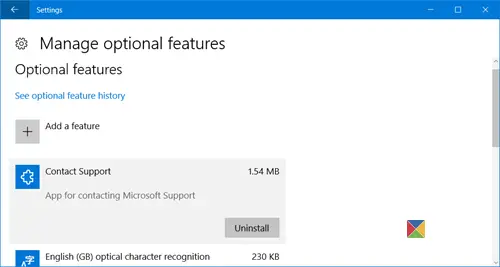
Clicking on the Manage optional features link will open the following box for you.

To remove an app or a feature, select the feature and click on the Uninstall button.
To add a feature, click on the “+ Add a feature” link as shown above. The following window will open.
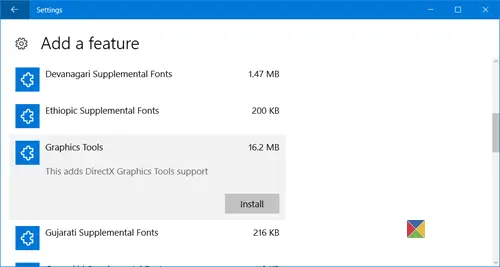
Here you can select the feature and click on the Install button.
Clicking on the See optional feature history will open the following panel, where you will be able to see a history of all the optional features that you added or removed.
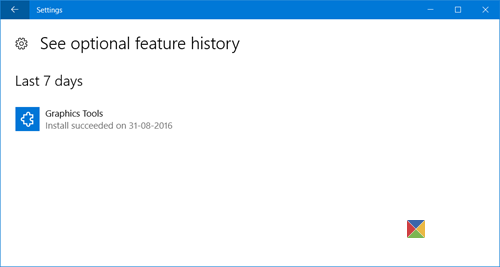
In this way, you can install Graphics Tools, Windows Developer Mode, Fonts and several other optional features like it.
3] Enable or Disable Optional Windows Features using Powershell
Windows Powershell is indeed a very powerful tool. You can do a lot of things with this command line, too. While using this, we will first populate the list of available features, then download the desired feature, and finally discuss enabling and disabling it.
So first, to populate the list of features, enter this command,
Get-WindowsOptionalFeature -Online
After that, in order to install any feature from the list of features, enter this command:
Get-WindowsOptionalFeature -Online -FeatureName *Type feature name*
Then, to enable any downloaded feature, enter this command,
Enable-WindowsOptionalFeature -Online -FeatureName “Type feature name” -all
Finally, to disable any enabled feature, enter this command,
Disable-WindowsOptionalFeature -Online -FeatureName “Type feature name”
4] Turn On or Off Optional Windows Features using Command Prompt
Start by pressing WINKEY + X button combo or right-click on the Start button and click on Command Prompt (Admin) or just search for cmd in the Cortana search box, right click on the Command Prompt icon and click on Run as Administrator. Click on Yes for the UAC or User Account Control prompt that you get.
Now, type in the following command to populate the list of available features:
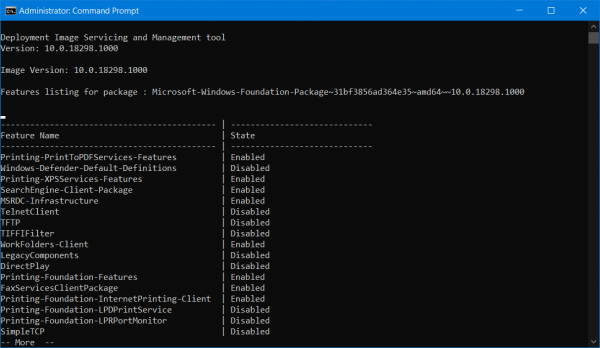
DISM /online /get-features /format:table | more
All you need to do now is copy the name of the feature that you need to enable.
Now, to enable the feature, enter the following command:
DISM /online /enable-feature /featurename:[Enter the name of the feature here] -All
Now, to disable any feature that is enabled on your computer, you need to follow some separate steps.
First, you need to check what all features are enabled. To populate a list of enabled features, enter this command,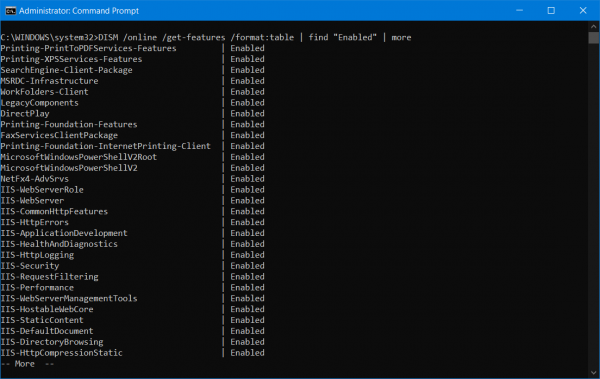
DISM /online /get-features /format:table | find “Enabled" | more
Now, to disable the Enabled feature, enter this command,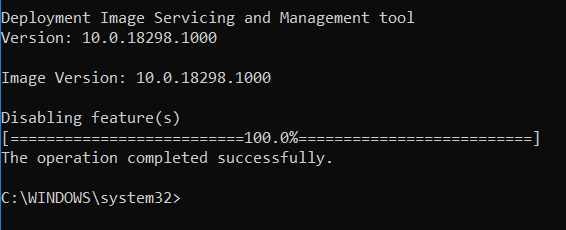
DISM /online /disable-feature /featurename:[Enter the name of the feature here] -All
As a bonus, if you wish to check information in detail about a specific feature, enter this command,
DISM /online /get-featureinfo/featurename:[Enter the name of the feature here]
5] Enable or Disable Optional Windows Features using an external installation source
You can also fetch the latest features from an updated offline source.
This source can be an ISO or any other type of image or just a folder.
For that, all you need to do is decide if you want to use the Command Prompt or Windows Powershell.
If you are using the Command Prompt, enter this command,
Dism.exe /online /enable-feature /featurename:< /All /Source:<Enter the path of the feature here>
And if you tend to use Windows PowerShell on the command line, you can do it too. Just enter this command,
Install-WindowsFeature –Source “<Enter the path of the feature here>”
Hope this helps.
To get the latest features, you need to get the latest version of the image of the operating system that you are trying to install the feature from.
I hope this helps!
Related: Turn Windows features on or off stuck on Please wait.