Microsoft has released the latest version of Windows 11, the Windows 11 25H2 Update Version 25H2. With this new feature update, Microsoft aims to continue delivering innovation and value to Windows users, a demographic that spans over 1.4 billion users. In this article, we will guide you through the process of upgrading to the Windows 11 25H2 update on your PC.

How to get the Windows 11 25H2 Update Version
The Windows 11 25H2 Update is the first major feature update that users have received since last year and is now available for free installation. Microsoft plans to roll out Windows 11 version 25H2 to all customers in multiple phases. Newer machines are expected to get the update first. Once the update is offered to your device, you will see a notification that an update is available for your computer. If you do get to see it, click on it and carry forward the upgrade process.
If you want to expedite this process and download and get the Windows 11 2025 Update, you have five options to download the Update.
- Manually frequently check if it is available on Windows Update
- Use the Media Creation Tool to install this Windows 11 version
- Use the latest Windows 11 ISO Disc Image to download and install it
- Use Windows 11 Installation Assistant.
- Download the final Release Preview Build via Insider.
We will discuss how you can launch this update for both Windows 11 and Windows 10 PC via their Settings. The other options have been linked to their respective posts above. Before you proceed, it will be better to check if your PC is compatible with this Windows 11 Update. If it does, and you are already running the initial version of Windows 11, then you shouldn’t experience any hiccups with the new update.
Read: Windows 11 25H2 Update not showing
Get Windows 11 25H2 Update on Windows 11 via Settings
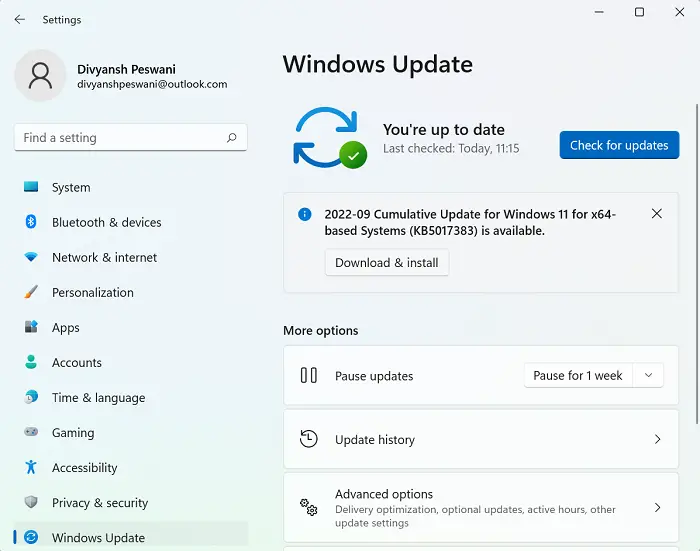
If you’re using Windows 11 on your PC, you should follow the steps below to get the 2025 Update Version 25H2:
- Press the ‘Win + I’ key combination to open Windows Settings
- From the tabs on the left of the screen, click on Windows Updates
- Ordinarily, your PC should check for updates on its own and show an available update by the name of “Windows 11 2025 Update Version 25H2,” but if it doesn’t, you can always click on the “Check for Updates” button
- This should, ideally, bring up an option to install the new Windows 11 feature update
Since this is a feature update, it is not an automatic and mandatory download. You will need to click on the ‘Download and Install’ option to initiate the process. Suppose you don’t see an option to upgrade to this new version. In that case, it may be because Microsoft has withheld the update from your PC, possibly due to conflicting apps or an incompatible system.
Note: Windows 11 Feature Updates are not available on the Microsoft Update Catalog.
Read: How to reclaim space after upgrading Windows 11 to a newer version
Get Windows 11 Feature Update on Windows 10 via Settings
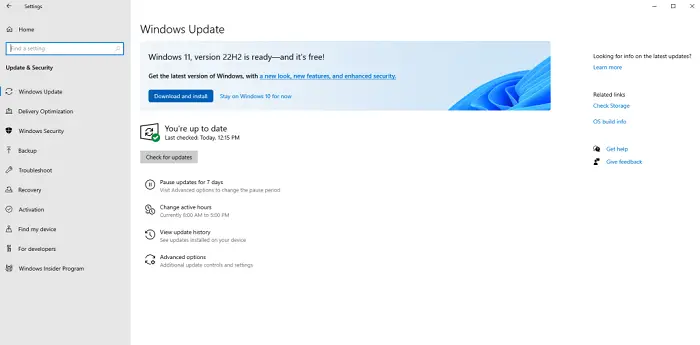
Similarly, you can also receive this update if you’re using a Windows 10 PC. First things first, you need to check if your system meets the minimum requirements to upgrade to Windows 11. You can do so via the PC Health Check app.

Once you’ve made sure that the requirements are met, you can install Version 24H2 by following the steps below:
- Open Windows Settings
- Visit Update & Security > Windows Update
- Select Check for Updates
If your device is eligible and ready to be updated, then this feature update will show up.
This post will help you if Windows 11 Update Version 25H2 is not installing.
Read: How to downgrade Windows 11 Update 25H2
How many GB is Windows 11 Feature Upgrade?
A common and valid question when a user considers upgrading to Windows 11 is how much disk space the update will consume. While directly upgrading from Windows 10 to Windows 11 ensures the file’s download size is around 3.5GB, using an ISO file to install Windows 11 on your PC can take up to 5.3GB of space.
READ: How to Defer or Delay Windows 11 Feature Upgrades.
Can I go back to Windows 10?
Before you take this decision, you shoul know that Windows 10 will reah End-of-support in October 2025.
If you find your Windows 11 to be sluggish, eating up too much of your PC’s battery, or has just generally messed up your settings, then there is a process in place that allows you to downgrade your system back to Windows 10. The process is very easy if you want to roll back within 10 days of upgrading to Windows 11. Within that time frame, simply open the Windows Settings > System > Recovery and click the Go Back button to revert your system to Windows 10.
On the off chance that you haven’t been able to make up your mind within ten days, there’s still a way for you to go back to Windows 10. This would require you to download the Windows ISO file from Microsoft.com and use the Rufus tool. This article provides a detailed explanation of the process for reverting to Windows 10 from Windows 11.
Read: Download Windows 11 Enterprise ISO using Media Creation Tool.