On a running Windows 11 or Windows 10 installation on a PC, the DriverStore folder is the default location for all drivers installed on your system. Usually, even with prolonged computer use, this folder doesn’t hog drive storage space. Nevertheless, some Windows PC users are reporting noticing the folder consuming a very significant amount of disk space. This post will show you the ways to safely clean DriverStore File Repository folder in Windows 11/10.
What is DriverStore in System32?
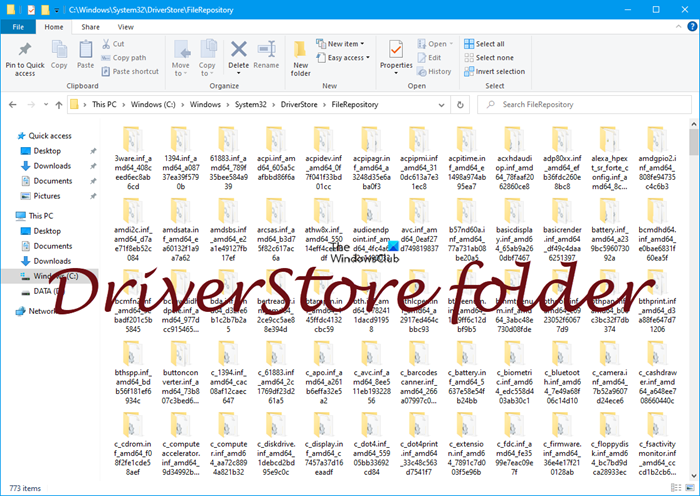
The Driver Store is a trusted collection of third-party driver packages and native device drivers that ship with the system, maintained in a secure location on the local hard disk. Before a driver can be installed, it must first be injected into the driver store which is located under C:\Windows\System32\DriverStore\FileRepository. All files in the driver package are considered critical to the device’s installation.
When a driver package is copied to the driver store, all its files are copied as well. This includes the INF file and all files referenced by it. All files in the driver package are considered critical to the device’s installation. The process of copying a driver package to the driver store is called Staging. A driver package must be staged in the driver store before it can be used to install any devices.
Is it safe to delete DriverStore folder?
No, you should not delete this folder. If you delete all the contents of the DriverStore folder on your Windows PC, it will cause errors, crashes and other issues. In the most severe cases, it could render your system or associated hardware inoperable. So basically, you need to know what you are deleting. As a precautionary measure, we strongly recommend creating a restore point before deleting any driver files from this folder.
How to clean up DriverStore filerepository in Windows 11
We can clean the DriverStore folder in Windows 11/10 in the following easy ways. We’ll explore this topic under the methods outlined below in this section as follows:
- Using Disk Clean-up – Safest way
- Using Command Prompt
- Using Batch file
- Using Driver Store Explorer.
Let’s take a look at the description of the step-by-step process in relation to each of the methods.
1] Safely clean DriverStore folder using Disk Clean-up
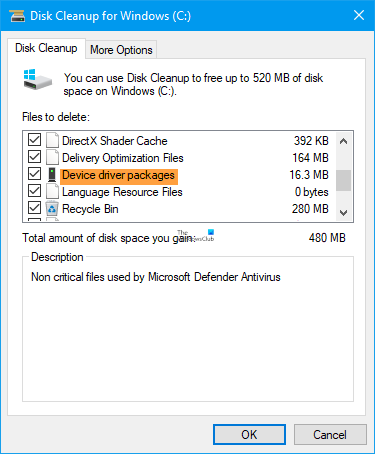
This is the safest, easiest, and most straightforward method for cleaning the DriverStore. The Disk Cleanup Tool can clean up and remove old, unnecessary drivers from your Windows 11/10 computer.
- When you launch the utility, choose the drive you want to clean up.
- Next press Clean up system files.
- Now select Device Driver Packages and any other options you want.
- Press on OK to run the tool.
You can also use Command-line version of Advanced Disk Cleanup Utility.
2] Clean DriverStore folder using Command Prompt

Another route to clean the DriverStore folder on your Windows 11/10 PC is by using Command Prompt.
To clean the DriverStore folder on your Windows11/10 PC using Command Prompt, do the following:
- Press Windows key + R to invoke the Run dialog.
- In the Run dialog box, type cmd and then press CTRL + SHIFT + ENTER to open Command Prompt in elevated mode.
Once the command prompt window opens, follow the instructions in this guide on how to uninstall drivers using the command prompt.
3] Clean DriverStore folder using Batch file
To clean DriverStore folder on your Windows11/10 PC by creating a batch file, then run the .bat file, do the following:
- Press Windows key + R to invoke the Run dialog.
- In the Run dialog box, type notepad and hit Enter to open Notepad.
- Copy and paste the syntax below into the text editor.
@echo off
for /L %%N in (1,1,600) do (
echo Deleting driver OEM%%N.INF
pnputil /d OEM%%N.INF
)
- Save the file with a name and append the .bat file extension – eg; DScleanup.bat and on the Save as type box select All Files.
To clean up the DriverStore folder, navigate to the location where you saved the file and run the batch file with admin privilege (right-click the saved file and select Run as Administrator from the context menu).
Read:
- How to show Hidden Devices and Non-present Devices in Device Manager
- How to remove Unwanted, Unnecessary and Non-present Devices
4] Using Driver Store Explorer
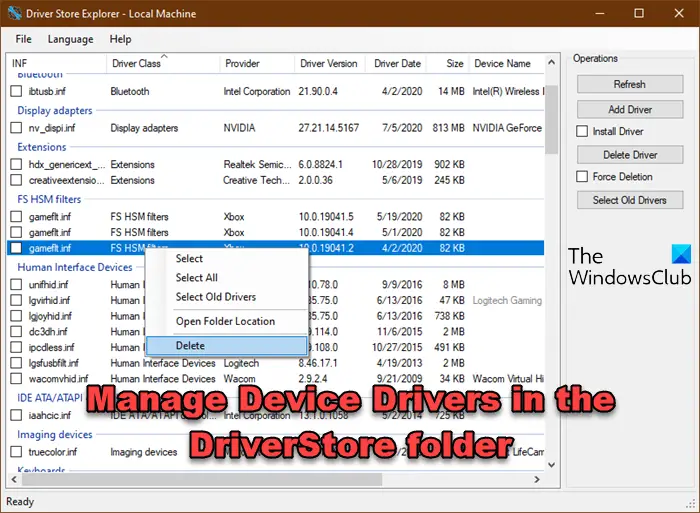
Driver Store Explorer is a free software that lets you manage, list, add, or remove device driver packages in DriverStore folder of Windows.
Driver Package and INF File
If any device driver needs to be installed on a PC, its driver package files must be copied into DriverStore. When we add any driver package in DriverStore, all of its files are copied along with one INF File, which actually references all the other files present in the package. As every single one of these files is crucial for driver installation, the INF file must reference all files present in the package so that, during installation, they can be found easily in DriverStore. In the other way round, if the INF file references a file that’s not available in the package, it is not copied to the DriverStore.
Copying the files related to a driver package to DriverStore is called Staging. In order to install a driver for any device on a PC, it must be staged in DriverStore, i.e., all the corresponding package files, along with the INF file, must be copied to DriverStore. However, you can’t just pick any driver package and copy it to DriverStore. It needs to go through a couple of integrity and syntax checks before the files are copied. Below are the brief stages during staging:
- Verification: Before the driver package is copied to DriverStore, it is verified against several security checks that confirm whether the package files are corrupted or tampered with. The driver’s package should be digitally signed to pass this check.
- Validation: This is the next part where the user permissions are validated and the INF file is checked for all the referenced files in the package. In case any discrepancy is found, the package shall not be copied.
Once you have downloaded Driver Store Explorer, extract the files and run the executable (Rapr.exe) with administrator privileges.

The Driver Store Explorer window will open right away on your screen. Click Enumerate to list all the copied (and installed) driver packages in the DriverStore location. Once all the Driver Package details are listed, you can choose to (force) delete any zombie driver that might potentially be creating a problem.
Also, if you have a package available, you can copy its files to DriverStore using the Explorer window. Just click Add Package and select the package files to import. Apart from this, you can also export package files from Driver Store Explorer. Right-click any driver entry and select Export to save it to your local disk.
That’s pretty much about it. It is indeed a decent tool to add or remove any driver packages from your system. Old drivers keep sitting in the system consuming memory and resources, so this can come quite in handy to get rid of them. It may not be able to delete system-critical drivers – and that is good!
You can download the Driver Store Explorer from github.com.
What is FileRepository folder in Windows 11?
The FileRepository folder stores a copy of every device driver installed on your system. Before Windows loads a driver, it first injects it into this repository to verify its authenticity and integrity. The contents of this folder also help during the driver reinstall or rollback process.
How to clean up the FileRepository folder in Windows 11?
The contents of this folder grow over time because each new or updated driver gets stored here. To clean up the contents of the FileRepository folder, you can use Disk Cleanup or PnPUtil as explained in this post.
How do I uninstall drivers from DriverStore?
Windows users can safely uninstall or delete a driver package from the driver store on the Windows computer in two main ways which are; uninstall drivers using a command prompt or uninstall the driver via Device Manager. For some hardware like the display, you can use the dedicated uninstaller – Display Driver Uninstaller.