If Windows 11 fails to boot, it launches the Automatic Repair tool to fix itself, but the repair tool crashes, displaying a Blue Screen of Death (BSOD) before the computer restarts, this post will help you. This can create a frustrating cycle where you cannot access your desktop and the built-in repair tools cannot even complete their diagnostic phase. In this post, we will see what you can do if Automatic Startup Repair gives a Blue Screen in Windows 11.

What is the BSOD in Windows 11 Automatic Repair?
When the Automatic Repair tool itself crashes to a Blue Screen, it indicates a severe system conflict or hardware instability. Based on your history of random freezes and WiFi drops, this is likely caused by a faulty driver loaded by the repair environment, or by failing hardware (such as RAM or a hard drive) being stressed during the repair tool’s diagnostic phase. Since the reset failed at 50%, this further confirms that the system files required for recovery are severely corrupted or that the hardware is struggling to read/write data correctly.
Fix Automatic Repair Blue Screen in Windows 11
If Automation Repair displays a Blue Screen in Windows 11/10, follow the solutions below to resolve the issue.
- Check your hard disk for errors
- Disable Automatic Restart on System Failure
- Test your RAM
- Use a Bootable USB Installation Media to Perform a Clean Install
Since you cannot start your computer normally, see if you can boot in Safe Mode. If you can, then it makes things easier. If you have recently installed a driver or software, you can boot Windows into Safe Mode to troubleshoot. If you had already enabled the F8 key earlier, it is easier to press F8 during boot to enter Safe Mode.
If you cannot enter Safe Mode, you may need to boot your PC using your Windows Installation Media or Recovery Drive, then select Repair your computer, go to Troubleshoot > Advanced Startup Options, and open Command Prompt. You can now use CMD to run commands
1] Check your hard disk for errors
If your hard drive has bad sectors or file system errors, the Automatic Repair tool may crash when attempting to access these damaged areas. Manually checking the drive can bypass the automatic crash and repair underlying physical or logical issues.
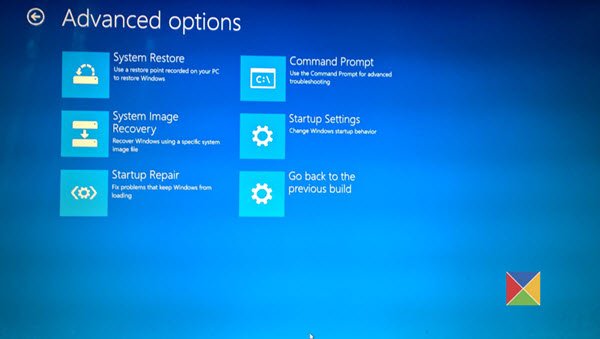
Go to Troubleshoot > Advanced options > Command Prompt.
In the Command Prompt window, type the following command and press Enter.
chkdsk c: /r
This scans the C: drive, locates bad sectors, and recovers readable information.

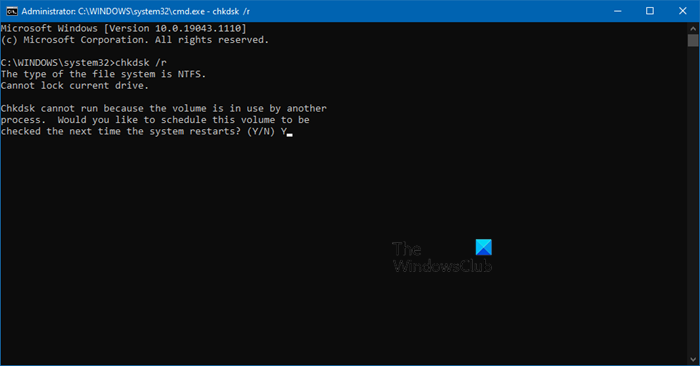
Now, allow the scan to complete as it can take a significant amount of time. Once finished, type exit and try restarting normally
2] Disable Automatic Restart on System Failure
The computer might be crashing and restarting so quickly that you cannot see the specific Blue Screen error code, which is vital for diagnosis. Temporarily disabling the automatic restart allows the Blue Screen to stay on screen so you can note the error (e.g., “PAGE FAULT IN NONPAGED AREA” or “CRITICAL PROCESS DIED“).
First, from the Advanced options screen, select Command Prompt.
Type the following command and press Enter.
bcdedit /set {default} recoverenabled No
Then, type the following command and press Enter.
bcdedit /set {default} bootstatuspolicy ignoreallfailures
Close the Command Prompt and restart.
When the Blue Screen appears again, it will stay on screen. Note the error code and search online for it to guide targeted troubleshooting.
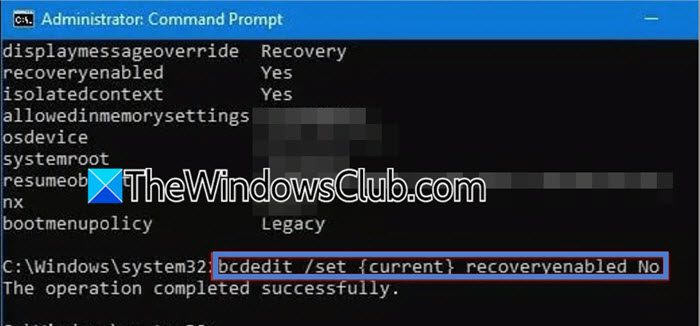
Note: If you see The element data type specified is not recognized, or does not apply to the specified entry error message, run bcdedit /enum. Check Windows Boot Loader section. Under it, you’ll see an identifier line. It will likely be something like {current} or a long string like {xxxxxxxx-xxxx-xxxx-xxxx-xxxxxxxxxxxx}.
Then, try the commands again using that identifier. For example, if the identifier is {current}, you would run the following command.
bcdedit /set {current} recoverenabled No

bcdedit /set {current} bootstatuspolicy ignoreallfailures
Finally, check if the issue is resolved.
3] Test your RAM
Faulty RAM is a primary reason for Blue Screens during system processes, including repair tools. Since your reset failed midway, it suggests potential memory corruption. Testing your RAM from the BIOS or a Windows Recovery tool can confirm this.
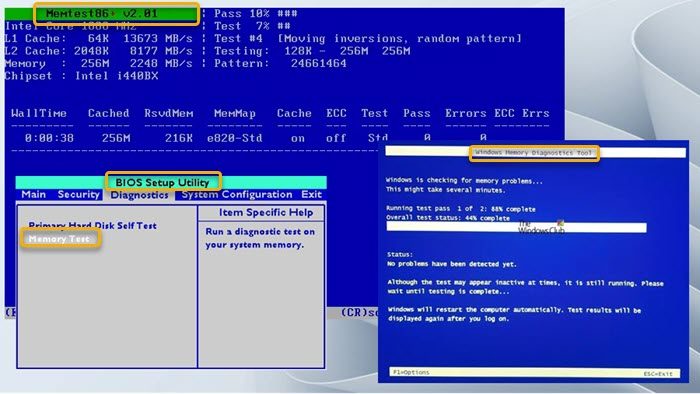
Restart your PC. As it boots (before the blue screen appears), press the specific key for your manufacturer (usually F2, F12, DEL, or ESC) to enter BIOS/UEFI Settings.
Look for a tool called Diagnostics or Memory Test. (Alternatively, from the blue screen, go to Troubleshoot > Advanced options > Command Prompt and type mdsched.exe but note this often requires booting into Windows).
Run the extended memory test. If errors appear, your RAM is failing and needs to be replaced.
4] Use a Bootable USB Installation Media to Perform a Clean Install
Since the Windows Reset function failed at 50% and the Automatic Repair crashes, your local recovery environment is likely beyond repair. Using a USB drive with Windows 11 installation files on another PC bypasses your broken hard drive entirely to perform a fresh installation.
On a separate, working computer, go to the Microsoft Software Download page and download the Windows 11 Media Creation Tool.
Use the tool to create a bootable USB flash drive (minimum 8GB). Then, insert the USB drive into your broken PC and boot from it (you may need to press F12 or ESC at startup to select the boot device).
On the setup screen, click Install now. When asked, choose “Custom: Install Windows only (advanced)”.
Delete all partitions on the drive where Windows is currently installed. Warning: This erases all your data. Then, select the unallocated space and click Next to perform a clean, stable installation of Windows 11. Use this only if you are comfortable losing your data.
Read: Automatic Startup Repair couldn’t repair your PC in Windows 11
How to fix Automatic Repair problem in Windows 11?
To resolve Automatic Repair issues on Windows 11, follow the solutions outlined in this post. We recommend that you start by checking your hard disk. You can also check our post to know what to do if the Automatic Startup Repair is not working.
Also Read: Stuck in Automatic Startup Repair or Reset PC reboot loop.