
Some users encounter the “Application is not compatible with the installed NVIDIA Driver” error while launching the NVIDIA Control Panel. Clicking the Close button closes the error window, preventing users from using the NVIDIA Control Panel. The error message says that the current NVIDIA driver does not support the NVIDIA Control Panel application. However, reports say that NVIDIA Control Panel was working perfectly on the same computer earlier. This article explains how to fix this error.
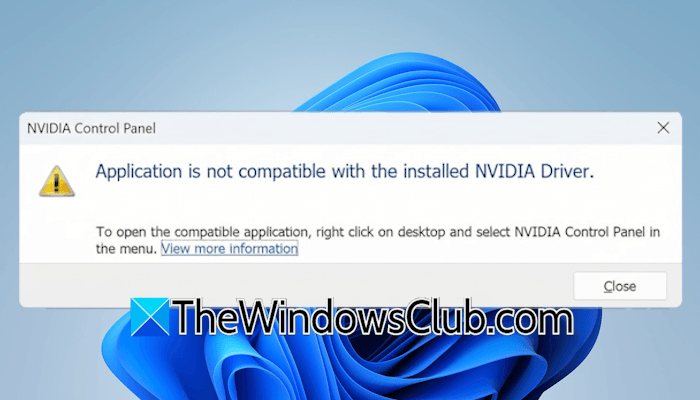
Application is not compatible with the installed NVIDIA Driver on Windows 11
To open the compatible application, right click on desktop and select NVIDIA Control Panel in the menu.
Application is not compatible with the installed NVIDIA Driver
Use the following fixes if you encounter the “Application is not compatible with the installed NVIDIA Driver” error when launching the NVIDIA Control Panelin Windows 11:
- Launch NVIDIA Control Panel as an administrator
- Uninstall the recent Windows Update (if applicable)
- Roll back the NVIDIA graphics card driver
- Perform a clean installation of the NVIDIA graphics card driver
- Modify Windows Registry
All these fixes are explained in detail below. But before proceeding, we suggest you check for Windows Update manually. If an update is available, install it and see if it fixes this error. Also, some of the following fixes may trigger the BitLocker screen. If you don’t have the BitLocker Recovery key, you will be locked out of your system, as you can’t bypass that screen. Therefore, we also suggest you back up the BitLocker recovery key for all your hard drive partitions. Save the BitLocker Recovery key to your Microsoft account and on an external storage device.
1] Launch NVIDIA Control Panel as an administrator
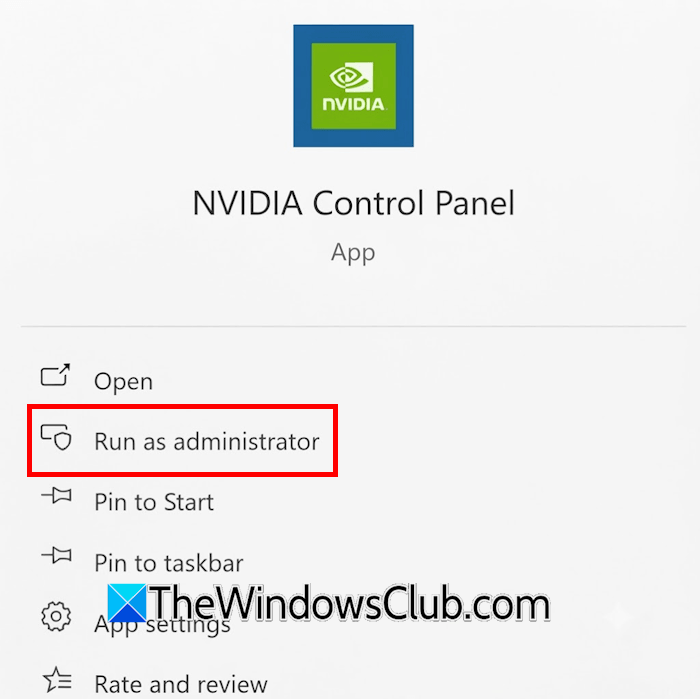
The error message suggests opening the NVIDIA Control Panel via the right-click context menu, and reports indicate this workaround has worked for some users. However, it is not a permanent fix, as Windows has stopped launching the application unexpectedly. Right-click on NVIDIA Control Panel and select Run as administrator. Click Yes in the UAC prompt. If this fixes the error, you can make the application always run as administrator.
2] Uninstall the recent Windows Update (if applicable)
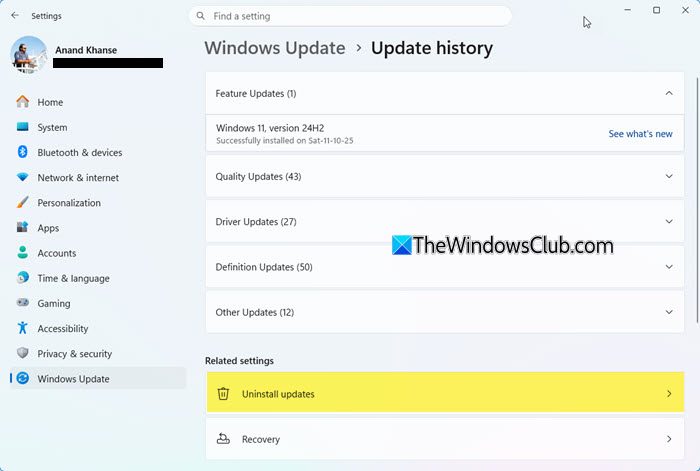
According to the reports, some users encountered this error after installing a Windows Update. Sometimes, a Windows Update causes issues. In such a case, we can uninstall that problematic update. If this happened to you as well, uninstall the problematic Windows Update.
3] Roll back the NVIDIA graphics card driver
Since the NVIDIA Control Panel was working fine earlier, the problem may be due to a problematic driver update. Roll back the NVIDIA graphics card driver and see if it helps. Go through the following instructions:
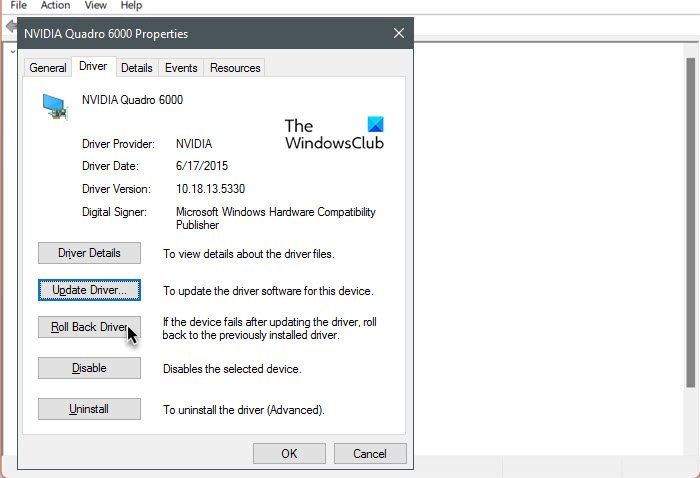
- Open the Device Manager.
- Expand the Display adapters branch.
- Right-click on the NVIDIA graphics card driver and select Properties.
- Navigate to the Driver tab and click the Roll Back Driver button.
- Follow the on-screen prompts to install the previous version of the GPU driver.
If the Roll Back Driver button is greyed out, you can try other ways to install the earlier version of your GPU driver, such as rolling it back in Safe Mode.
4] Perform a clean installation of the NVIDIA graphics card driver
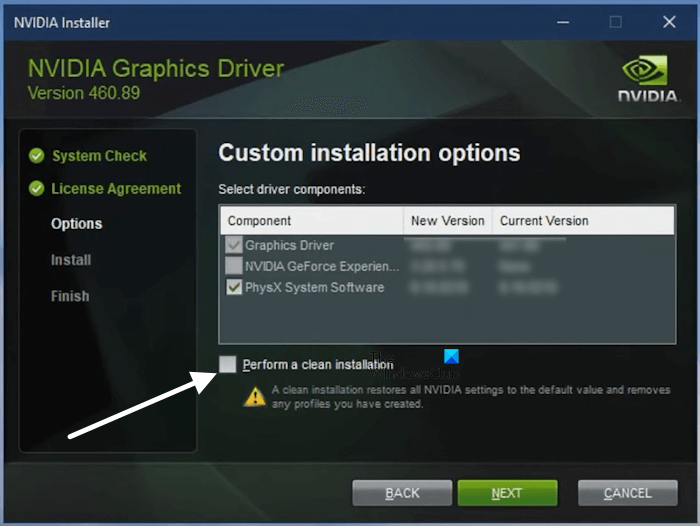
If the issue persists after rolling back the NVIDIA GPU driver or you cannot roll it back to the previous version, perform a clean installation. For this, you can use a third-party utility, Display Driver Uninstaller (DDU). Before you uninstall your display driver with DDU, download its latest version from the official NVIDIA website. The NVIDIA installer also has an option to perform a clean installation. Therefore, if you do not want to install a third-party tool, you can use the NVIDIA installer for a clean installation.
5] Modify Windows Registry
If the issue persists, modify the Windows 11 Registry and see if it helps. Before you proceed, we recommend you back up the Registry and create a system restore point. This will help you restore your system to the previous working state if any problem occurs after modifying the Registry. This registry fix is a workaround that bypasses the error window and forces the NVIDIA app to open. You can keep this setting until the next update is released for your NVIDIA graphics card driver.
Open the Registry Editor and navigate to the following path:
Computer\HKEY_LOCAL_MACHINE\SYSTEM\CurrentControlSet\Services\nvlddmkm\FTS
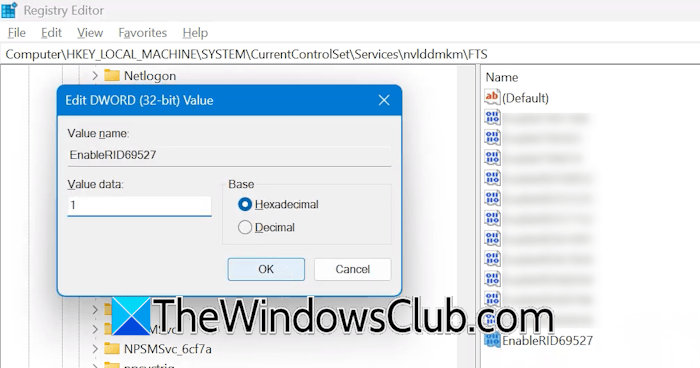
Make sure you have selected the FTS folder on the left. Now, look for the EnableRID69527 value on the right side. If the value does not exist, right-click in the empty space on the right side and select New > DWORD (32-bit) Value. Name the value EnableRID69527. Now, double-click on the value and type 1 in its Value Data. Click OK to save changes. Restart your system for the changes to take effect.
That’s it. I hope this helps.
How to fix NVIDIA drivers failing to install?
If NVIDIA drivers are failing to install, restart your system and try again. If that doesn’t work, try a clean installation by completely removing the current driver from your system. If the installer displays an error, troubleshoot accordingly.
How do I manually install NVIDIA driver on my system?
To install the NVIDIA driver manually, download a compatible version from the official website and run the installer. To download the right NVIDIA driver for your GPU, you need to enter your graphics card details on the NVIDIA website.
Read next: NVIDIA system tray icon missing in Windows.
