
Sometimes, we encounter display issues on a Windows computer. Most of the time, display issues are associated with a corrupt graphics card driver. In such cases, updating the GPU driver restores normal display functionality. However, in some cases, we need to perform a clean installation of the display driver. In this article, I will show you how to clean install the NVIDIA graphics card driver in Windows 11/10.

Download the latest version of your NVIDIA driver
Before proceeding, download the latest version of your NVIDIA graphics card driver from the official NVIDIA website.
When you visit the NVIDIA website, you will see the following two options:
- Get automatic driver updates
- Manual driver search
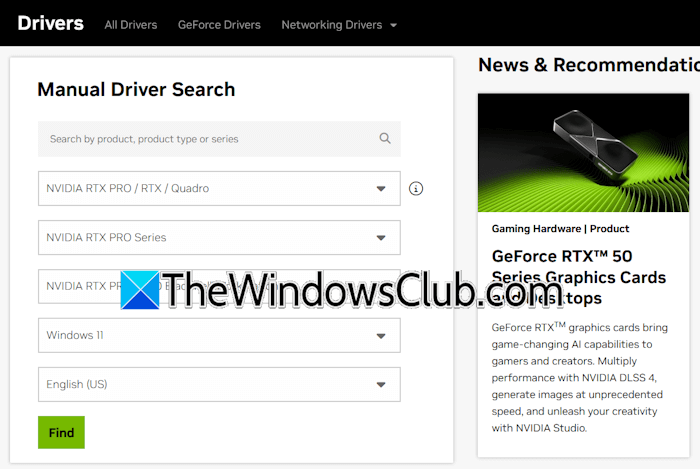
Since you have to perform a clean installation of the NVIDIA graphics card driver, please do not use the Get Automatic Driver Updates option, as it will update your NVIDIA GPU driver. Instead, search for the driver manually.
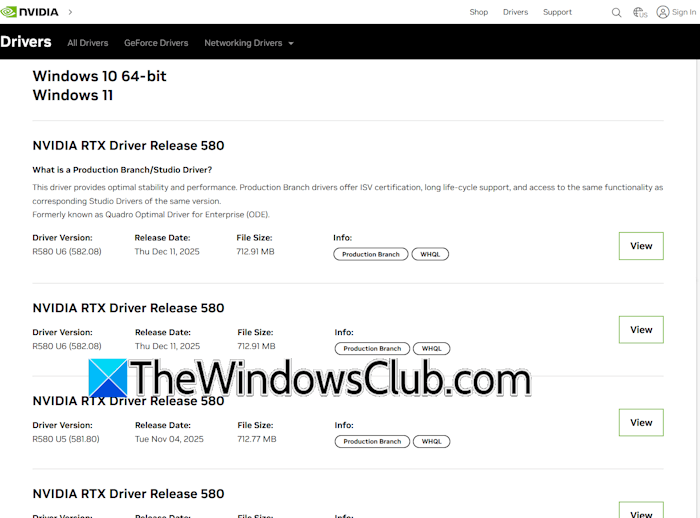
As you click Find, the website will show you all the previous versions of the driver along with the latest one. Download the most recent version of the GPU driver. Click View and then click Download.
How to clean install NVIDIA Graphics Card Driver in Windows 11
I will show you the following two methods to clean install the NVIDIA graphics card driver on your Windows 11 computer:
- Clean install NVIDIA graphics card driver in Windows 11 using Display Driver Uninstaller
- Install it using the NVIDIA GPU driver installer file
Both of these methods are explained in detail below.
1] Clean install NVIDIA graphics card driver in Windows 11 using DDU
The first method is to perform the cleaning installation of the NVIDIA GPU driver using a third-party tool, Display Driver Uninstaller. Visit the official website and download DDU. The file will be downloaded as a ZIP file. Extract it and save it to any location on your PC.
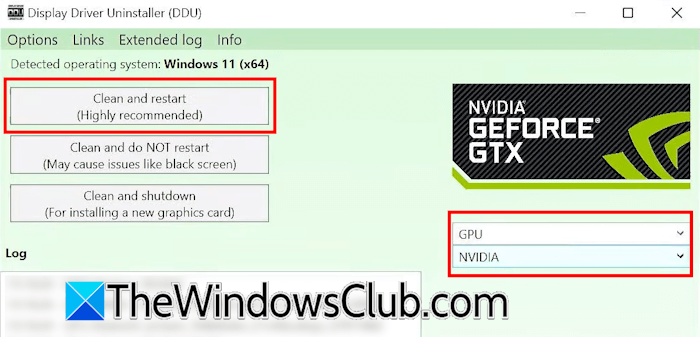
Now, the next step is to boot in Safe Mode. Once you are in Safe Mode, open the extracted DDU folder and launch the Display Driver Uninstaller. Keep the default settings as they are. Select GPU in the “Select device type” drop-down. Choose NVIDIA in the next drop-down.
DDU will show you the following three options for the clean installation of your GPU driver:
- Clean and Restart (Highly recommended): Select this option if you want DDU to restart your computer automatically after removing your GPU driver and all its components from your system.
- Clean and do NOT restart (May cause issues like black screen): Select this option if you do not want DDU to restart your computer after removing the GPU and all its components from your system. This option is suggested if you have to do some other things after removing the display drivers before rebooting your system. If you select this option, you have to restart your system manually. Simply restarting your system will not take you out of Safe Mode. You have to properly exit from Safe Mode.
- Clean and shutdown (For installing a new graphics card): This option is useful if you want to install another graphics card on your system. Before installing a new graphics card, it is necessary to remove the current driver and all its components from your system.
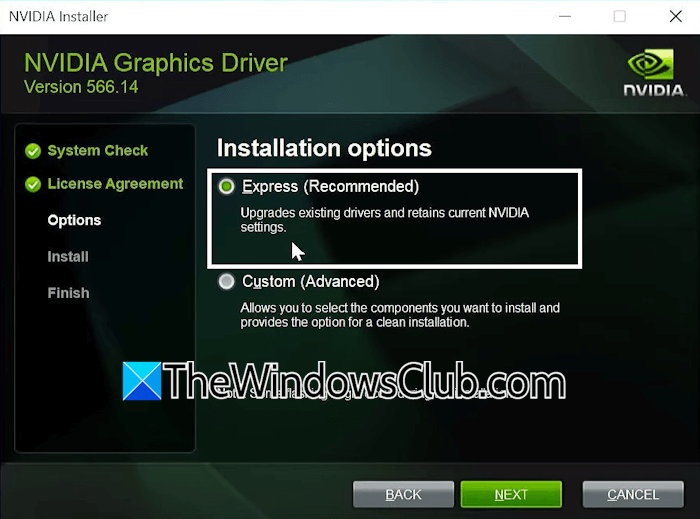
Click “Clean and Restart (Highly recommended)” and DDU will start its work. The process will take time, and your display might flicker, but it is normal. After completion, your system will reboot automatically in normal mode. After the restart, run the GPU driver installer file that you have downloaded from the official NVIDIA website. Select the Express (Recommended) option and click NEXT. The installation process will start. After completion, your system will have the latest version of the NVIDIA graphics card driver.
2] Install it using the NVIDIA GPU driver installer file
If you prefer not to use a third-party tool, such as DDU, to perform a clean installation of the NVIDIA GPU driver, you can use the driver installer file instead. Double-click the driver installer file to run it. On the first screen, you will be asked whether you want to install only the graphics card driver or GeForce Experience along with the graphics card driver. Select the required option and click AGREE AND CONTINUE.
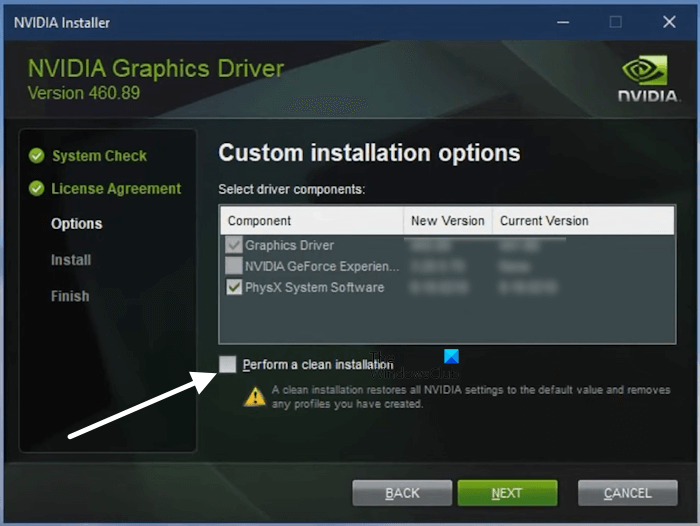
On the next screen, you will see these two options: Express install and Custom install. Select the Custom option and click NEXT. On the next screen, select the checkbox that says “Perform a clean installation.” Click NEXT. You will encounter some flashes on your screen during the installation, but this is normal.
That’s it. I hope this helps.
TIP: NV Updater will help update the NVIDIA Graphics Card Driver easily.
How to completely remove NVIDIA drivers in Windows 11?
To completely remove the NVIDIA drivers in Windows 11, use a third-party tool called DDU. Run it in Safe Mode to remove the NVIDIA driver and all its components from your system.
What is DDU used for?
DDU stands for Display Driver Uninstaller. It is a third-party tool used for completely removing the graphics card driver. It is compatible with AMD, NVIDIA, and Intel graphics cards.
Read next: NVIDIA GeForce Experience unable to open Share.
