
Some users encounter performance issues on their computers. Upon investigation, they find that the Windows Camera Frame Server is consuming excessive system resources. If the Windows Camera Frame Server is showing high RAM and CPU usage on your system, the solutions provided in this article will help you.
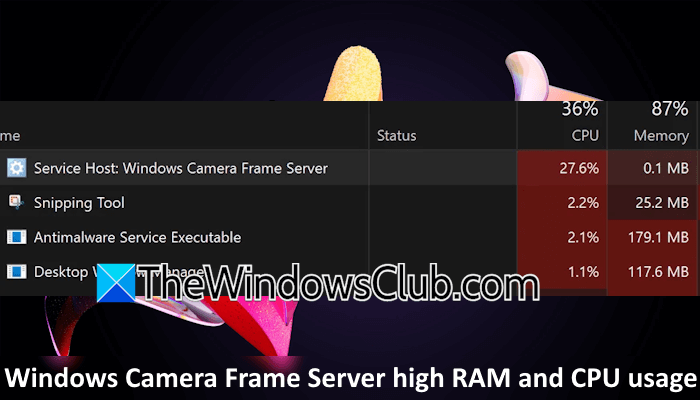
Windows Camera Frame Service enables multiple clients to access video frames from camera devices. When an app accesses your camera, this service is triggered automatically. You can view it in the Task Manager under the Windows Processes tab. If this service is disabled, none of the apps on your system can access your camera.
Fix Windows Camera Frame Server high RAM and CPU usage
Use the following suggestions to fix the Windows Camera Frame Server high RAM and CPU usage issue on your Windows computer:
- Roll Back your camera driver
- Update or reinstall the camera driver
- Disable camera access to all apps
- Disable your antivirus
- Check the issue in a Clean Boot state
- Perform System Restore
All these fixes are explained in detail below:
1] Roll Back your camera driver
A corrupt camera drive can also cause this problem. Therefore, the first step is to roll back your camera driver. Follow these steps:
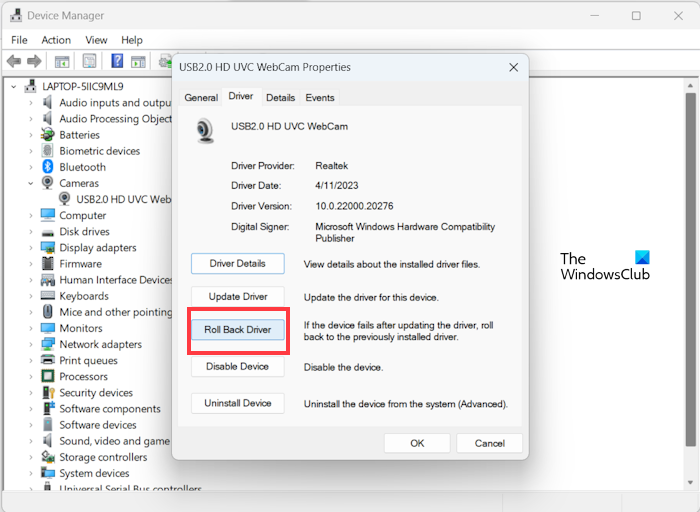
- Open the Device Manager.
- Expand the Cameras branch.
- Right-click on your camera driver and select Properties.
- Go to the Driver tab and click the Roll Back Driver button.
- Follow the on-screen prompts to install the previous version of your camera driver.
If the Roll Back Driver button is greyed out, try other methods to install the previous version of your camera driver. However, if none of these methods work, it means that Windows has not retained an earlier version of your camera driver.
2] Update or reinstall the camera driver
If the Roll Back Driver option does not help, you can try updating or reinstalling the camera driver. Uninstall the Camera driver in Device Manager, then restart your computer.
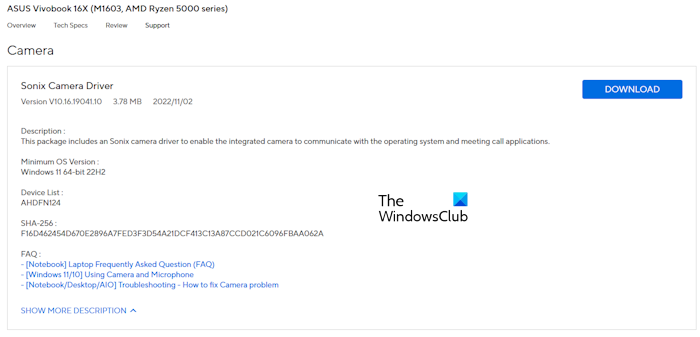
If the issue persists, download the latest version of the camera driver from the official website of your computer manufacturer and install it.
3] Disable camera access to all apps
Since the service manages camera access for some applications on a Windows computer, one of such applications might be causing this problem. To check this, disable camera access to all the applications.
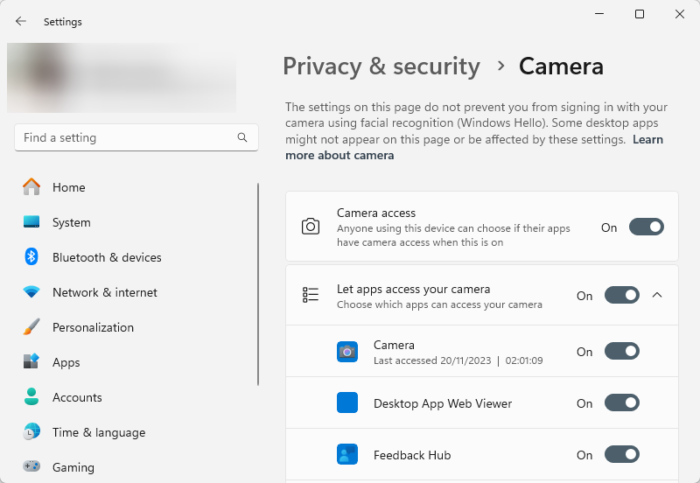
Follow these steps:
- Open Windows 11 Settings.
- Go to Privacy & Security > Camera.
- Turn off the Camera access button.
Now, monitor your system for some time and see what happens. If this step stabilizes RAM and CPU usage, it indicates that one of the applications you restricted from accessing your camera was causing the problem.
Now, to identify the problematic application, enable camera access to applications one by one, and monitor the CPU and RAM usage after allowing the camera to access for each application.
4] Disable your antivirus
Your third-party antivirus might be causing this issue. Some antivirus programs include a webcam security feature that prevents applications and malware from accessing your PC’s webcam without your permission. This feature prevents untrusted applications from capturing images or videos and sending them to the hacker.
If your antivirus has such a feature enabled, it might be causing this issue. To confirm this, disable your antivirus and monitor your system. If the Windows Camera Frame Server does not show high CPU or RAM usage after you disable your antivirus, your antivirus might have this feature. Open your antivirus and review all its settings.
5] Check the issue in a Clean Boot state
If the issue persists, a third-party service might be triggering the Windows Camera Frame Server to consume your system resources. To confirm this, start your system in a Clean Boot state and monitor the CPU and RAM consumption. Be careful while using MSConfig, as if you disable all the services by mistake, your system will become unstable, and you won’t be able to use it.
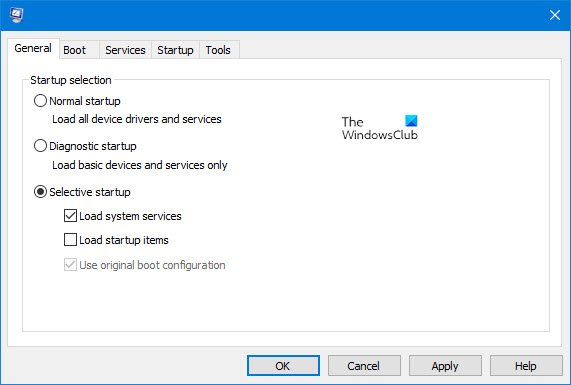
If the issue disappears in the Clean Boot state, you have to identify the problematic third-party service. Once you find it, check which app the service is associated with. Uninstall or update that app.
6] Perform System Restore
If nothing works, perform System Restore. While restoring your system to a previous point in time, select the restore point created on or after the date the issue started.
If no restore points exist on your system, the last resort is to reset your PC.
That’s it. I hope this helps.
How to fix high CPU or RAM usage?
Running resource-intensive applications on a Windows computer results in high CPU and RAM consumption. It is normal when you use heavy applications. However, the CPU or RAM usage remains high even if you are not using a heavy application; it is a matter of concern. In such a case, it can result from corrupt system image files or a memory leak. Troubleshoot the issue in a Clean Boot state and repair your system image files.
Why is 90% of my CPU being used?
There are several reasons why 90% of your CPU is being used. There might be some resource-intensive applications running in the background. Check this. Also, troubleshoot in a Clean Boot state. Installing Windows 11 on unsupported hardware is possible, but it causes a high CPU usage problem.
Read next: Modern Setup Host high CPU or Memory usage on Windows.
