
Windows Boot Manager (or BOOTMGR) is a key component of the boot process. It starts a system, displays the boot menu (for multi-boot or dual-boot scenarios), and loads the selected OS loader. However, some users have complained that Windows Boot Manager is not showing in BIOS on their Windows 11 PC. Thus, users can’t boot into Windows, which can also result in various BOOTMGR errors. Thankfully, some workarounds are available to address this problem. If you have restarted your PC several times and updated the BIOS, and the problem persists, these solutions will help.
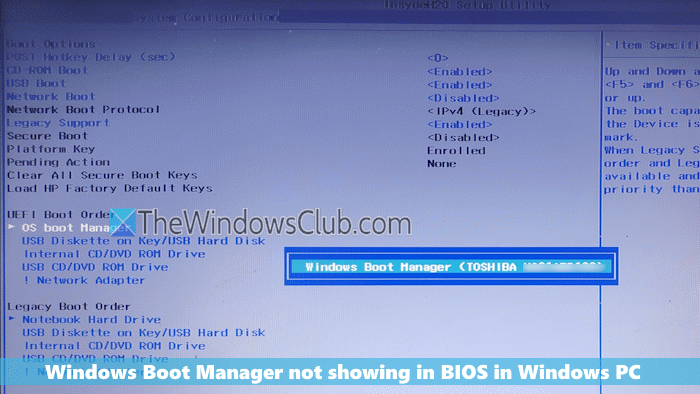
Why is Windows Boot Manager not showing in BIOS?
If Windows Boot Manager is not showing in BIOS settings, it may be because Boot Mode is set to CMS/Legacy. In addition, if the boot sector is damaged or replaced with a nonstandard Windows boot sector, or if Boot Configuration Data (BCD) is misconfigured or corrupted, this can also prevent Windows Boot Manager from appearing in the BIOS.
Windows Boot Manager not showing in BIOS in Windows 11
If Windows Boot Manager is not showing in BIOS in Windows 11/10, use these solutions:
- Disconnect external devices
- Change Boot Mode to UEFI
- Check BIOS settings
- Perform Startup Repair
- Recreate Boot files
- Create a new Boot Sector and rebuild the Boot Configuration Data
- Manually create the Boot path file in UEFI.
Before making any changes, you should back up or recover data from your unbootable hard drive, just in case.
1] Disconnect external devices
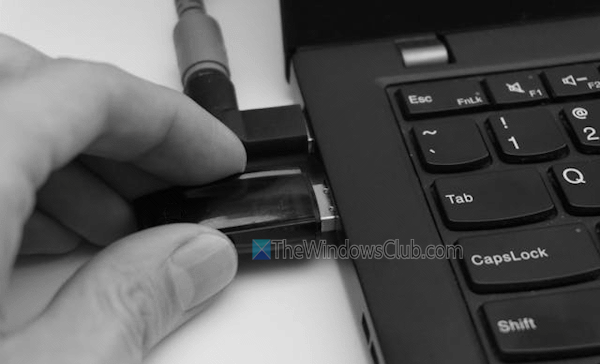
Your PC might mistakenly detect external drives, removable media (USB devices or non-bootable discs), etc., as bootable devices and attempt to boot from them. In this case, remove or disconnect external devices and see if the Boot Menu appears; if so, your problem is solved.
Also, make sure that your hard drive is detected by your computer. You should check that the power cable and controller cables are connected properly and are not malfunctioning or loose (unplug and re-plug cables if needed).
2] Change Boot Mode to UEFI
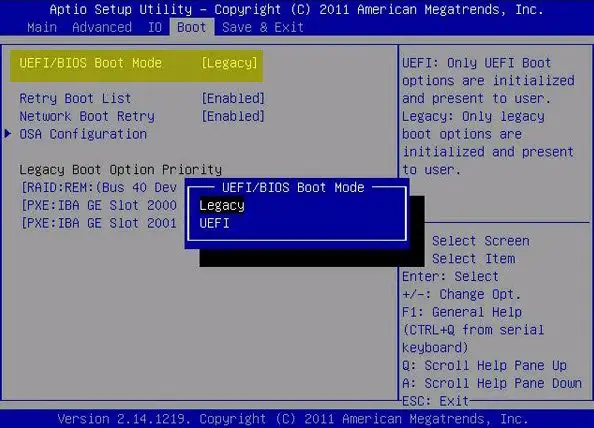
Some new motherboards support both BIOS and UEFI boot modes, and switching from Legacy to UEFI helped some users fix this problem. So, in Windows 11, open the BIOS settings, go to the Boot menu (or Boot Options menu), and you will see a Boot Mode or UEFI/BIOS Boot Mode option. There, change Boot Mode from Legacy to UEFI. Also, set Secure Boot to Enabled/Disabled, and restart your PC.
TIP: You can also check if your PC uses UEFI or BIOS
3] Check BIOS settings
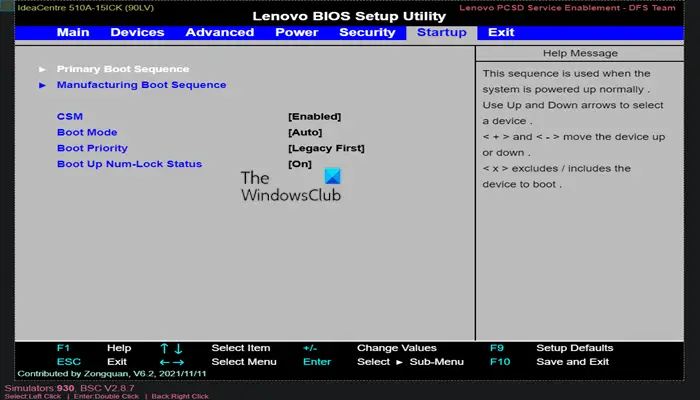
Incorrect BIOS settings can also be the reason that Windows Boot Manager is not showing in Windows 11. For example, if the boot sequence in BIOS is incorrect (wrong boot drive, say a USB drive, is placed first than bootable disk or drive), Windows won’t be able to detect the correct drive to boot into Windows. So, check your BIOS settings and adjust them as needed.
Restart your PC and access the BIOS menu (by pressing Esc key, F10, or F2 key during startup). In BIOS settings, check if the hard disk is detected, change the Boot order or priority to the correct bootable device placed first or on top, set the correct Boot Mode, enable or disable Fast Boot, Secure Boot, and save the changes.
If you are unable to change the boot order in BIOS, check and configure Secure Boot, reset BIOS settings to default, and try again.
4] Perform Startup Repair
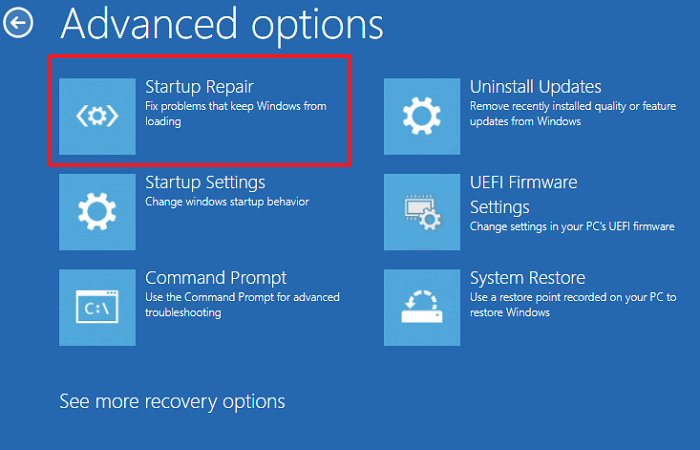
Startup Repair (formerly Automatic Repair) is a built-in tool in Windows 11 and is helpful to fix certain problems that prevent Windows from starting. If there are damaged or missing system files, a damaged MBR, Registry errors, or corrupted boot configuration data (BCD) causing Windows Boot Manager not to show in BIOS, the Startup Repair tool can try to repair or fix such issues automatically. Here are the steps:
- First, boot into Windows Recovery Environment (WinRE). Since you can’t log in to Windows, you need to interrupt the normal bootup to access WinRE to perform Startup Repair. Turn on and off your PC during bootup more than twice, and your system will automatically trigger the Windows Recovery Environment
- Navigate to Troubleshoot > Advanced Options > Startup Repair > Restart
- After reboot, Startup Repair will scan your PC to find and try to fix issues automatically.
Related: Fix BOOTMGR is Missing error in Windows PC
5] Recreate Boot files
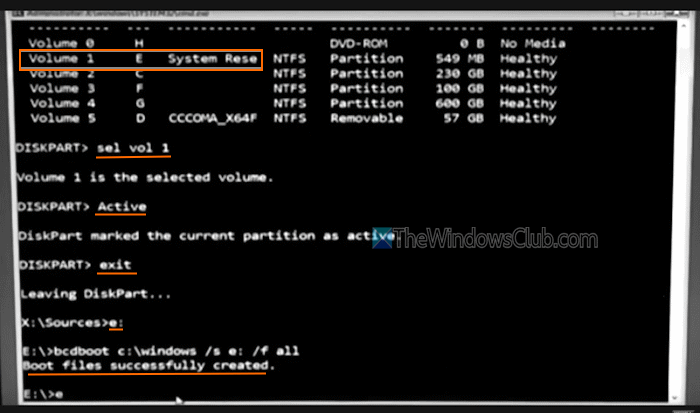
This is one of the best solutions, as some users benefit from it. First, set the system partition as Active. Then recreate or copy the boot files, and execute the command to copy them to the system reserved partition. You will need Windows installation media or a USB drive, and the Command Prompt window in WinRE to execute the command and resolve this issue. Here are the steps:
- Create a Windows bootable installation media using the Media Creation Tool or the popular tool Rufus
- Connect the USB drive or installation media and turn on your computer
- An initial setup window will open where you can set preferences, and press Next
- Select the Repair my PC option
- Press the Next button to access Windows RE
- Click on the Command Prompt option
- In the Command Prompt window, you need to run the DISKPART tool to select your disk (if more than one disk is connected), select the volume where the System Reserved partition is present, set the selected partition as active, and exit the Diskpart tool. For this, execute the following commands one by one:
Diskpart
List disk
Select disk 0
List volume
Select volume 1
Active
Exit
Here, you have to replace disk 0 with the actual disk number and replace volume 1 with the correct volume number in your PC. Otherwise, the commands won’t execute successfully. In addition, you should also remember the volume letter of the selected volume.
Now, access the system partition volume (say L:). Finally, execute the following command in the selected volume:
bcdboot C:\windows /s L: /f ALL
This command uses the BCDBoot command-line tool to create boot entries from C:\Windows on the drive with volume letter L. Here, /s specifies the volume letter of the system partition, and /f specifies the firmware type with the ALL value that supports booting on a BIOS or UEFI-based computer. You must replace volume letter L with the correct volume letter for your PC.
Exit and restart your PC.
Read: Unable to boot Windows after installing Ubuntu
6] Create a new Boot Sector and rebuild the Boot Configuration Data
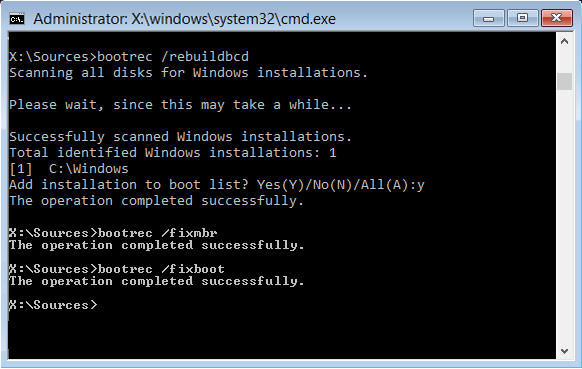
As we already mentioned, if the boot sector was replaced or damaged, and/or the Boot Configuration Data (BCD) is misconfigured, this could also be why Windows Boot Manager isn’t showing in BIOS and you can’t boot into Windows. In this case, you have to write or create a new boot sector to the system partition and rebuild BCD. The steps are:
- Use the installation media to enter the Windows Recovery Environment
- Select the Command Prompt option
- In the Command Prompt window, execute the following commands:
Bootrec /rebuildbcd
Bootrec /fixboot
Also read: Default Boot Device Missing or Boot Failed
7] Manually create the Boot path file in UEFI
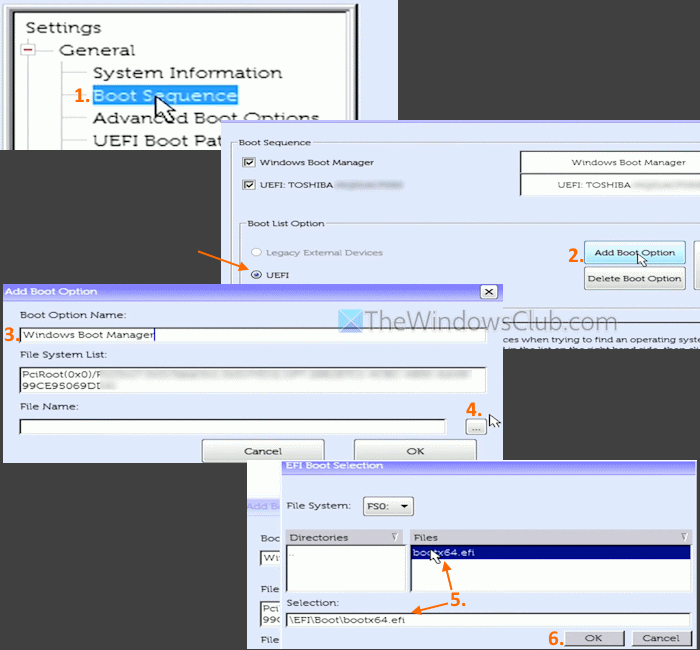
This option is suitable for Dell users. The steps to manually create the boot path file in UEFI are as follows:
- Restart your PC and press the F2 key repeatedly to enter the UEFI BIOS
- Expand the General section
- Select the Boot sequence option
- In Boot List Option, select UEFI
- Expand the Secure Boot section and select the Secure Boot Enable option under it
- In the right section, uncheck the Secure Boot Enable option
- Come back to the Boot sequence option in the General section
- In the right section, make sure that Windows Boot Manager and your hard disk are selected (or checked) under the Boot Sequence section
- Under the Boot List Option section, click on the Add Boot Option button, and a separate box will open
- There, in the Boot Option Name text field, add a Windows Boot Manager name entry
- Click on the three horizontal dots button, and an EFI Boot Selection window will open
- Navigate to EFI > Boot directory and select efi
- Press OK
- Select Exit to restart your PC.
That’s all.
Now read: Windows Boot Manager on wrong drive [Fix]
How to enable Windows Boot Manager in Windows 11?
To enable the Windows Boot Manager menu in Windows 11, open the Command Prompt window as an administrator. After this, execute the following commands one by one:
bcdedit / set {bootmgr} displaybootmenu yes
bcdedit /set {bootmgr} timeout 30
This first command will display the boot menu (to select an operating system to load), and the second command sets the time duration (30 seconds) to display that menu. You can also use Startup and Recovery (in System Properties) or use the System Configuration tool to enable/disable Windows Boot Manager.
Read next: Hard Drive not showing up on Boot Menu in Windows PC.
