We have noticed that the external hard drive connected to the USB 3 Port is not recognized by Windows. The drive is not visible in the File Explorer making it inaccessible. If USB 3.0 is not working in Windows 11, it points to problems with SuperSpeed USB 3.0 ports or devices. For instance, it could be the external drives or hubs that use the blue‑colored ports but fail to connect or run at full speed. In this post, we will see what you can do if USB 3.0 not working in Windows 11/10.

First, check the type of error message you are getting. Second, run the Hardware and Device Troubleshooter or the Windows USB Troubleshooter and check if it helps. The automated tools check the hardware/USB connected to the computer for any known issues and fix them automatically.
Next, check for any pending updates in Windows Update. Some of the updates might be related to the drivers and therefore need to be installed on the computer. So check if you need to update your drivers. Visit the related website, search for the latest drivers for the hard disk model, install them on the computer, and check whether that resolves the issue.
Why is my USB 3.0 not showing up?
Windows might not recognize the device connected to the USB 3.0 port if the port is not working. So, try plugging the device into a different port and see if that helps. But if it still doesn’t work, we need to check and resolve the driver issues. For that, check the solutions mentioned below.
USB 3.0 not working in Windows 11
If the USB 3.0 External Hard Drive is not working or recognized on your computer, here are some suggestions you can try:
- Uninstall & reconnect the external hard drive
- Reinstall USB controllers
- Disable USB selective suspend setting
Let us look at the suggestions in detail.
1] Uninstall & reconnect the external hard drive
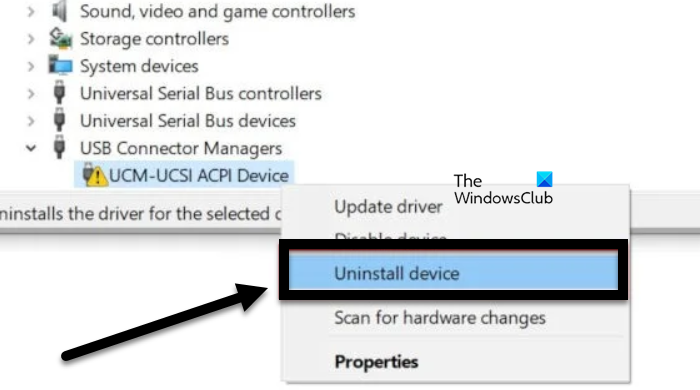
To do this, type ‘Device Manager’ in the Start Search box click the icon.
Next, select Disk Drives from the list of hardware, right-click the USB external hard drive with the issue, and click Uninstall device.
After uninstalling, unplug the USB cable. Then, wait for a minute and reconnect the USB cable. The driver should automatically load.

Look for the USB drive in Windows Explorer.
Read: Fix USB 3.0 slow transfer speed.
2] Reinstall USB controllers
The method works if there is a problem with the loaded USB driver i.e. it has either become unstable or corrupted.
Open Device Manager and expand Universal Serial Bus controllers.
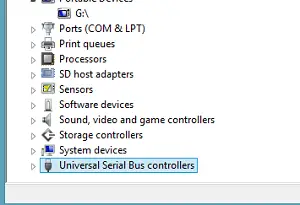
Then, right-click a device and click Uninstall device. Repeat the same procedure for all devices.
Once done, restart the computer. Your USB controllers should automatically install.
Read: USB ports are not working in Windows 11
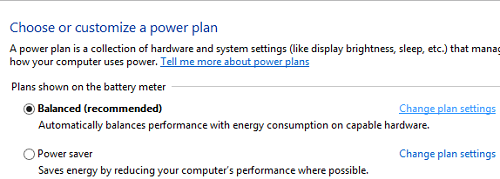
3] Disable USB selective suspend setting
Click the battery icon on your computer’s taskbar. Adjacent to your currently selected plan, you should find ‘Change Plan Settings’ link. Click the link.
Next, choose the ‘Change advanced power settings’ option.
Then, click the box to expand the USB Settings. Expand USB selective suspend settings.
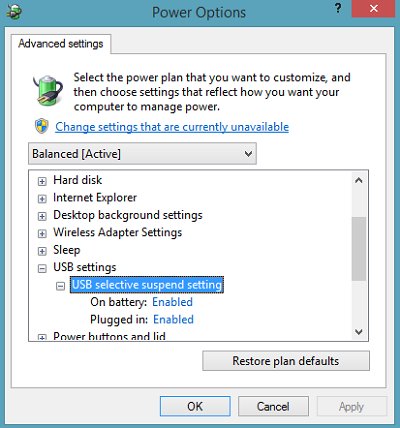
Click the link adjacent to Plugged in option, then from the drop-down menu select Disabled option.
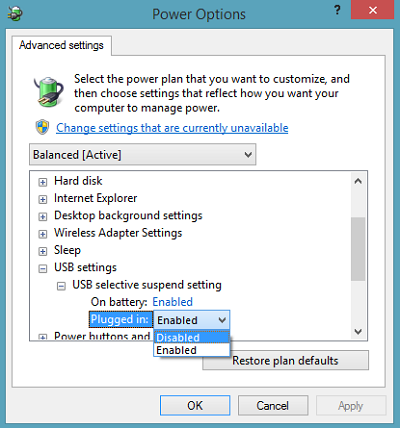
If you’re using a laptop, click Battery, then click the drop-down menu and select Disabled.
Click Apply, then click OK.
Make sure you create a system restore point first. Also, remember to restore your old settings if you find that some suggestions have not helped you.
Check this post if Windows does not recognize the second Hard Drive.
These posts may also interest you:
I hope something helps you!
Why Windows 11 does not recognize USB device?
Windows 11 might not recognize the connected USB device if the USB driver or controller has become unstable or corrupt. You may also experience this issue if there are some outdated drivers present on your computer. We recommend you check our guide If Windows 11 is not recognizing USB device.
Also Read: External Hard Drive not showing up.