
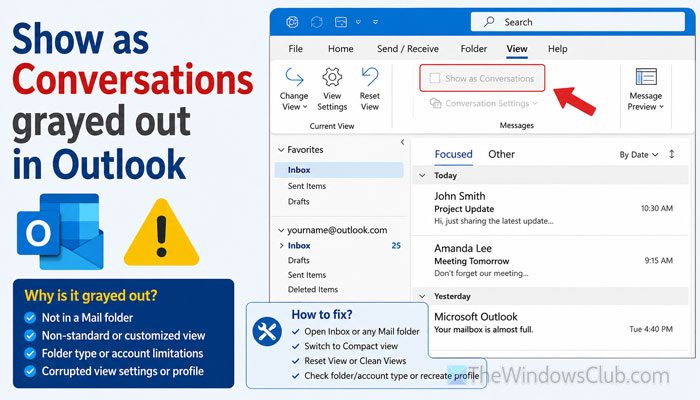
If the Show as Conversations option is grayed out or missing in Outlook, here is what you can do to troubleshoot this issue. Whether you use the classic MS Outlook or the new Outlook app, you can try these solutions to understand how it works and where it works.
What does the Show as Conversations option do in Outlook?
In simple terms, the Show as Conversations option lets you view a series of emails in an instant-messaging, chat-style view. Instead of clicking on each email, you can find the latest email at the top, the second-latest email right below it, and so on.
It also groups related emails into one thread. It pulls the subject lines of all your emails and groups identical subject lines into one thread.
How do you enable Show as Conversations in Outlook?
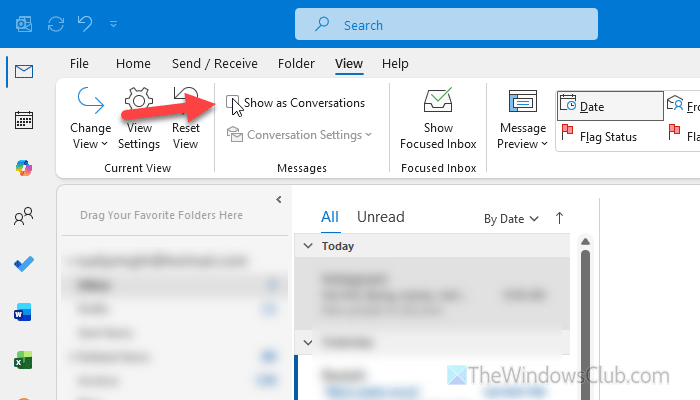
To enable Show as Conversations in Outlook, you must be using the Classic Outlook app. If so, open any email folder such as Inbox, Draft, Sent, etc., and go to the View tab. There, you’ll find a checkbox named Show as Conversations. Click on this check to activate it.
Why is Show as Conversations grayed out in Outlook?
If Show as Conversations is grayed out in Outlook, one of these could be the reason:
- You haven’t selected any email folder.
- You are using an IMAP or POP account.
- You are using the new Outlook app.
- You have already created a group email.
- Your data files may have issues.
- You have enabled a different setting in the new Outlook app.
- You have selected a different Arrangement setting.
Show as Conversations grayed out in Outlook
If the Show as Conversations option is grayed out in Outlook, follow these solutions:
- Choose the correct Arrangement setting
- Select an email folder
- Do not use IMAP or POP account
- Use Classic Outlook app
- Check Group By settings
- Check settings in new Outlook app and Outlook.com
- Check Change View setting
- Reset Outlook view
- Repair Outlook data files
To learn more about these solutions, continue reading.
1] Choose the correct Arrangement setting
This is the most important setting to check. You can arrange your emails in multiple ways, regardless of the email folder. For example, you can arrange emails by sender, categories, attachment size, etc. However, you must select the Date option.
For that, go to the View tab, head to the Arrangement section, and choose the Date option.
Read: How to sort folders alphabetically in Outlook
2] Select an email folder
The Show as Conversations option isn’t available if you try to enable it in the search results window. It is also not available if you open Calendar, To Do, People, or anything else. It is available only if you select an email folder such as Inbox, Draft, Sent, Deleted Items, or Archive.
It is also available if you open any custom folder that you have created. That said, before finding the option above, select an email folder first.
Read: Default Folders missing in Outlook and Outlook on the Web
3] Do not use IMAP or POP account
The Show as Conversations option doesn’t work if you enable it on an IMAP or POP account. It works best with a Microsoft account. Therefore, if you are trying to enable it for an IMAP or POP account, we suggest avoiding this plan.
Read: We couldn’t log on to the incoming (POP/IMAP) server
4] Use Classic Outlook app
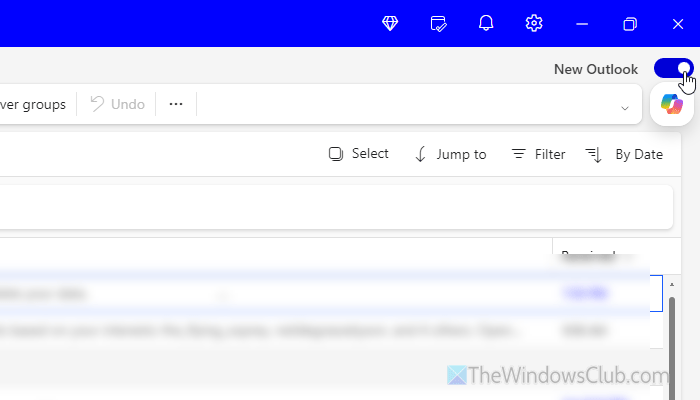
The new Outlook app doesn’t have the Show as Conversations option. If you want to enable this feature, you must switch to the Classic Outlook app. For that, toggle the New Outlook button in the top-right corner and select the Switch back to classic Outlook option. Then, you can find the option in the View tab.
5] Check Group By settings
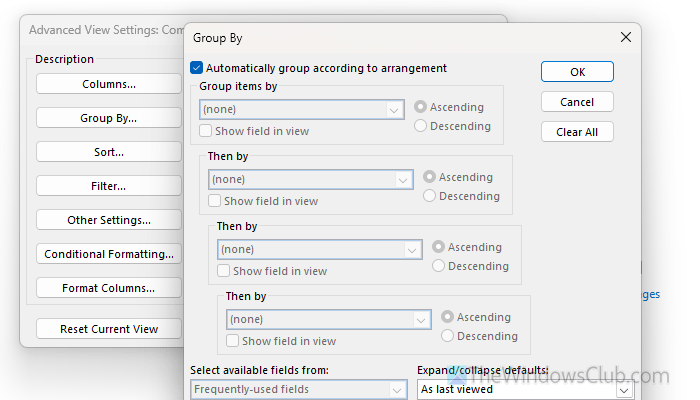
If you are using a custom Group By setting, we suggest disabling it. For that, go to the View tab and click on the View Settings option. Click on the Group By button, and choose the Automatically group according to arrangement option. Finally, click the OK button.
For your information, it will help you arrange your conversations by Date.
Read: How to group emails in Outlook
6] Check settings in new Outlook app and Outlook.com
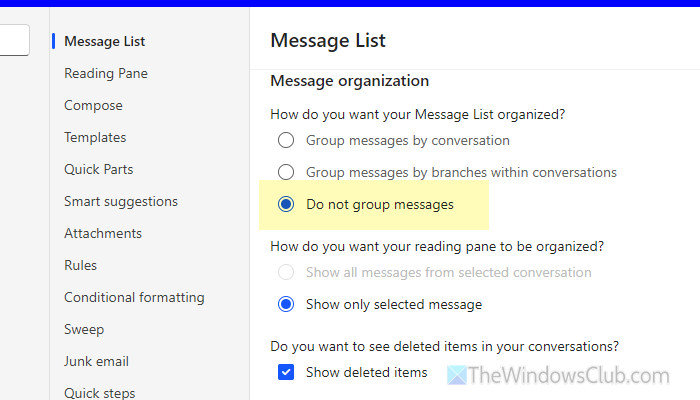
To check the view settings in the new Outlook app, go to View > View settings > Message List. Then, choose the Do not group messages option, and click the Save button.
If you are using Outlook.com or the Web version of Outlook, you can find the same option at the same location.
7] Check Change View setting
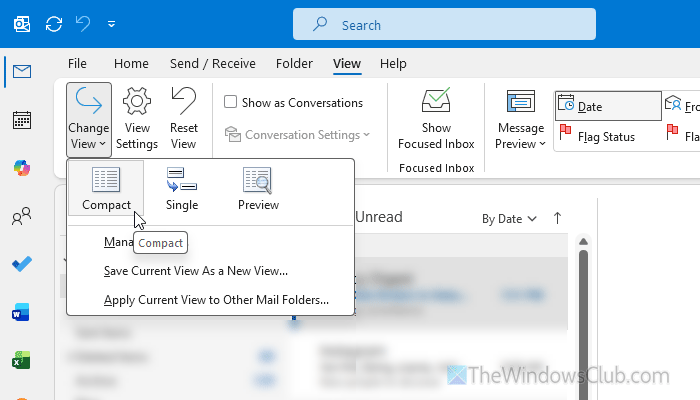
We suggest using the Compact view for your emails. In case you don’t know about it, go to the View tab and click on the Change View button. Then, select the Compact option.
Although it doesn’t affect the conversations view directly, it may help at times.
Read: How to Create, Manage & Change Inbox View in Outlook
8] Reset Outlook view
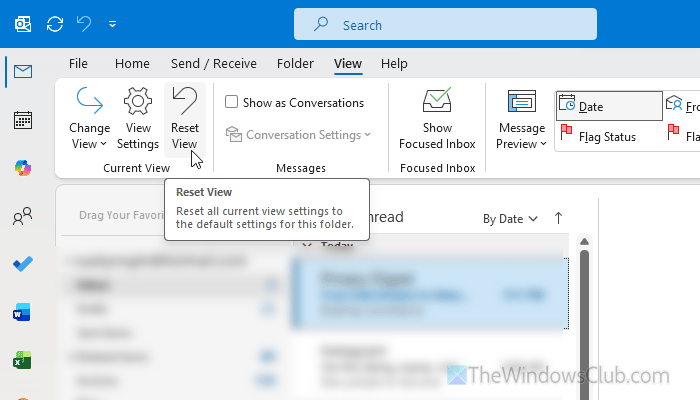
If you have changed many settings for arrangement, view, and conversations and don’t remember them all, reset the View settings to default so Outlook can apply the option that best fits your needs. To do that, use the Reset View option, which is available on the View tab.
9] Repair Outlook data files
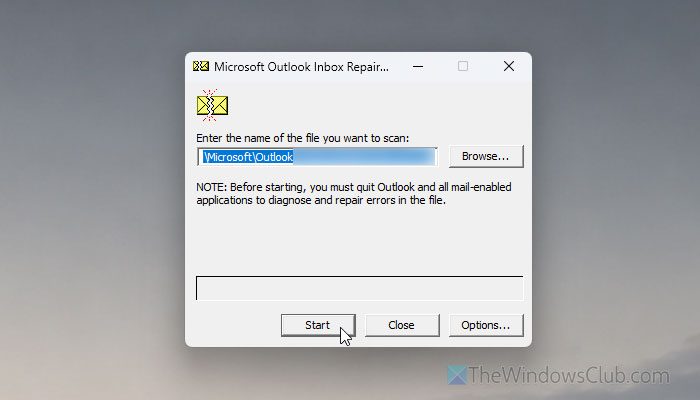
To repair Outlook data files, use the built-in tool SCANPST.EXE. Navigate to this folder and open SCANPST.EXE:
C:\Program Files\Microsoft Office\root\Office16
Then click the Start and Repair buttons. In case you want to learn more about the Outlook data file repairing process in detail, you can go through this article.
Read: Outlook Inbox Repair Tool keeps popping up
Why won’t Outlook let me show as conversation?
If you have selected anything else apart from Date in the Arrangement setting, you won’t find the Show as Conversations option in Outlook. Also, if you are using an IMAP or POP account, you may see this disabled.
How do I add a Show as a conversation in Outlook?
To add or enable Show as Conversation in Outlook, you must select an email folder and go to the View tab. Then, tick the Show as Conversations checkbox.
Read: How to Enable, Disable, Use Conversation View in Outlook.
