
Some users reported that the emails they never deleted were unexpectedly moved to the trash in Outlook. They said the emails moved directly to the trash instead of landing in the inbox. This could happen for several reasons, such as incorrectly configured Outlook rules, an antivirus conflict, or actions performed on another connected device. If your Outlook emails keep going to the trash, the solutions provided in this article will help.
Outlook emails keep going to the Trash
Use the following fixes if your Outlook emails keep going to the trash:
- Do you use the Outlook app on your phone?
- Do you use Outlook on another device?
- Check Outlook rules
- Check Outlook Sweep settings
- Disable your antivirus
- Disable add-ins
- Repair or reinstall Office
- Check unauthorized access in your Microsoft account
- Secure your Microsoft account
All these fixes are explained in detail below.
1] Do you use the Outlook app on your phone?
If you use the Outlook app on your phone, you might have accidentally trashed emails. You can configure swipe actions in the Outlook app on your phone to delete your emails, archive them, and more. You may have set the swipe action to delete emails.
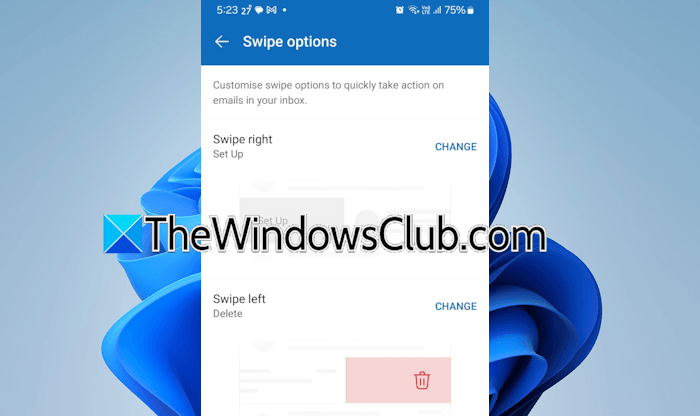
Check this by following these steps:
- Open the Outlook app on your phone.
- Tap on the profile icon on the top left side.
- Tap on the Settings icon.
- Now, tap Mail and then tap Swipe Actions.
If you have configured any of the swipe actions to delete emails, change them.
2] Do you use Outlook on another device?
If you have set up Outlook on another device, that might be triggering this issue. Microsoft Outlook allows you to create two types of rules: client-side rules and server-side rules. Client-side rules work on a particular machine after you sign in to Outlook on that machine. These types of rules show a “client-only” message in the Rules and Alerts window, so you can identify them.
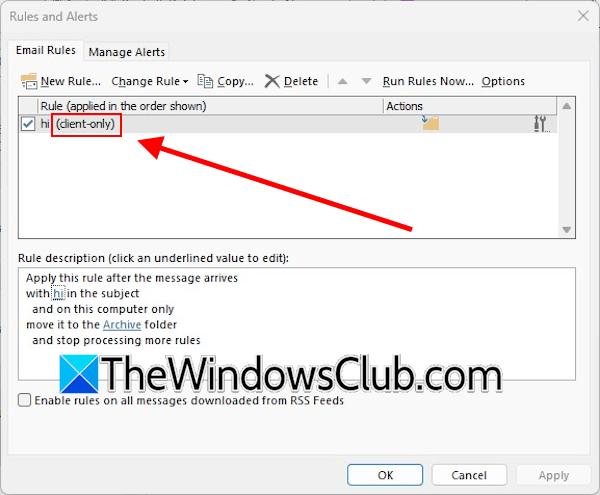
If you use Outlook on another device, log in to that device and open Microsoft Outlook. Now, click Home > Rules > Manage Rules & Alerts. The Rules and Alerts window will appear. In that window, select the Email Rules tab and check whether any rule is showing the client-only message. If yes, select that rule and read its description. If the rule is configured to delete emails from a particular sender, delete or modify that rule.
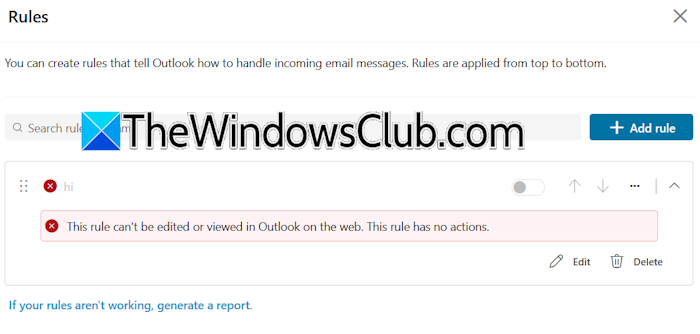
If you do not remember whether you have set up Outlook on another device in the past and created a client-side rule, open the New Outlook app and navigate to Settings > Mail > Rules. If you see the following message on any of the rules, that rule is the client-side rule.
This rule can’t be edited or viewed in Outlook on the web. This rule has no actions.
In the New Outlook app, you cannot view the description of that rule. Therefore, if you are not sure what that rule contains, delete it.
3] Check Outlook rules
Check Outlook rules. The previous fix explains how to check rules in Microsoft Outlook. The steps to check rules in the New Outlook app and Outlook.com are the same.
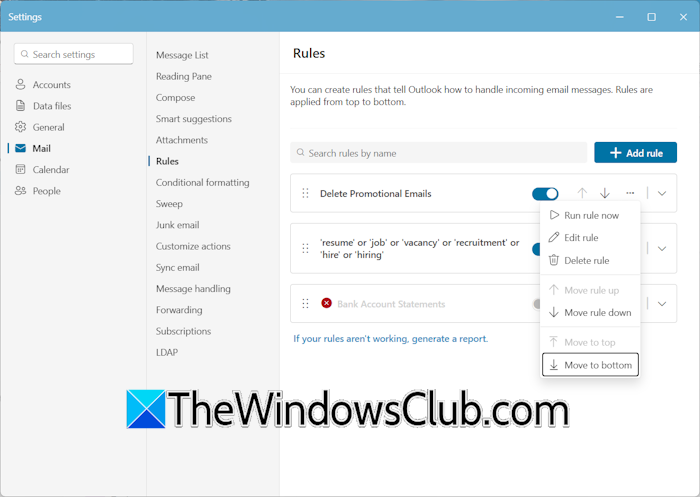
Go through the following instructions:
- Open the New Outlook app or visit Outlook.com in your web browser and sign in with your Microsoft account.
- Click on the gear icon on the top right side to open Settings.
- Now, select Mail > Rules.
- Review all the rules and delete the rule that is configured to send messages to the Deleted Items or trash folder.
- To delete a rule, click the three dots next to it and select Delete rule.
4] Check Outlook Sweep settings
The New Outlook app and Outlook.com have a Sweep feature. This feature sends mass email messages to a particular folder. By default, the targeted folder is Deleted Items. To check the Sweep settings, follow these steps:
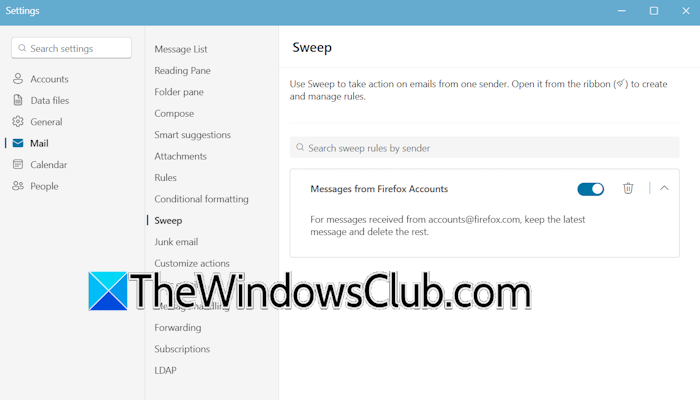
- In the New Outlook app or Outlook.com, open Settings.
- Go to Mail > Sweep.
If you’ve configured a Sweep setting for a particular sender, it will appear there. You can turn it off or delete it.
5] Disable your antivirus
Sometimes, antivirus can cause this issue. If your third-party antivirus has email protection or anti-spam features, it might be responsible for this problem. Check this in your antivirus settings. If you find such a setting, disable it. Alternatively, you can temporarily disable your antivirus to check whether it is causing this problem.
6] Disable add-ins
Another possible cause of this problem is an installed add-in. To verify whether this is the case with you, disable all add-ins. Follow these steps to disable add-ins in Microsoft Outlook:
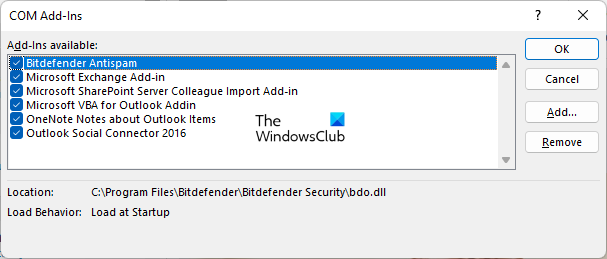
- In Microsoft Outlook, navigate to File > Options.
- Select Add-ins from the left and then select COM Add-ins in the drop-down.
- Click GO.
- Uncheck all the checkboxes and click OK.
After disabling all the add-ins, ask the sender to send you a test email. If the problem does not persist, one of the add-in is the culprit. To find the culprit, enable one add-in at a time and ask the sender again to send you another test email. You have to repeat this step until the problem reappears. When the issue reappears, the add-in you have just enabled is the culprit.
7] Repair or reinstall Office
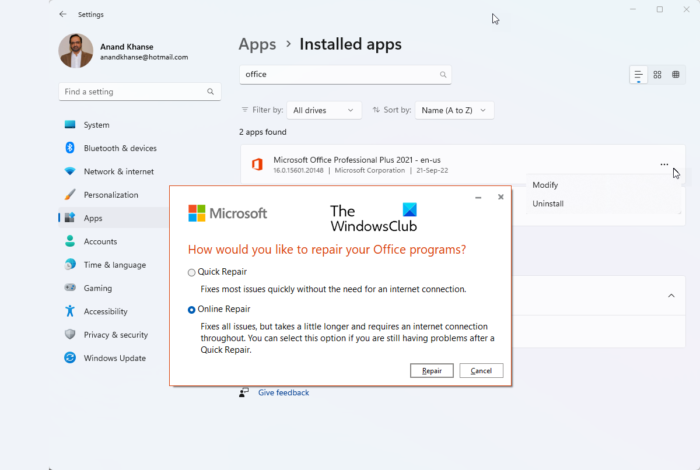
You can try repairing the Microsoft Office suite and see if it helps. Run an online repair. The online repair process will take some time. If it does not help, reinstalling Office may work. For this, use a third-party tool, such as Revo Uninstaller, to completely remove Office from your system. After that, download and install Office. If you have registered Microsoft Office properly, it should be available in your Microsoft account for download. Before you remove Office, make sure that you have its activation key, as it may be required after reinstallation.
8] Check unauthorized access in your Microsoft account
If the issue persists, someone might have unauthorized access to your Microsoft account. Check this. The following instructions will help you with this:
- Open your web browser and log in to your Microsoft account.
- Select Security from the left side.
- Expand the Account Security tab on the right side.
- Click View my sign-in activity.
- Expand all the tabs one by one and check the sign-in activity. If you find any suspicious entry, sign out of your Microsoft account from everywhere.
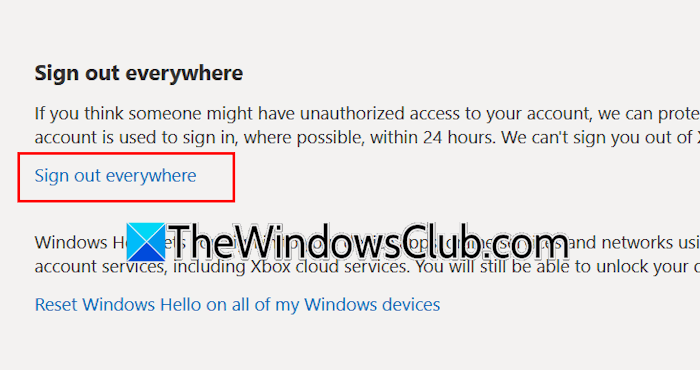
To sign out of everywhere, go to Security > Manage how I sign in. Scroll down. You will see the Sign out everywhere link. Click on that.
9] Secure your Microsoft account
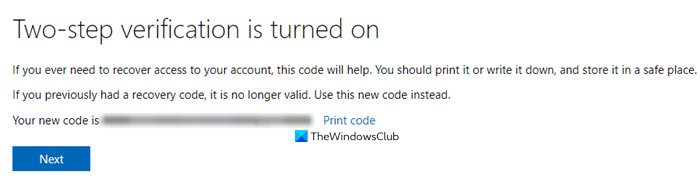
After signing out of your Microsoft account on all devices, the next step is to secure your account. Change your account password and enable two-factor authentication.
That’s it. I hope this helps.
How do I stop emails from going to trash in Outlook?
If your emails are automatically going to trash, you may have configured a rule or a Sweep action. Check this in Microsoft Outlook and the New Outlook app. If you find such a rule or a Sweep action, delete them to stop Outlook from moving emails to trash.
Why are my emails suddenly going to trash?
There can be many reasons for this problem. You may have configured a rule in Microsoft Outlook or a Sweep action in the New Outlook app. Apart from that, some third-party antivirus may also interfere with incoming emails and cause this problem. Another possibility is that someone has unauthorized access to your Microsoft account. Secure your Microsoft account immediately.
Read next: Outlook removes attachments when replying.
