
If Outlook blocks the Safe Senders list in Windows 11 and automatically sends emails to the Junk folder, here is what you can do to fix the issue. Whether you use the new or classic Outlook, you can go through these solutions to get rid of this problem within moments.
What does Outlook block Safe Senders list in Windows 11?
If Outlook blocks the Safe Senders list, one of these could be the reason:
- The list is broken or damaged by malware, virus, adware, etc.
- Your Outlook installation has some issues.
- The Junk email filter is not working in Outlook for some reason.
- Some other programs’ security policies are creating a conflict, and Outlook is failing to fetch the existing and its own details.
- You have installed a third-party security add-in that is causing the mess.
- Your Outlook profile is corrupt.
- You have imported the wrong list.
Outlook blocks Safe Senders list in Windows 11
If Outlook blocks the Safe Senders list in Windows 11, follow these instructions to resolve the issue:
- Check Junk Email Options
- Verify the Safe Senders list
- Reimport the list
- Disable additional add-ins
- Switch between new and old Outlook
- Repair Outlook profile and OST/PST file
- Ask the admin to check the filters.
To learn more about these solutions, continue reading.
1] Check Junk Email Options
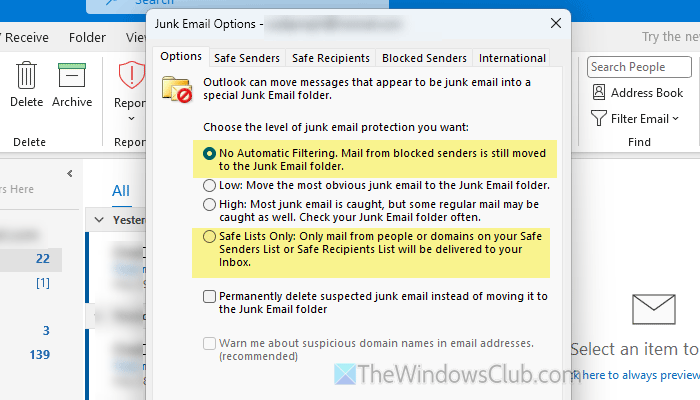
It is the very first thing you should check when Outlook automatically blocks the Safe Senders list. There are a few settings that may let you allow or block receiving email from. If you enable this setting, the Safe Senders list might not work consistently.
To verify this setting, open the Outlook app and go to the Delete section in the Home tab. Click on the Block menu, and select the Junk E-mail Options.
After opening the wizard, ensure that you are in the Options tab. Here you can find a few settings. Choose any of these two:
- No Automatic Filtering.
- Safe Lists Only
If you have any other option, there is a chance of having such a problem. Finally, click the OK button to save the change.
Read: How to change Junk Email Protection Level in Outlook
2] Verify the Safe Senders list
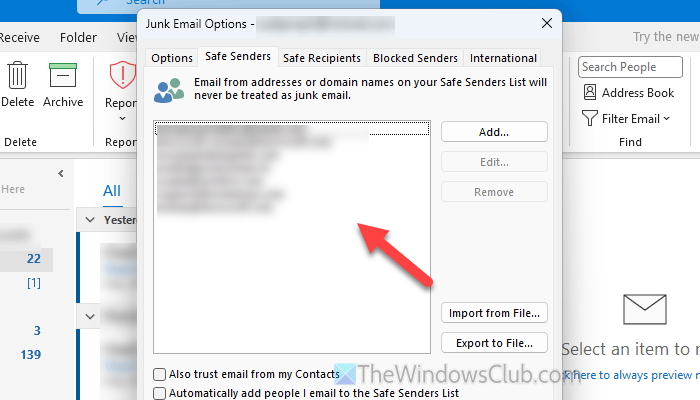
It is most important to verify whether the Safe Senders list is intact or not. If this list is tampered with or damaged for any reason, you won’t be able to get what you are looking for.
If you use the old Outlook app, open the Junk E-mail Options wizard by following the same steps as above and go to the Safe Senders tab. Here you can find all the email addresses. If you cannot find the list, click the Add button to start adding the addresses.
If you use the new Outlook app, click on the Settings gear icon and go to Mail > Junk email. Then, find the Safe senders and domains menu.
Read: Blocked Senders entries are missing in Outlook Web App
3] Re-import the list
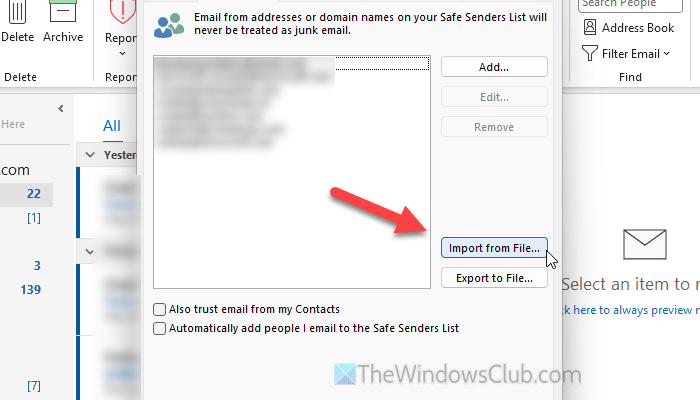
As said earlier, if the Safe Senders list is broken or tampered with, you will find the aforementioned error. If you have the list on your computer, you can certainly import it at once. For example, open the same Safe Senders tab and click the Import from File option.
Choose the file and click the Open button. You will find the email addresses in the empty box.
Note: Unfortunately, the same option is not available in the new Outlook app.
Read: How to export or import Blocked and Safe Senders list in Outlook
4] Disable additional add-ins
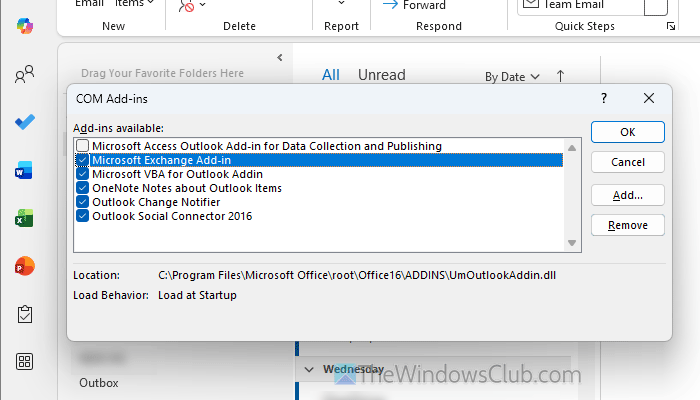
If you use many third-party add-ins, disable them all at once, as they could be causing the problem you are encountering. To deactivate all add-ins in Outlook, open the Outlook Options wizard and click on the Add-ins tab. Next, choose the COM Add-ins and click the Go button.
Remove the tick from all the checkboxes and click the OK button.
If the problem is gone, you can enable one add-in at a time to find the culprit.
5] Switch between new and old Outlook
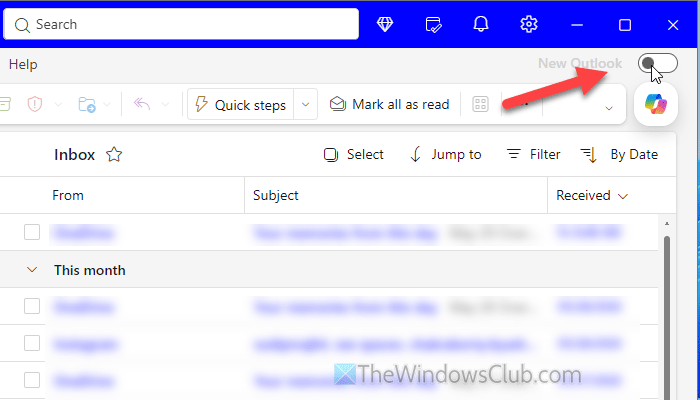
At times, there could be a glitch in the new version of Outlook. If you use the new Outlook app, it is suggested to opt for the old Outlook app once. For that, toggle the corresponding button once.
6] Repair Outlook profile and OST/PST file
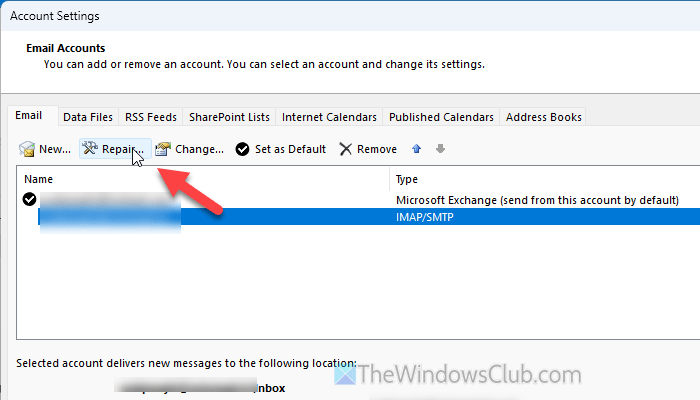
To repair the Outlook profile, open the File and go to Account Settings > Account Settings.
Choose the profile you want to repair and click on the Repair button. Next, click on the Repair button again and let the process finish. However, if you want to check everything manually, expand the Advanced options menu and tick the Let me repair my account manually checkbox.
On the other hand, if you want to repair the PST/OST file, you can use SCANPST.EXE, which is one of the best tools available on the market. You can download it from the official Microsoft website. Once downloaded, you can open it and click the Repair button to start the process.
7] Ask the admin to check filters
If you use a work or school account, your administrator may have added a layer of security, which can cause Outlook to block the Safe Senders list automatically. That is why it is suggested to ask your admin to check the filters.
How do I add a sender to the Safe Senders list in Microsoft Outlook?
To add a sender to the Safe Senders list in Outlook, open the Outlook app and go to Block > Junk Email Options. Switch to the Safe Senders tab and click the Add button. Enter the email address and click the OK button.
How to manage Blocked Sender list in Outlook?
To manage the blocked sender list in Outlook, open the Junk Email Options panel first and switch to the Blocked Senders tab. To delete someone, select the email ID and click the Remove button. To add someone, click the Add button, and enter the email address.
Read: How to prevent Email from going to Junk in Outlook
