You may notice that your keyboard keeps disconnecting when playing games on a Windows PC if the game places a higher demand on your system’s USB controllers and power management. What makes it particularly perplexing is that the keyboard often works perfectly fine for everyday desktop use, only failing when a game is running. In this post, we will discuss this issue and explore potential solutions if your keyboard keeps disconnecting while playing games on a PC.

Why does my keyboard not work when I play games?
This issue usually happens because games put more stress on your system’s USB controllers and power management. During gameplay, your keyboard is checked for input more often. This can cause problems if power-saving features attempt to put the USB port to sleep, if the USB port gets overloaded with data, or if software for your peripherals (like iCUE, Synapse, or Razer Central) interferes with the game, leading to the driver crashing and the device resetting.
Fix Keyboard disconnecting when playing games on PC
If your keyboard disconnects while playing games on your Windows PC, follow the solutions mentioned below.
- Disable USB Selective Suspend Settings
- Change the Power Management Settings
- Update your motherboard’s chipset drivers
- Use a Different USB Port (Avoid Hubs and Front Panel)
- Replace or test with a different keyboard cable
Let us talk about them in detail.
1] Disable USB Selective Suspend Settings

By disabling USB Selective Suspend Settings, we can prevent Windows from misinterpreting the rapid, constant key presses of gaming as inactivity. By disabling this feature, you force the operating system to maintain consistent power flow to the USB ports, eliminating the brief power-down and reset cycle that causes disconnection. To do so, follow the steps outlined below.
- Open the Control Panel by searching for it in the Start Menu.
- Go to System and Security > Power Options.
- Click on Change plan settings.
- Select Change advanced power settings.
- Go to USB > USB selective suspend setting.
- Change both On battery and Plugged in to Disabled.
Finally, check if the issue is resolved.
2] Change the Power Management Settings
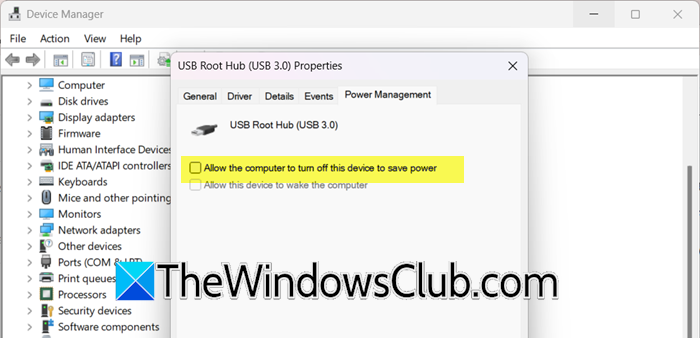
We will adjust the Power Management Settings of your USB Hub to focus on the specific hardware controllers for your USB ports, overriding Windows’ default power-saving. Disabling this setting prevents the root hub from entering a low-power state, ensuring a stable and uninterrupted connection for your keyboard during gameplay.
Let us see how to do the same.
- Open the Device Manager.
- Expand the Universal Serial Bus controllers section.
- Right-click on each item named USB Root Hub or USB Root Hub (USB 3.0) and select Properties.
- Go to the Power Management tab and uncheck the box that says Allow the computer to turn off this device to save power.
Repeat this for every USB Root Hub listed.

3] Update your motherboard’s chipset drivers
Outdated chipset drivers can lead to poor communication and power management between your CPU, motherboard, and USB controllers. This differs from a general Windows update, although updating your Windows can sometimes lead to driver upgrades as well.
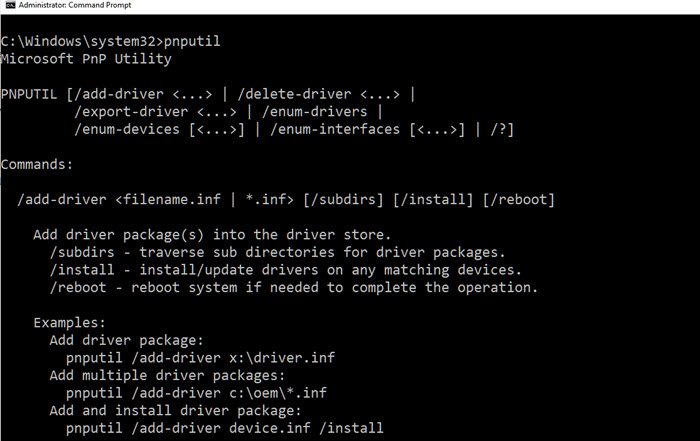
You can download the latest version of the chipset driver from the manufacturer’s website, or check for Driver and Optional Updates from Settings.
Finally, check if the issue is resolved.
4] Use a Different USB Port (Avoid Hubs and Front Panel)

USB ports on the back of your PC connect directly to the motherboard. This connection provides a stable power supply, which is less likely to experience voltage drops. In contrast, front-panel ports and unpowered hubs use internal cables. These cables can cause signal interference and power issues, especially when a lot of power is being used, such as during gaming. Additionally, USB 2.0 ports typically perform better with drivers and are less susceptible to electrical noise than high-speed USB 3.0 ports.
Physically unplug your keyboard from its current port and plug it directly into a different USB port on the back of your computer. If you have both USB 2.0 (black) and USB 3.0/3.1 (blue/teal) ports, try a USB 2.0 port, as it can sometimes be more stable for input devices.
Read: Keyboard or Mouse not working in Windows 11
5] Replace or test with a different keyboard cable
This issue is often hardware-specific, particularly with mechanical keyboards that have detachable cables. A damaged or low-quality cable may function properly during regular typing. Still, it can fail when it’s slightly moved or when the electrical demand increases due to rapid key presses in a game. If your keyboard has a detachable cable (typically USB-C or Micro-USB), try a different, high-quality data-sync cable. If the keyboard uses a proprietary or fixed cable, test your keyboard on another PC during a game, or test a different keyboard on your PC to isolate the fault.
Hopefully, with the help of these solutions, your issue will be resolved.
Read: Mouse or Keyboard keeps disconnecting in Windows 11.
How to fix keyboard glitch on PC?
To fix a keyboard glitch on your PC, first physically reconnect the keyboard to a different USB port, preferably a USB 2.0 one on the back of your tower. Next, update your motherboard’s chipset drivers from the manufacturer’s website, as outdated drivers are a common cause. Then, navigate to your Windows power settings and disable the “USB selective suspend setting” to prevent the system from cutting power to the port. Finally, open Device Manager, locate your USB Root Hubs, and in the properties of each, disable the power management option that allows the computer to turn them off.
Read: Keyboard not typing, not working or Unresponsive on Windows 11.