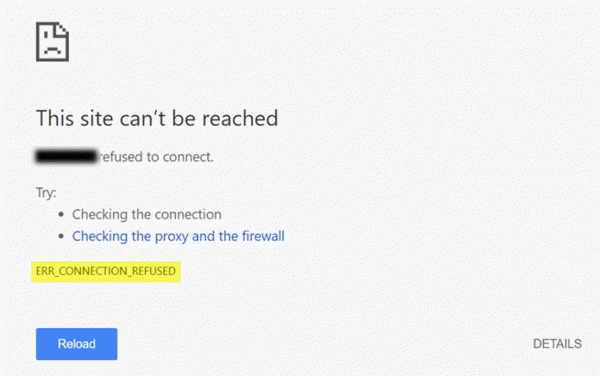
If you are using Google Chrome and receive This site can’t be reached, ERR_CONNECTION_REFUSED error message, then this post offers suggestions on fixing the problem. In most of the cases, this problem occurs because of the site’s server issues – but sometimes a user may need to take steps at his or her end as well.
Fix ERR_CONNECTION_REFUSED error in Chrome

If the server, where the site is hosted, fails to serve the page as you have requested, Google Chrome shows the error message called ERR_CONNECTION_REFUSED. Here are some suggestions that may help you troubleshoot this issue.
To fix ERR_CONNECTION_REFUSED in Google Chrome, follow these steps:
- Check if site is up or down
- Change your IP address
- Flush DNS cache
- Change your DNS Server
- Don’t use a proxy server for LAN
- Scan for malware
To learn more about these steps, continue reading.
1] Check if site is up or down
First, check if the website is up or down. If the site is down, no matter what you do, you will get the same error message until the site admin fixes it.
2] Change your IP address
Sometimes, this problem also belongs to your ISP as well as the IP address. You may change your IP address using a free VPN software or a Proxy software. If the site is opening, you should know that the problem belongs to your IP address or ISP.
3] Flush DNS cache
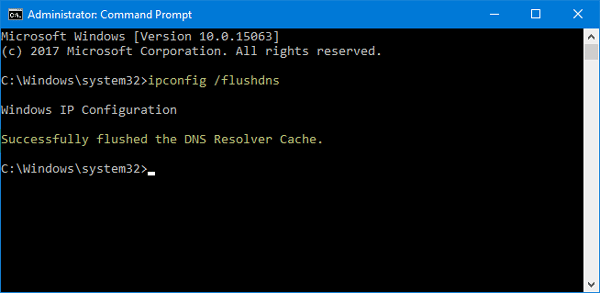
If you can open site with VPN, you should try flushing the DNS cache of your computer. To do so, open Command Prompt with administrator privilege. Search for “cmd” in the taskbar search box or start menu search box, right-click on the corresponding search result, select Run as Administrator. Following that, enter this command-
ipconfig /flushdns

Once it is cleared, you should see a success message like this: Successfully flushed the DNS Resolver Cache.
4] Change your DNS Server
Whether you are using direct Ethernet connection or Wi-Fi, you can change the DNS settings. This solution is for those, who can open the website using a VPN but are unable to do the same without VPN.
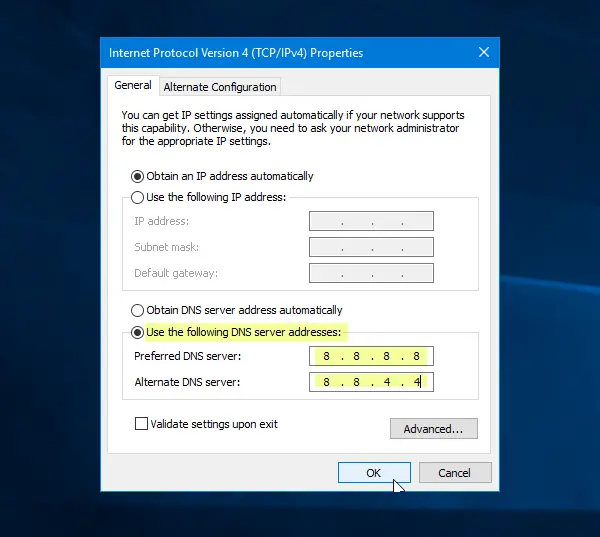
Press Win+R, type ncpa.cpl, and hit the Enter button. Right-click on the Ethernet or your connection, and select Properties. Now, double-click on the Internet Protocol Version 4 (TCP/IPv4).
On the next screen, you should find an option called Use the following DNS server addresses. Make a select that checkbox and enter the following addresses for using Google Public DNS:
- Preferred DNS server: 8.8.8.8
- Alternate DNS server: 8.8.4.4

Don’t forget to save all these changes.
5] Don’t use a proxy server for LAN
If you are unable to open any website after installing a VPN app or browser extension, you need to check this setting. sOpen “Internet Options” and switch to Connections tab. In that tab, you should see LAN settings. Make sure the Use a proxy server for your LAN option is unchecked. If it is checked, remove the checkmark and save your changes.
6] Scan for malware
This is a prevalent issue, and maybe you need to scan your computer with a reliable antivirus.
How do I fix ERR_CONNECTION_REFUSED?
To fix the ERR_CONNECTION_REFUSED error on the Google Chrome browser, you need to follow the aforementioned solutions. Start the troubleshooting process by checking if the site is live or not. Then, you can change your IP address, flush the DNS cache, change your DNS server, etc. All the steps are mentioned above, and it is recommended to follow them one after one.
Why am I getting ERR_CONNECTION_REFUSED?
There could be several reasons why you are getting ERR_CONNECTION_REFUSED error in the Google Chrome browser on Windows 11/10. From an issue with the server to incorrect firewall settings, anything could be responsible for this error. However, you need to go through the above-mentioned tips and tricks to get the issue fixed.
Hope these simple solutions are helpful.
This never helps.
I kept receiving this message for about 2 weeks. It was driving me nuts. Then per chance, I needed to take care of something completely unrelated – This took me to the Windows Firewall page and I found my answer.
I needed to stop Windows Firewall due to it conflicting with my WiFi Router’s hardware Firewall. I know that I am safe and I can finally go to my normal websites without seeing that horrid message! By the way, my WiFi Router’s Firewall is setup very tight and with security in mind.
One of the big reason I honestly don’t like Automatic Updates with Windows is all of the changing of my own settings on my computer. Now, it doesn’t happen every time but often enough to upset me, especially when I am not sure what is going on with my computer.
Overall I like Windows 10. Back in 2015 when it first came out – NO, I hated it. Then Microsoft did a major update in Nov. 2015 – I downloaded it in January 2016 and was greatly pleased. I felt like it was Windows 7 but updated. I had been using Windows 7 Pro. My new version was Windows 10 Pro and that was pleasing, also.