
Deployment Image Servicing and Management (DISM) is a built-in command-line tool in Windows 11/10 that repairs the Windows system image and fixes component store corruption. It is often used alongside the System File Checker (SFC) when troubleshooting system issues. However, the DISM tool itself may sometimes fail to work as expected. It may get stuck during the scan, fail to complete the repair process, or display errors, such as:
- Error 0x800f081f, The source files could not be found,
- Error 87, The parameter is incorrect,
- Error 5, Access is denied,
- Error 2, The system cannot find the file specified, or
- Error 50, DISM does not support servicing Windows PE with the /Online option.
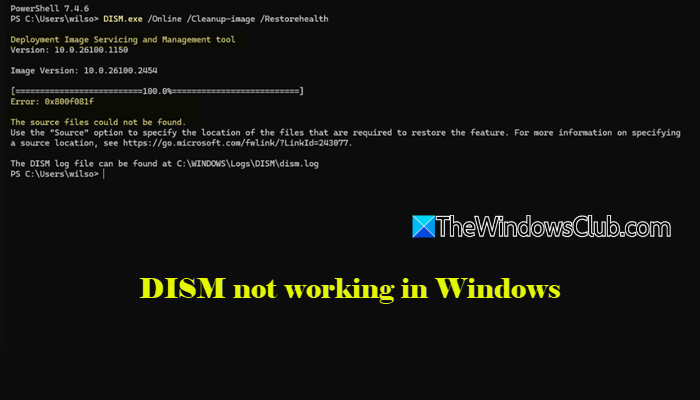
In this guide, we will explain why DISM may not work on your Windows 11 PC, and how to fix the issue.
What causes DISM to stop working in Windows?
DISM may fail to work for several reasons. In most cases, the issue occurs due to corruption in the Windows component store, missing or damaged system files, or problems with the Windows Update components that DISM uses to download repair files. It can also fail if the command syntax is incorrect, the specified repair source is invalid or does not match the installed Windows version, or pending Windows updates are preventing servicing operations. In rare cases, third-party antivirus software can also cause a DISM scan to fail.
DISM not working in Windows 11
To fix DISM if it is not working in Windows 11, use these solutions:
- Specify a repair source for DISM
- Run the StartComponentCleanup command
- Reset Windows Update components
- Run CHKDSK
- Repair Windows using an in-place upgrade
Before we see the above solutions in detail, try these quick fixes first:
- Run Command Prompt as an administrator.
- Double-check the DISM command syntax. A missing space, incorrect switch, or invalid parameter can result in a DISM error.
- Verify the drive letter and file path.
- Make sure the Windows installation media matches your PC.
1] Specify a repair source for DISM
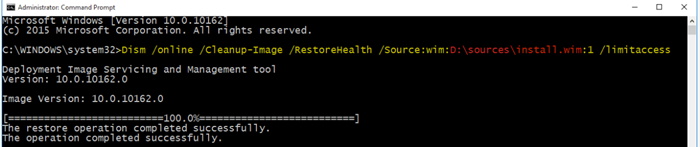
If you see error 0x800f081f/0x800f0915, The source files could not be found, or DISM reports that it cannot locate the files required to complete the repair, use this solution.
By default, the DISM RestoreHealth command downloads the required repair files from Windows Update. If Windows Update is damaged or the required files are unavailable, you can use a Windows installation media as the repair source.
Before you begin, make sure the Windows ISO matches the edition, language, and build of the Windows version installed on your PC.
Download the Windows 11 ISO from Microsoft’s official website. Right-click the ISO file and select Mount. Open the mounted drive in File Explorer and note its drive letter (for example, D:).
Next, open Command Prompt as an administrator. Type the following command and press Enter:
DISM /Online /Cleanup-Image /RestoreHealth /Source:WIM:D:\Sources\install.wim:1 /LimitAccess
Replace D: with the drive letter of the mounted ISO.
If the ISO contains an install.esd file instead of install.wim, run:
DISM /Online /Cleanup-Image /RestoreHealth /Source:ESD:D:\Sources\install.esd:1 /LimitAccess
Wait for the scan to complete and then restart your computer.
2] Run the StartComponentCleanup command
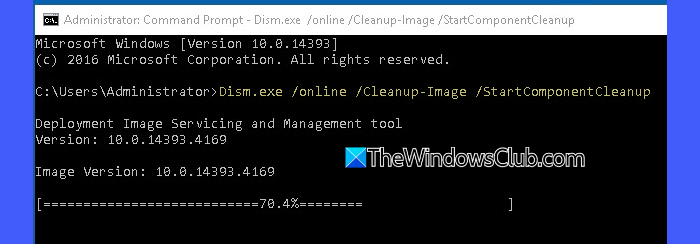
If the RestoreHealth command gets stuck, fails repeatedly, or reports that pending operations are preventing servicing, use this solution.
The StartComponentCleanup command removes old and unnecessary files from the Windows component store. It can also resolve servicing issues that prevent DISM from completing successfully.
Open Command Prompt as an administrator. Type the following command and press Enter:
DISM /Online /Cleanup-Image /StartComponentCleanup
Wait until the operation finishes. If DISM reports that pending actions are preventing servicing, run the following command:
DISM /Online /Cleanup-Image /RevertPendingActions
Restart your computer after the command completes. Now run the RestoreHealth command again and check if the problem is resolved.
3] Reset Windows Update components
If DISM hangs while downloading repair files, fails with Windows Update-related errors, or RestoreHealth does not complete when using Windows Update as the repair source, use this solution.
DISM relies on Windows Update to download replacement files unless another repair source is specified. Resetting the Windows Update components can restore normal operation.
Follow our detailed guide to reset Windows Update components. After the reset is complete, restart your computer and run the DISM command again.
4] Run CHKDSK
If DISM fails repeatedly without a clear error message, gets stuck during the scan, or you suspect file system corruption, use this solution.
Disk errors or bad sectors can prevent DISM from accessing the files it needs. Running the CHKDSK utility scans the drive for errors and repairs them, if possible.
Open Command Prompt as an administrator. Type the following command and press Enter:
chkdsk C: /f /r
If prompted to schedule the scan for the next restart, type Y and press Enter. Restart your computer.
The scan may take some time depending on the size and condition of your drive. Once Windows starts normally, run the DISM command again.
Note: Windows automatically repairs many minor file system issues during regular maintenance. Run CHKDSK only if you suspect disk or file system errors are interfering with DISM.
5] Repair Windows using an in-place upgrade
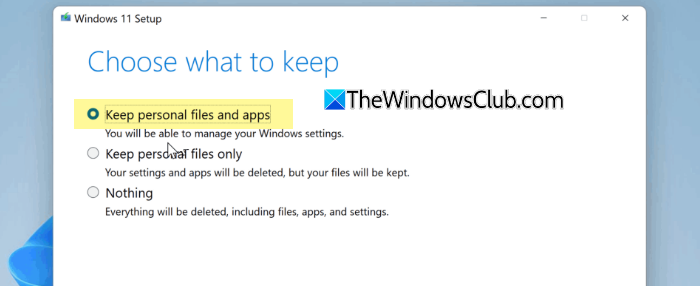
If none of the above methods work, or DISM continues to fail even after trying a valid repair source, try this.
An in-place upgrade reinstalls Windows while keeping your personal files, installed apps, and most settings. It replaces damaged Windows servicing components that DISM cannot repair.
Download the latest Windows ISO from Microsoft’s website, mount it, and run the Setup.exe file. When prompted, choose the option to Keep personal files and apps, then complete the installation. After Windows finishes the upgrade, check if DISM works normally.
I hope this helps.
Read: Fix 0x800f0906 DISM Error when repairing Corrupt Windows Image.
How to fix Windows 11 with DISM?
To repair the Windows system image, open Command Prompt as an administrator and run the DISM /Online /Cleanup-Image /RestoreHealth command. Once the process completes successfully, restart your PC and run the SFC /scannow command to repair any corrupted system files.
Should I run SFC or DISM?
If Windows is experiencing system issues, it is generally recommended to run DISM first, followed by SFC. DISM repairs the Windows component store that SFC relies on, while SFC scans for and replaces corrupted or missing system files using the repaired component store. To understand when to use each tool and the correct order to run them, read our detailed guide on SFC vs. DISM: Which tool should you run first?
Read Next: SFC not working, will not run or could not repair corrupt file.
