
Windows 11 allows users to change the display resolution. All the supported screen resolutions are shown in Windows 11 Settings. Some users changed the display resolution and are now facing a black screen issue on Windows 11. If the display goes black even after selecting a supported display resolution, the problem may be your display adapter. However, other causes can also trigger this problem, like third-party software. This article lists possible fixes to resolve this issue.
Changed resolution, now black screen on Windows 11
If you changed the display resolution and are now facing the black screen issue on your Windows 11 computer, use the following fixes to resolve this issue:
- Restart the GPU driver
- Use NVIDIA Control Panel to change the display resolution (if applicable)
- Troubleshoot in a Clean Boot State
- Roll back or reinstall the graphics card driver
- Restore or reset your PC
Black screen after changing display resolution in Windows 11
1] Restart the GPU driver
Wait for a few seconds. If the issue continues, restart the graphics driver. Press the Win + Ctrl + Shift + B keys. You will hear a beep sound. This clears your graphics card’s temporary cache and restarts the driver. In some display-related issues on Windows PCs, this method can restore the display.
2] Use NVIDIA Control Panel to change the display resolution (if applicable)
Sometimes, changing the display resolution through Windows 11 Settings may cause compatibility issues with the graphics card driver, resulting in a black screen. Therefore, if your system has NVIDIA graphics, try changing the display resolution through the NVIDIA Control Panel. This trick has worked for some users. Since your display is black, you cannot use the NVIDIA Control Panel. First, you need to revert the changes in Safe Mode.
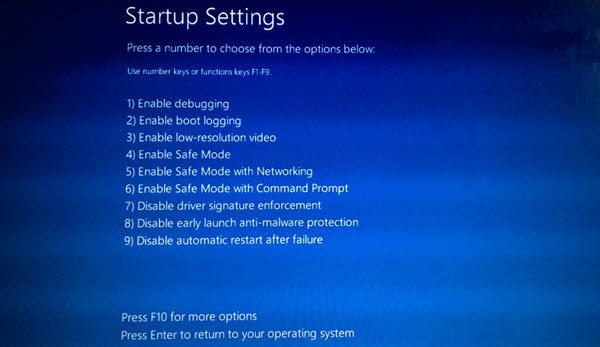
To boot into Safe Mode when the screen is black, use the Windows Recovery Environment. Enter the Windows Recovery Environment by interrupting the normal boot process. The following instructions will help you:
- Press and hold the power button to force shut down your PC.
- Turn on your system. Press and hold the power button as soon as you see the manufacturer’s or Windows logo on the screen.
- Repeat the above steps until you see the Preparing Automatic Repair message on your screen.
Now, you are in the Windows Recovery Environment. Select Troubleshoot > Advanced Options > Startup Settings. Click Restart. Now, locate the number corresponding to the Enable Safe Mode with Networking option. Press the respective Function key. For example, if the option is number 5, press F5.
Your system will then boot into Safe Mode. Once you are in Safe Mode, open Windows 11 Settings and select the Recommended display resolution. When you are done, exit Safe Mode.
Once your display is visible, follow the instructions listed below:
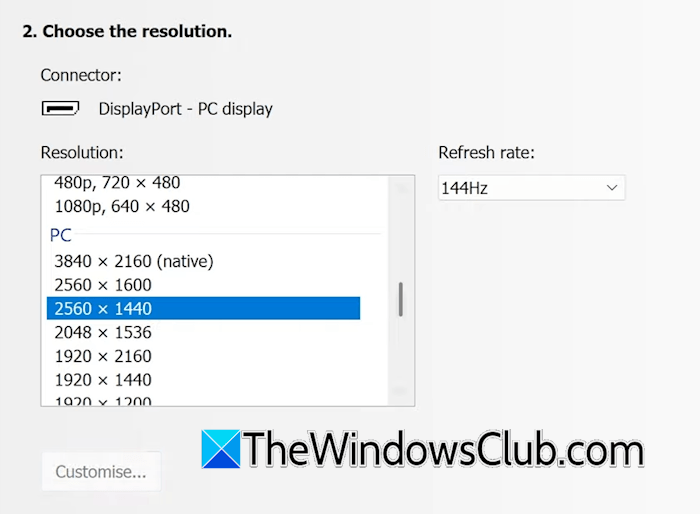
- Launch the NVIDIA Control Panel.
- Expand the Display branch on the left.
- Click Change Resolution.
- Select the display, then choose the required resolution.
When you are done, click Apply to save changes.
3] Troubleshoot in a Clean Boot State
The issue might be due to a third-party application or service. To confirm this, check the issue in a Clean Boot State. First, revert the changes to bring back the display. You can do this by entering Safe Mode. Once your display is visible, enter the Clean Boot state and then change the display resolution. To enter the Clean Boot state, disable all third-party services. Therefore, be careful while performing this action, as disabling all the services by mistake will make your system unstable. Therefore, it’s best to Hide all Microsoft services and then do the needful.
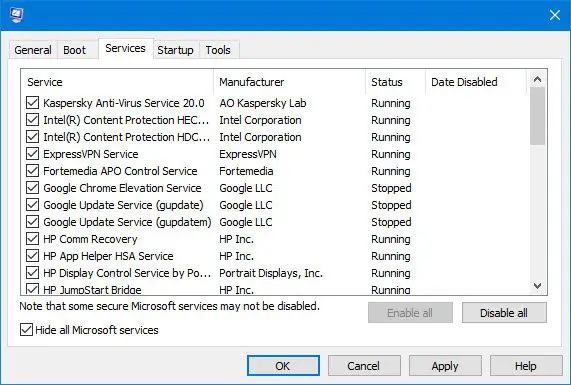
If the issue doesn’t occur in Clean Boot, a third-party application or service is causing it. Now, uninstall all the driver-related and display-related applications from your system. Then change the resolution again and see what happens. If the issue does not occur, one of the uninstalled applications is the culprit.
4] Roll back or reinstall the graphics card driver
If the issue persists, the problem may be with your display adapter. It might have been corrupted. Roll it back to the previous version and see if it helps. First, bring back the display via Safe Mode, then follow these steps:
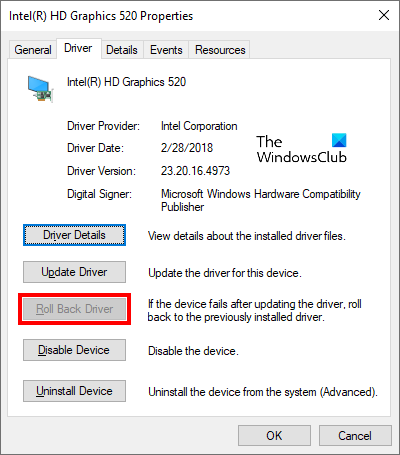
- Open the Device Manager.
- Expand the Display adapters branch.
- Right-click on your display driver and select Properties.
- Navigate to the Driver tab and click Roll Back Driver.
- Follow the on-screen instructions to roll back the graphics card driver to the previous version.
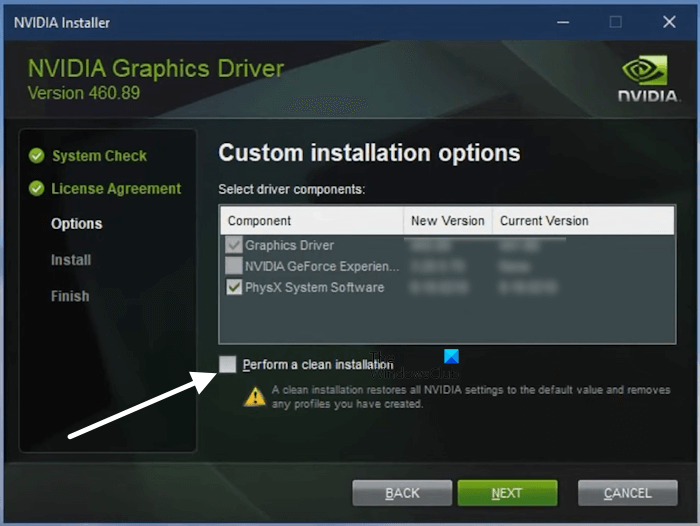
If rolling back the display driver does not help, or the Roll Back Driver option is greyed out, perform a clean installation of the graphics card driver. Visit your computer manufacturer’s official website and download the latest version of your GPU driver.
NVIDIA GPU users can use the NVIDIA software to clean install the GPU driver. If your system has AMD graphics, you can use the AMD Cleanup Utility. Alternatively, you can use the DDU utility to completely remove the graphics card driver from your system. After that, run the installer file to install the GPU driver.
5] Restore or reset your PC
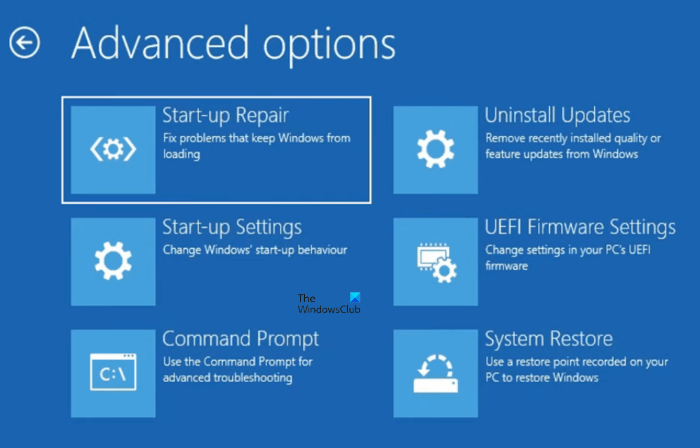
If the issue persists, restore your system using System Restore. This tool restores your computer to a previous working state. You can use it if the restore points are present on your system. Select the restore point that was created on the date after which the issue started occurring. Since your display is not visible, you have to enter the Windows Recovery Environment by interrupting the normal boot process. Once you are in WinRE, navigate to Troubleshoot > Advanced Options > System Restore.
If no restore points are available or System Restore does not help, reset your system. Again, you must enter WinRE. Once you are in the Windows Recovery Environment, navigate to Troubleshoot > Reset this PC. While performing this action, select the Keep my files option, as this option does not delete your data. However, all apps will be uninstalled, and you’ll need to reinstall them later.
I hope this helps.
How do I fix a black screen on Windows 11 after an update?
If you encounter a black screen issue after installing an update on Windows 11, first check the display cables. If the cables are fine, the update itself may be the problem. Enter the Windows Recovery Environment so the display becomes visible. Now, uninstall the Windows Update.
How to fix 1920×1080 resolution not showing in Windows 11?
If 1920×1080 isn’t showing in Windows 11, make sure your display supports it. If your display supports that resolution but it doesn’t show in Windows 11 Settings, the issue may be your graphics card driver. Performing a clean installation of the GPU driver can help. If you have an NVIDIA GPU, you can apply that resolution through the NVIDIA Control Panel.
Read next: How to fix Screen Resolution problems in Windows.
