For developers, IT enthusiasts, and anyone working with virtual machines or low-spec hardware, the large size of a standard Windows 11 installation can be a significant hurdle. What if you could create a stripped-down, lightweight ISO file that is less than half the size of the original? In this guide, you will learn how to use Nano11 to build a smaller Windows 11 ISO, transforming a standard 5GB+ file into a small 2.3-2.5GB image ideal for testing and development purposes.
Use Nano11 to build a smaller Windows 11 ISO
Nano11 Builder is a free PowerShell script made by NTDEV. It helps you create a simple Windows 11 image using only official Microsoft tools like DISM (Deployment Image Servicing and Management) and oscdimg. This script removes built-in apps such as Clipchamp, Xbox, and Office Hub, as well as important services like Windows Update and Microsoft Defender. It also gets rid of unnecessary drivers, language packs, and the Windows Component Store (WinSxS).
The final ISO file is very small, usually between 2.2GB and 2.5GB. The installed system takes up about 2.8GB to 3.2GB of space. Keep in mind that this system cannot receive Windows Updates or have the removed features added back. Therefore, it is meant only for testing or development and should not be used as your main operating system if Windows Updates and Features are something you need.
If you want to use Nano11 to build a smaller Windows 11 ISO, you need to follow the steps mentioned below.
- Meet the prerequisites
- Prepare the environment
- Run the Nano11 Builder
- Go ahead and install!
Let us talk about them in detail.
1] Meet the prerequisites

First of all, download the x64 disk image (ISO) for Windows 11 directly from microsoft.com. Now, download the latest version of Nano11 from github.com by clicking “Code” and selecting “Download ZIP”.
The script requires elevated permissions to modify system images; therefore, make sure you are an admin or have permission to open Windows CLI with admin privileges. You will need room for the original ISO, the working files, and the final Nano11 ISO.
2] Prepare the environment
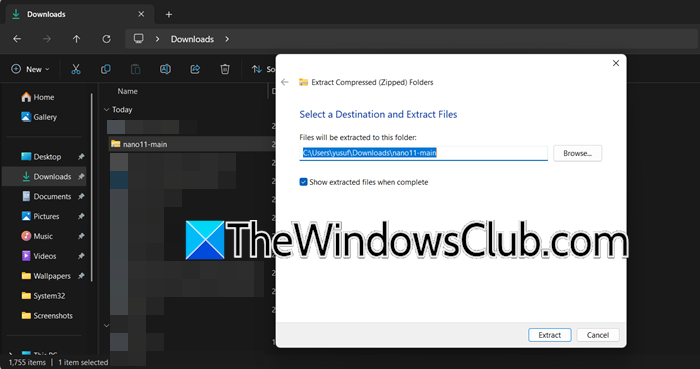
Now, you need to locate the downloaded nano11-main.zip file, right-click it, and select “Extract All…” to a convenient folder on your computer, such as C:\Tools\nano11\.
Navigate to your downloaded Windows 11 ISO file in File Explorer. Right-click the file and select Mount. Note the drive letter assigned to the virtual drive (e.g., D:) as you will need it shortly. If the Mount option is unavailable, right-click the ISO, select Open with, and choose Windows Explorer.
3] Run the Nano11 Builder
We are going to use PowerShell to run the script. So, open PowerShell as an administrator by searching for it in the Start Menu.
To allow the script to run, temporarily change the execution policy for the current PowerShell session by typing the following command and pressing Enter.
Set-ExecutionPolicy Bypass -Scope Process
If you get an error message saying Windows PowerShell updated your execution policy successfully, but the setting is overridden by a policy defined at a more specific scope, you can change the scope of the execution policy, but a better approach would be to run powershell -ExecutionPolicy Bypass -File “nano11builder.ps1”. If you still encounter an error, skip this step and move on.

Navigate to the folder where you extracted the script and run it.
cd <file-location> // to move to the Nano11 directory
.\nano11builder.ps1
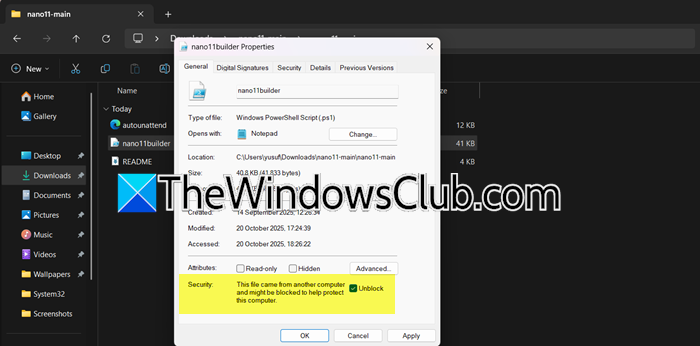
If you encounter an error when trying to run the script. Go to the location, right-click on the script, and select Properties. If you see “This file came from another computer and might be blocked to help protect this computer”, tick Unblock, and click Apply > OK. Once done, run the script again.
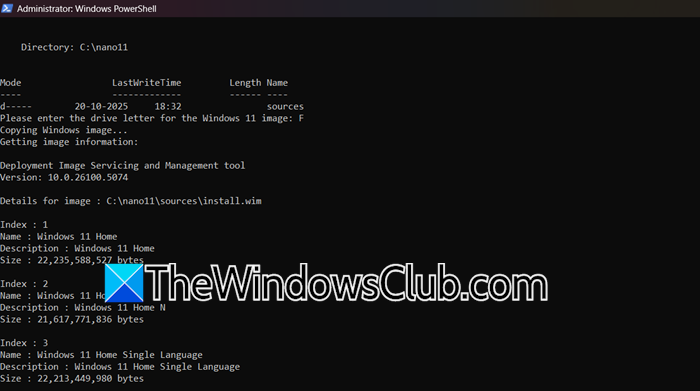
Type Y to continue. Next, enter the letter of the drive where your Windows 11 ISO is mounted (for instance, D) and press Enter. The script will list the Windows editions available in the image. Usually, you will enter 1 for Home or 6 for Pro, but check the index number the script shows. Press Enter after you select your edition.
The script will now mount the image, remove components, and rebuild the ISO. This can take considerable time (up to 90 minutes on some systems), depending on your hardware. Be patient and do not interrupt the process.
4] Go ahead and install!
Once the script finishes, your new nano11.iso file and a nano11.log file will be located in the same folder as the nano11builder.ps1 script. You can then use Rufus to create a bootable USB.
Hopefully, with the help of this post, you will be able to install a smaller version of Windows 11 on your computer.
Read: How to install Windows 11 from USB: Screenshot Tutorial
How to make your Windows 11 smaller?
You can make Windows 11 smaller by manually disabling features and removing bloatware via Settings and PowerShell, or by using a specialized tool like the Nano11 Builder script to create a drastically stripped-down installation ISO, which removes non-essential components, built-in apps, and services to significantly reduce its footprint.
Read: What is Tiny11? Is it safe to install?
How many GB is a Windows 11 ISO file?
A standard Windows 11 ISO file is typically between 5 GB and 7 GB in size. The exact size depends on the specific version (e.g., 24H2 or newer 25H2) and the language of the ISO you download.
Also Read: Install Windows 11 on unsupported hardware or processor.