If Steam doesn’t recognize the installed games on your Windows 11/10 PC, here’s what you can do to resolve the issue. Steam is the go-to place where you can manage and play your favorite games on PC. However, many users have reported that Steam does not recognize all installed games. If you are experiencing the same problem, follow the guide to fix it.

Steam doesn’t recognize installed games on Windows PC
Below is a list of effective workarounds you can try if Steam doesn’t recognize the installed games.
- Reinstall the Game without downloading
- Choose New Installation Drive
- Force Recognize Games using .acf cache
- Reconfigure the Library Folders
- Reinstall Steam
So, let’s check out all these solutions in detail.
Installed games appear as uninstalled on Steam
1] Reinstall the Game without downloading
Reinstalling the game is one of the easiest ways by which you can fix the problem. Don’t worry, we are not asking you to download the game again. If by any chance Steam doesn’t recognize any of the games, it’s likely that the games haven’t been installed. However, once you have downloaded the game, its data will be stored in the Steam apps folder. To get Steam to recognize the game, you will have to force-install it. Here are the steps you need to follow.
- Open the Steam client and log in with your credentials.
- Tap on the Games option present at the top section.
- Choose View Games Library.
- On the following page, you will find a list of all the downloaded and installed games. The list also includes games that Steam is unable to recognize.
- Choose the game that Steam is not able to recognize and click on the Install option.
Now, Steam will use the stored game files to forcefully install the game. Once done, restart Steam, and check whether your game is listed or not.
2] Choose New Installation Drive
Steam will fail to install the game if the default installation drive doesn’t have free space. Thankfully, you can change the Steam default installation location manually. Here are the steps you need to follow.
Note: We’ll make E drive our new steam installation location. You can change the location at your convenience.
- Open the E drive on your system, and make a new folder named, Steamapps.
- Launch the Steam client, click on the Steam option present at the top left corner.
- Choose Settings.
- In the settings menu, choose the Download option present at the left panel of the screen.
- Click on Steam Library Folders.
- Tap on the + icon, present next to your current storage drive.
- Choose your new installation folder.
That’s it. Relaunch Steam and check if the problem is fixed.
3] Force recognize Games using .acf Cache
If Steam is not recognizing the game, even if you have manually installed it using the above method then you will have to use the Steam cache data to recognize the games. Here are the steps you need to follow.

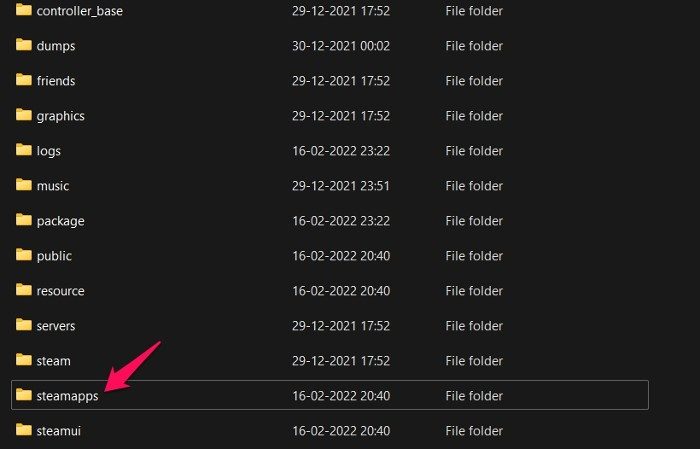
- Navigate to the place where you have stored all the Steam data. By default, it is C: > Program Files (x86)> Steam > Steamapps folder
- Open the Steam client, look for the games that are not installed. Choose the uninstalled games, and tap on the Install option.
- Steam will take some time to recognize all the existing files.
- Pause the update process and exit Steam.
- Go to C: > Program Files (x86)> Steam > Steamapps folder and select all the .acf files.
- Copy all the .acf files, paste them anywhere else other than the Steamapps folder.
- Open the Steam client and click on the Library. In the library section, you will see that the unrecognized game is denoted by the Uninstalled option.
- Close Steam client.
- Move all the .acf files back to the Steamapps folder.
That’s it. Open Steam and go to the Games library section. Tap on the resume update option on all the games that you paused before. Once the update process is complete, you will see the game listed on Steam.
Read: Steam Tips and Tricks.
4] Reconfigure the Library Folders
If you changed the default installation folder, it’s no surprise you are facing the problem. Follow the steps below to configure the new library path.
- Launch the Steam client on your system.
- Click on the Steam option present at the top-right corner.
- Tap on the Settings from the drop-down menu.
- Click on the Download option present on the left panel of the screen.
- Choose the Steam Library Folders.
- In the folder, you will see the default installation path of the apps.
- In case you have changed the location path, tap on Add Library Folder.
- Choose the path of the new library.
That’s it. Check whether the game is recognized in that location.
4] Reinstall Steam
If non of the above-mentioned workaround helped you in solving the problem, the last thing you can try to solve the problem is to reinstall Steam. It is likely that a temporary bug is causing the issue. So, reinstall Steam, log in with your credentials, and check if you can see the installed game in the library.
TIP: You might want to take a look at Steam Library Manager too. It lets you Backup, restore, move Steam games.
Why Steam doesn’t recognize Installed games?
There are several reasons Steam may not recognize installed games. To name a few, Steam will not recognize games if .acf files are faulty or missing. Additionally, if the default installation location is out of space, you will also encounter the problem.
Read: Steam Cleaner will delete Steam cache & data left behind by gaming engines
How won’t Steam detect my external hard drive?
Steam will fail to detect the hard drive if there’s a problem with the connection. In that case, you can re-plug the hard drive to resolve the issue. Damaged connecting cables will cause the issue. Repair or replace the connecting cable to resolve the issue.
Can you play Steam games on the external hard drive?
Yes, you can access your Steam games library from the external hard drive. You can use a USB HDD or SSD. However, you’ll have to adjust to the limited performance – the faster the driver, the faster the loading time.
Read Next: Fix Steam Missing Content Manifest error on Windows PC.