
On some Windows devices, Internal SATA drives show up as Removable Media. More often than not, this is caused by some issues with the computer’s BIOS. In this post, we will discuss this issue and explore how to resolve it.
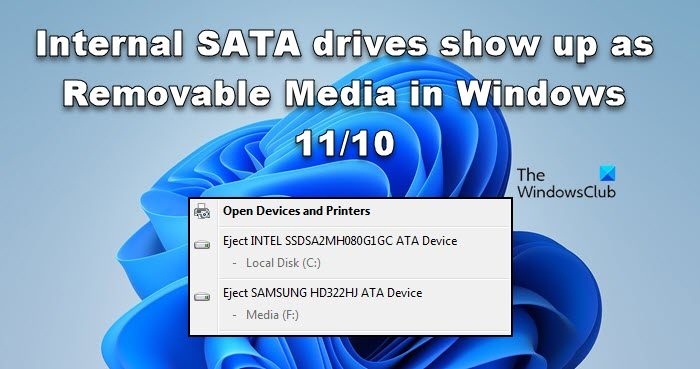
Why is my internal SSD showing as a removable disk?
Your system’s BIOS can label some storage devices as removable media and others as non-removable. This differentiation is made possible by the inbox, which inspects devices and applies the External label to the one connected to the external port. If the BIOS is outdated or there is an indexing issue, Internal Hard Drives will be displayed as removable devices.
Internal SATA drives show up as Removable Media in Windows 11
If Internal Hard Drives drives show up as Removable Media on your system, the very first thing you need to do is update your computer. If updating the OS is to no avail, follow the solutions below to resolve the issue.
- Update your BIOS
- Override Inbox driver surfaces devices
- Disable Hot Plug from BIOS
- Update Disk Drivers
- Enable Write Caching Policy
Let us talk about them in detail.
1] Update your BIOS
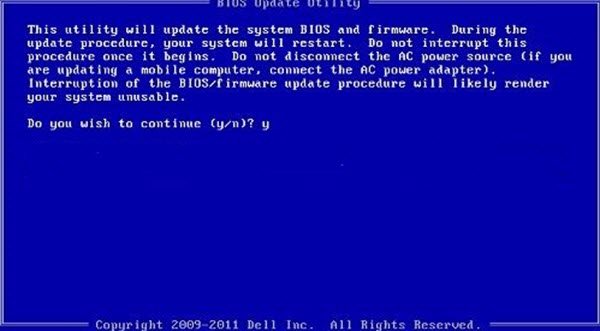
Most commonly, this misidentification is caused when the BIOS is outdated. So, first of all, make sure to update your BIOS. Once the BIOS is updated, check if Windows is able to recognize the internal SATA drive as internal.
2] Override Inbox driver surfaces devices
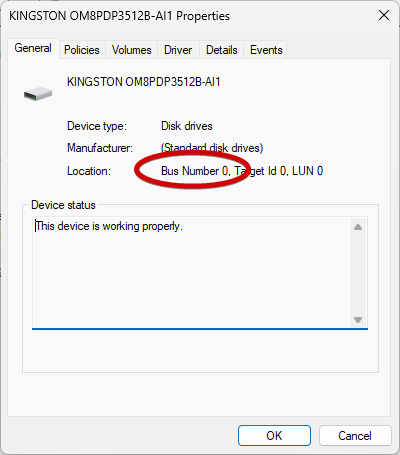
In this solution, we will override inbox driver surfaces devices on certain ports. We will be targeting the port where your SATA device is connected. We need to update your BIOS to recognize SATA drives as internal. To do the same, first, let us identify the port number. Open Run by Win + R and then run the following command.
devmgmt.msc
This will open the Device Manager. Expand Disk drives, right-click on the storage device, and select Properties. Make sure you are on the General tab and note the Bus Number.
Once we know the Bus Number, open Command Prompt as an administrator and then run the following command.
Windows 11/10/8 or above
reg.exe add “HKLM\SYSTEM\CurrentControlSet\Services\storahci\Parameters\Device” /f /v TreatAsInternalPort /t REG_MULTI_SZ /d x
Windows 7
reg.exe add “HKLM\SYSTEM\CurrentControlSet\Services\msahci\Controller0\Channelx\” /f /v TreatAsInternalPort /t REG_DWORD /d 0x00000001
Note: Replace the x in the command with the Bus Number we mentioned earlier.
Finally, check if the issue is resolved.
3] Disable Hot Plug from BIOS
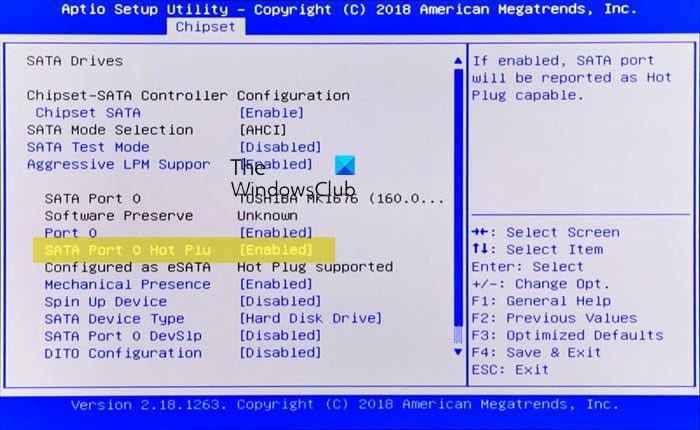
When Hot Plugging or Hot Swapping is enabled on your computer, the motherboard considers the hard disk as a removable device. Since we are having this trouble, we need to disable Hot Plug.
So, go ahead and boot into BIOS. Now, look for SATA Port and disable the Hot Plugging. Finally, check if the issue is resolved.
4] Update Disk Drivers
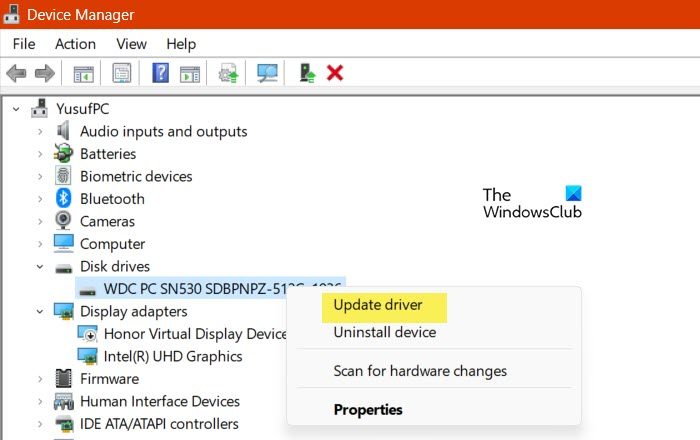
It is very likely that Windows is unable to detect the internal SATA drive as an Internal Disk Drive due to incompatibility with the disk drives. This incompatibility is due to outdated drivers. Therefore, we will just update the drivers and resolve the issue.
- Open Device Manager.
- Expand Disk Drives.
- Right-click on the driver and select Update drivers.
- Click on Search automatically for drivers.
Your system will search the Internet for the latest driver and install them if available.
There are some other methods to update drivers such as installing a free driver update software and installing the driver from the manufacturer’s website. Hopefully, this will do the job for you.
Read: How to initialize a Hard Drive in Windows?
5] Enable Write Caching Policy
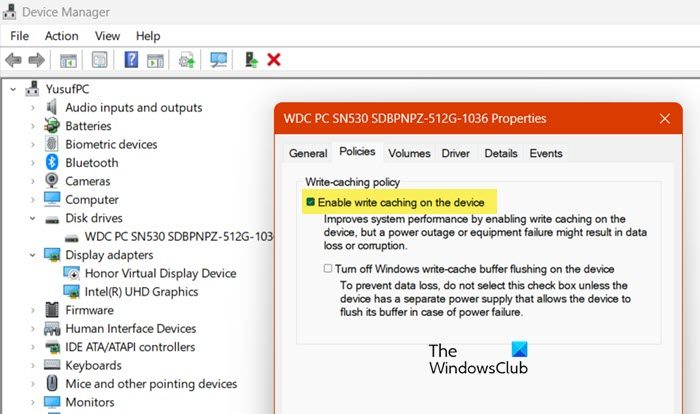
Enabling Disk Write Caching helps to improve the efficiency of your hard drives. Ideally, disabling it shouldn’t make Windows misidentify internal drives, however, there is a bug that forces it to do just that. We should enable the option for the internal drive to resolve the issue. Follow the steps given below to do the same.
- Launch Device Manager.
- Expand Disk drives, right-click on the driver of your SATA, and select Properties.
- Go to Policies and tick the box next to Enable write caching on the device.
- Finally, click the OK button.
After making the changes, check if the issue is resolved.
We hope that you are able to resolve the issue using the solutions mentioned in this article.
Read: Hard Drive keeps filling up by itself automatically
How to check if Drive is Removable in Windows 11
- In Windows 11, you can check whether a drive is removable by pressing Win + X, opening Disk Management, then right‑clicking the drive and selecting Properties. Under the General tab, the drive type will be listed (e.g., Removable vs. Basic).
- Alternatively, open Device Manager, expand Disk drives, right‑click your drive, and check its details. Removable drives are usually flagged as USB or external devices.
- You can also run
diskpartin Command Prompt, typelist disk. Removable drives will be marked accordingly. - File Explorer often shows removable drives under “Devices and drives” with an eject option.
How to fix Windows issue that displays internal SATA connected SSD HDD as removable?
If Internal drives are shown as removables, you may experience data loss. Since this issue is related to your BIOS and indexing, we need to update the BIOS and if that doesn’t work, we will override inbox driver surfaces devices. There are other potential causes of this issue and their respective solutions. You can follow the aforementioned solutions to resolve the issue easily.
Also Read: Stop Hard Drive from going to Sleep in Windows.
