
In cases where you are unable to boot into Windows and cannot access your files, you can create a bootable drive and use the media to boot and repair your OS installation on your device. In this post, we will show you how to boot Surface from USB Drive at Startup.
Starting your Surface from a USB drive can be useful if you want to change firmware settings or Windows startup settings or if your Surface device does not turn on, start, boot, or wake from sleep. Booting from a USB device doesn’t refresh or reset your Surface. Instead, it lets you start your Surface using Windows or another operating system that’s on your USB device.
How to boot Surface from USB Drive at Startup
Here’s a complete guide to help you through the process.
Prepare your USB Drive
Before you begin, format the drive as FAT32.
Create a bootable image using tools like Windows Media Creation Tool or Rufus as you may need it. You should also ensure the USB contains the correct installation or recovery files for your Surface model. If you’re reinstalling Windows, download the latest official ISO from Microsoft.
Shut down Surface completely
Now, save your work, close all applications and then hold the Power button for 5-6 seconds until the screen turns off.
This will perform a full-shutdown of your Surface device and ensures that your USB drive is recognized during boot.
Connect the USB Drive
Now connect the bootable USB drive to your Surface.
Boot from USB
To boot from the USB, press and hold the Volume Down button, and while holding it, press and release the Power button.
You need to keep holding the Volume Down key until the Surface logo appears.
Your Surface will now boot directly from the USB drive.
Once your Surface boots from the USB, you’ll see the setup or recovery interface. From here, you can:
- Reinstall Windows or another OS.
- Run recovery tools to fix startup issues.
- Access command‑line utilities for advanced troubleshooting.
Hope this works for you.
Surface does not boot from USB
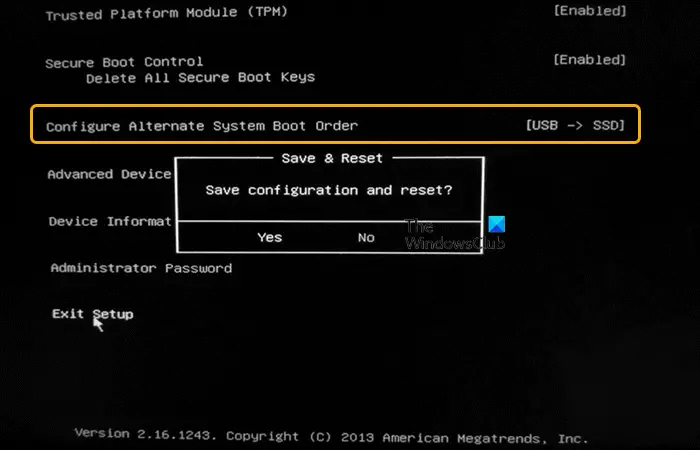
If your Surface does not boot from the USB, you have to check that the USB is bootable and properly formatted.
You may also need to configure its UEFI Settings.
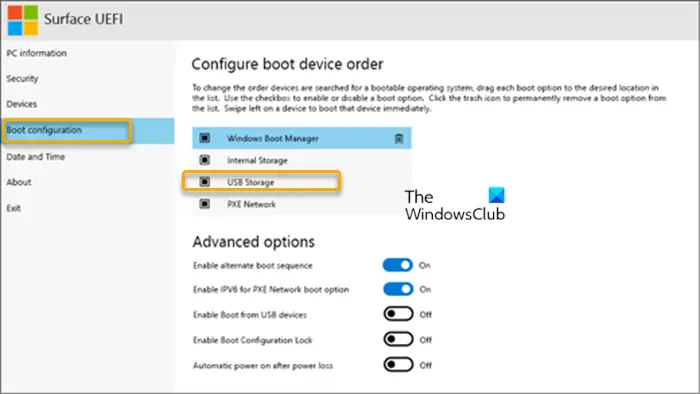
You will have to enter its UEFI settings and to do so, hold Volume Up and press Power button.
Next, navigate to Boot Configuration and ensure that USB Storage is enabled and prioritized above internal storage as boot device.
Save changes and exit.
This will tell your Surface to look for a bootable USB device first during startup.
Booting your Surface from a USB drive is straightforward once you know the right button combination and setup steps. So next time your Surface won’t start, or you need a clean install, remember: Volume Down + Power is the key combination to use to boot using USB.
If you’re having trouble starting your Surface following the instructions above, you can boot Surface from the USB drive within Windows.
How do you get to the boot menu on a Surface?
Press and hold the volume-up button on your Surface and at the same time, press and release the power button. When you see the Surface logo, release the volume-up button. The UEFI menu will display within a few seconds.
Why is my USB not bootable?
If the USB isn’t booting, you need to make sure: That the USB is bootable. That you can either select the USB drive from the Boot Device list or configure the BIOS/UEFI to always boot from a USB drive, then from the hard disk.
How do I know if my USB drive is bootable?
You can check your USB drive bootable status via the Disk Management tool in Windows 11/10. To do so, select and right-click the formatted drive and select Properties. Navigate to the Volumes tab and check the Partition style. You should see it marked with a boot flag, such as Master Boot Record (MBR) or GUID Partition Table.
