For any partition management work, there are many free third-party tools available, but Windows includes a pretty good Disk Management Tool that should suffice you for most of your disk management work like partitioning, formatting, merging, etc. The Windows 11 and Windows 10 built-in Disk Management Tool also allows you to resize a disk, create a partition, and more if you have enough free space on your system drive.
Disk Management Tool in Windows 11
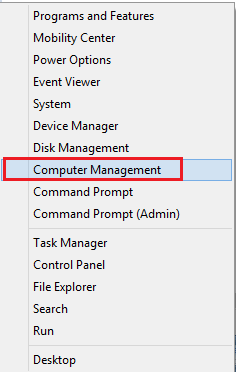
Before you begin, I recommend backing up your data to a secure location. You might want to also read up on the difference between Partition, Volume and Logical Drive. Next, you need to access the Computer Management tool first. So, press Win+X simultaneously to bring up the Power Tasks Menu and from the options displayed choose Computer Management.
This will display Computer Management. The Computer Management section is a collection of Windows administrative tools that you can use to perform various computer management tasks. The option also appears in the Administrative Tools folder in the Control Panel.
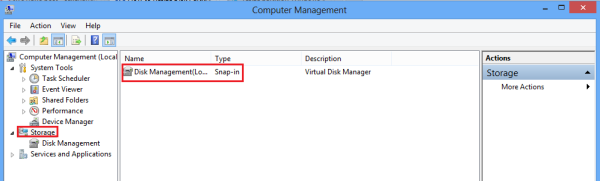
In Computer Management, you will find the Storage option. Under it, you will notice ‘Disk Management.’ Click on it. Alternatively, you may simply type “partition’ in Settings search and hit Enter to open the Disk Management Tool.
Resize, Extend Partition, Shrink, Delete Partition using Disk Management Tool
Once you click it, all disks and their volumes will be displayed in the small window.
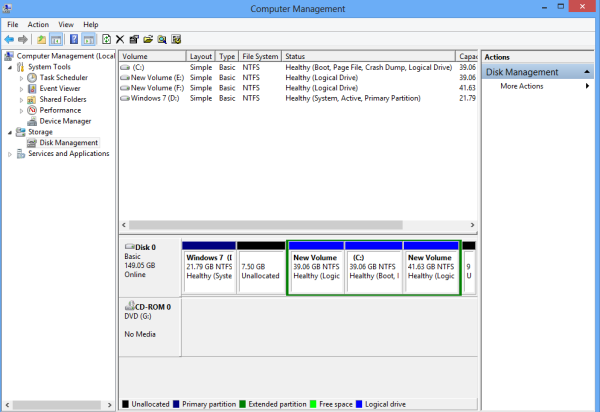
Select a disk for creating a new one. Right-click on it. You will see various options like:
- Change Drive Letter and Paths
- Format
- Extend Volume
- Shrink Volume
- Add Mirror
- Delete Volume

Read: How to delete a Partition or Volume.
Create a New Partition or Volume in Windows
Let us, as an example, say that you want to create a new volume or partition. So to do this, first select ‘Shrink Volume’.

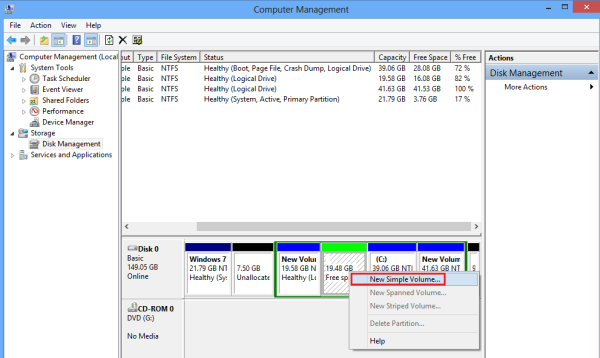
Then, wait for some time while Windows check the amount of space available for Shrink. Enter the amount of space to shrink in MB and hit ‘Shrink’. Once you hit the button, you will observe some free space created. Check out the screenshot below.

Now, right-click on the free space created and choose the first option ‘New Simple Volume’.
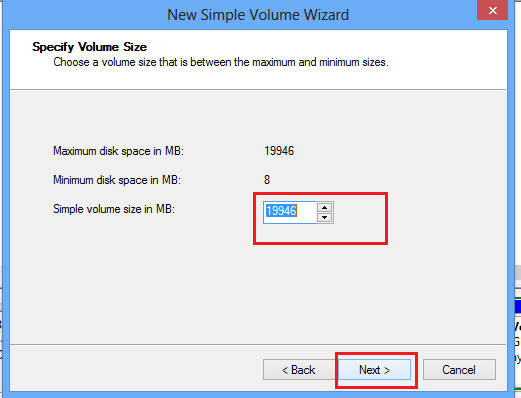
Then, select the amount of space you would like to allocate to the free space and click ‘Next’.
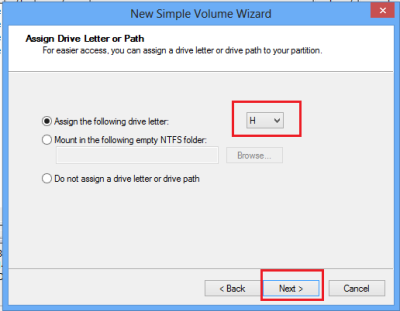
Now, assign a drive letter to your partition and move to the next step by clicking ‘Next’.
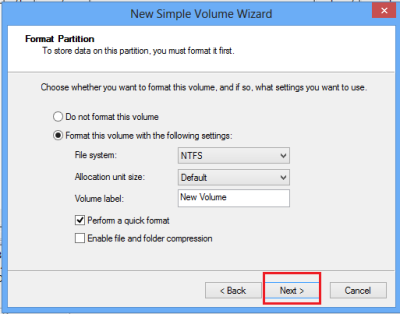
If you would like to store data on this partition, you will have to partition it first. So, format the partition with NTFS.
After the formatting process completes successfully, you can see a new partition created in File Explorer.

Using the built-in Disk Management Tool in Windows 11/10, you can easily create, extend, shrink and perform other operations on partitions.
TIPS:
- This post will help you if Shrink volume is greyed out
- See this post if your Extend Volume option is grayed out.
- Learn how to use Unallocated Drive Space in Windows 11
- Learn how to resize a partition in Windows using DiskPart.