Many users have faced this issue while using the Sound Recorder app of Windows. The app fails to save the recording. It could have happened for any reason, such as an outdated audio driver or a faulty audio service status. If you are also experiencing the same problem, this post may help you.
We couldn’t save this recording, It looks like the autosaved file was deleted before you finished recording it.
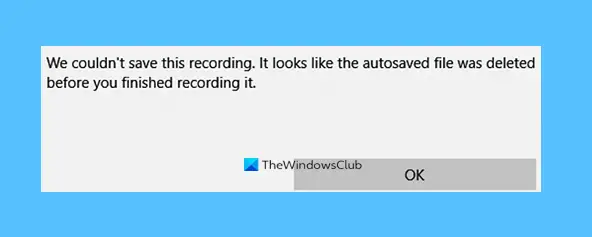
Sound Recorder couldn’t save this recording in Windows 11/10
In this post, we have covered six different options that might help you resolve this issue. These are:
- Save the file to another location
- Run Recording Audio Troubleshooter
- Reset or reinstall the Sound Recorder app
- Update the Audio driver
- Troubleshoot in Clean Boot State
- Use a third-party audio recorder tool.
Let’s check these options one by one.
1] Save the file to another location
Try to Save the file to another location and see iff that helps.
2] Run Recording Audio Troubleshooter
Just like Windows 10, Windows 11 also come with a Recording Audio troubleshooter that might come in handy to you for resolving this issue. So, try to run that troubleshooter and see if it helps.
In Windows 11, follows these steps:

The steps to run Recording Audio troubleshooter in Windows 11 are as follows:
- Hit Win+I shortcut key. This will launch Windows 11 Settings app
- In the System category, scroll down and click on the Troubleshoot option
- Click on the Other troubleshooters option
- Scroll down the troubleshooters page
- Click on the Run button available for the Recording Audio option
- Now troubleshooter will prompt you to select an audio device (Microphone, Stereo mix, etc.) for which you are having a recording issue
- Press the Next button.
After this, the troubleshooter will start detecting problems related to your audio device and provide you with the fixes accordingly. You just need to press the Apply this fix (if a fix is available) button, and Windows will do the rest for you.
In Windows 10, follows these steps:


Windows 10 includes built-in troubleshooters to identify and resolve various types of issues. One of such troubleshooters in Recording Audio Troubleshooter that might help a lot to fix this Voice Recorder couldn’t save this recording issue. It checks the audio service status and other issues for the selected audio driver and provides fixes. Here are the steps:
- Open Settings app using Win+I hotkey
- Access Update & Security category
- Select Troubleshooter page visible on the left sidebar
- Click on the Additional troubleshooters option on the right part
- Scroll down the page
- Click on the Recording Audio section
- Press Run the troubleshooter button
- Select the audio device for which you want to detect problems
- Press the Next button.
Now the troubleshooter will automatically detect audio problems and provide you the fixes. That might fix this Voice Recorder issue.
3] Reset or reinstall Sound Recorder app
In Windows 11, follows these steps:

Sometimes, the only option to make an app work properly is to reset or reinstall it. So, if other options don’t work for fixing your audio recording problem, then you should try the same for it. Here are the steps to reset or reinstall the Sound Recorder app in Windows 11:
- Use the Win+I shortcut key to launch the Settings app
- Click on the Apps category visible on the left section
- Click on Apps & features option
- Scroll down the list of apps to access Sound Recorder
- Click on the icon with three vertical dots
- Click on Advanced options
- Scroll down the page
- Use the Reset or Uninstall button.
If Reset does not work, use the Uninstall button to uninstall it. Then visit the Microsoft Store to download and install the Sound Recorder app.
In Windows 10, follow these steps:

Open Settings > Apps > Apps and features
Locate the Voice Recorder app > Click Advanced options and then Reset the Voice Recorder app.
If Reset does not work, use the Uninstall button to uninstall it. Then visit the Microsoft Store to download and install the Sound Recorder app.
4] Update the Audio driver

An outdated audio driver can also cause a lot of issues including this issue. Therefore, it is good to update your audio driver. The steps are:
- Type device manager in the Search box
- Press Enter key
- In the Device Manager window, expand Sound, video and game controllers
- Right-click on your audio driver
- Click on the Update driver option
- Use Search automatically for drivers option to let Windows automatically find, download, and install the latest driver.
Or else, you can also use the Browse my computer for drivers option to manually install the audio driver available on your PC
After updating the audio driver, Restart your PC, and see if your problem is gone.
This might fix the issue and you will be able to save the recording using the Sound Recorder app of Windows 11/10.
5] Troubleshoot in Clean Boot

This is one useful option to fix this issue. Clean Boot starts your Windows PC with a minimal set of startup programs and drivers, which is helpful for troubleshooting and diagnosing problems that you can’t identify. It is somewhat similar to the Safe Mode feature of Windows, and it may also work to resolve this issue.
If some program, driver, or other item is interfering with the Sound Recorder app and causing the issue of not being able to save the recording, Clean Boot might help you identify it.
So, try to troubleshoot in Clean Boot State with different actions using the System Configuration feature. After each action, restart the PC to identify the actual problem. This may take some time, but it could be very helpful in solving your problem.
6] Use a third-party audio recorder tool
If, after trying all these options, the Voice Recorder app still cannot save recordings, consider using a free audio recorder tool instead.
There exist some good free audio recorder software, like Ashampoo Audio Recorder, that you can try. You can also access the Microsoft Store and install a free third-party voice recorder app.
If the third-party audio recorder works fine, then you can also uninstall the Sound Recorder app if you want.
Why is my Windows Sound Recorder not working?
There could be any reason because of which the Sound Recorder app is not working on your Windows computer. It might be corrupted, has outdated drivers, etc. It is even possible that the microphone might not be enabled on your computer or Sound Recorder doesn’t have access to the microphone. The problem could be anything. Therefore, you should try some solutions that may work to resolve this issue.
You can check and enable the microphone (if it is turned off or disabled), allow Sound Recorder to access the microphone, update the audio driver, adjust microphone levels, reset Sound Recorder, and more. We also cover some of those solutions in this post. You can check the steps to try a solution and see if it works for you.
If the Sound Recorder still doesn’t work, it’s better to use another voice recorder tool.
How do I save a voice recording in Windows 11?
If you are using Windows Sound Recorder app, then saving a voice recording is pretty easy. Actually, you don’t even have to select the output folder to save the recorded audio. Once you are done with recording, the Sound Recorder app automatically saves it to the default folder. All your recordings are saved in the Sound Recordings folder under the Documents folder. You just need to use File Explorer to access Documents and open the Sound Recordings folder.
Although voice recordings are saved automatically, users sometimes encounter the issue where the Sound Recorder is unable to save the recording. If you also encounter this issue, you can try some fixes, such as changing the save location for recordings, updating the Sound Recorder app, or updating the audio driver. All such fixes are mentioned above in this post, along with the corresponding steps.