Some users experience low resolution or laggy videos inside their VirtualBox machine. The confusion comes when, inside the guest OS’s Device Manager, we expect to see a powerful NVIDIA or AMD GPU, only to find a generic VirtualBox Graphics Adapter. The core issue is that VirtualBox uses a default graphics driver instead of leveraging the host’s powerful GPU. While a VirtualBox VM does not detect the Graphics Card directly, this article explores ways to significantly enhance graphics performance with a few key adjustments.
VirtualBox not detecting Graphics card in Windows 11
If VirtualBox is not detecting the Graphics card, execute the solutions given below.
- Enable 3D Acceleration and increase VRAM
- Install the correct display driver in the Guest OS
- Allocate more system resources to the VM
- Install/Reinstall VirtualBox Guest Additions
Let’s troubleshoot the issue.
1] Enable 3D Acceleration and increase VRM

3D Acceleration allows the Virtual Machine to leverage the host computer’s GPU for rendering graphics, rather than relying solely on the CPU. The next step is to increase the Video RAM to provide the necessary resources to support higher resolution and complex visuals.
- First and foremost, properly shut down the Virtual Machine, and select the Virtual Machine from the list in the main VirtualBox Manager.
- Right-click on the problematic VM, and click on the Settings gear icon, and navigate to the Display tab.
- On the right side, locate the Graphics Controller drop-down menu and select the recommended option for the guest OS.
- Next, check the Enable 3D Acceleration box, and locate the Video Memory slider.
- Slide it to at least 128 MB or more if it is available for better performance. Click OK to save the changes and then close the Settings window.
To complete the configuration, we need the essential drivers for these new graphic capabilities, so move on to the next solution to install VirtualBox Guest Additions.
2] Install/ Reinstall VirtualBox Guest Additions
After configuring the virtual hardware, the next step is to get the guest operating system drivers. Guest Additions are a special software package that provides these critical drivers for graphics, mouse integration, and shared folders.
- Boot the virtual machine OS, and log in.
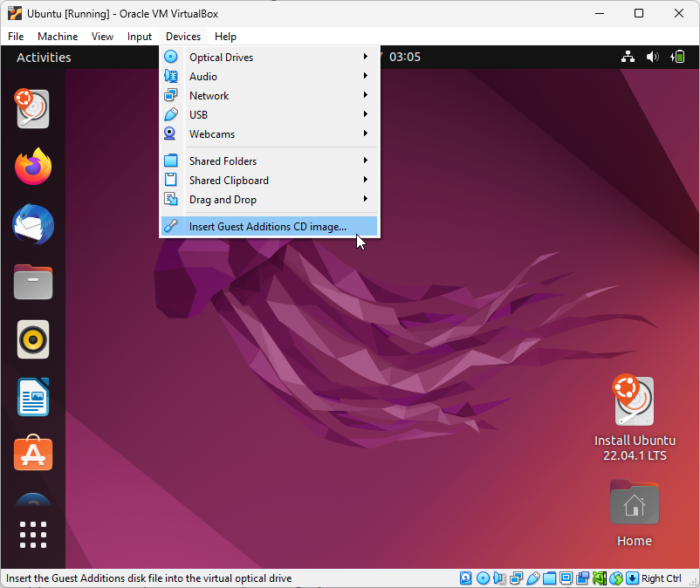
- Go to the VirtualBox menu, click on Devices, and select Insert Guest Additions CD image.
- The installation should start automatically, and if it doesn’t, open File Explorer, and go to the location where the VirtualBox Guest Additions file is located, and run VBoxWindowsAdditions.exe.
- Next, grant installer permissions, agree to install the device software, and keep the default settings.
After the installation completes, fully restart the VM for the changes to take effect. If the issue persists, perform a complete reinstall, as it often resolves corrupted driver files.
3] Allocate more system resources to the VM

If the dedicated processing power and memory are insufficient, the entire system, including graphics, will be sluggish. To prevent this, it’s necessary to ensure that the VM has enough CPU and RAM for smooth performance.
- Power off the VM, go to the VirtualBox Manager, and select the VM.
- Click on the Settings icon, navigate to the System tab, and then go to the Processor sub-tab.
- Drag the Processor slider to allocate at least 2 CPU cores; however, do not allocate all the host’s cores.
- Now, go to the Motherboard sub-tab, and drag the Base Memory slider to allocate a sufficient amount of RAM.
- Next, in the Acceleration sub tab, ensure the Paravirtualisation Interface is set to Hyper-V or KVM for modern Windows/ Linux hosts.
- Click Ok to apply all the changes.
Doing the above steps reduces overall system strain and ensures that the graphics enhancement can perform to its full potential.
Read: VirtualBox displays Black screen and not Booting guest OS
4] Install the correct display driver in the Guest OS
Even after installing Guest Additions, Windows Update, or the guest OS can sometimes override the optimal virtual graphics driver with a generic one. In this solution, we are going to force the system to use the correct driver.
- Boot into the VM, log in to the guest OS, and click Win + X to open the Quick Link menu.
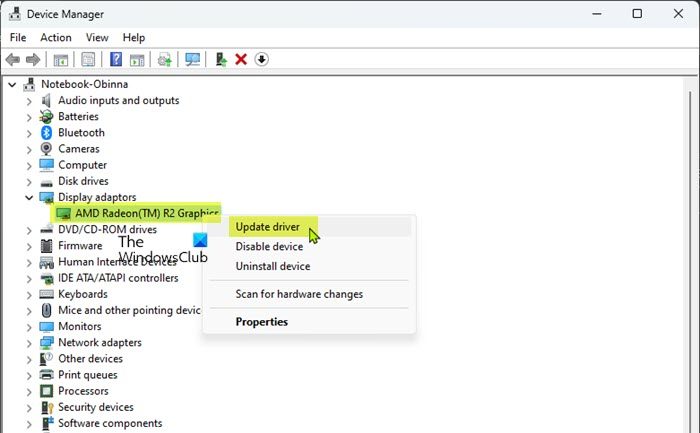
- Select Device Manager, and then find and expand the Display Adapter section.
- Right-click on the display adapter listed, and select Update Driver from the context menu.
- Click on Browse my computer for drivers, and then select Let me pick from a list of available drivers on my computer.
- Choose the one with the most recent date or the highest version number, and click Next to install it.
Follow all the on-screen prompts, and once done, reboot the PC. Check the display adapter in Device Manager to confirm it.
That’s it!
Read: How to use Windows Sandbox and VMWare or VirtualBox together
How to enable NVIDIA Graphics card in BIOS?
To enable the NVIDIA Graphics card, restart the computer and boot into the BIOS. Once in the BIOS interface, navigate to the section often labelled as Advanced, Video Graphics settings, or Display, and then look for an option called Primary Display Adapter, Graphics Device, or Initial Display Output. Change this setting from Auto / Integrated Graphics to PCI-E, PEG, or Discrete Graphics to prioritise the NVIDIA card, and exit BIOS. The system will reboot with the NVIDIA graphics card now.
Read: How to make VirtualBox VM full screen in Windows 11
Do I need to install GPU drivers on a virtual machine?
Yes, one needs to install GPU drivers within a Virtual Machine; however, these are not the same drivers we install for the physical NVIDIA or AMD card. In a VM, we are dealing with virtual hardware, not the physical GPU itself. Therefore, it’s necessary to install the specific virtual graphics driver provided by the virtualization software, supplied through the Guest Additions package in VirtualBox or the VMware Tools package in VMware.
Read: Bluetooth not working in VirtualBox.