
In this guide, we are going to export a virtual machine running in a virtualized environment on your computer and import it into a server-based hypervisor. We will see how to export a virtual machine from VMware Workstation to ESX/ESXi
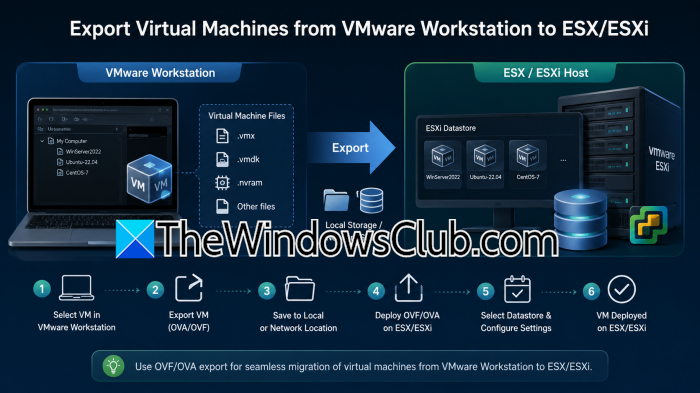
Export virtual machine VMware Workstation to ESX/ESXi
Moving a virtual machine (VM) from a local computer (PC or Mac) to a dedicated server like ESXi has many benefits. While VMware Workstation works well for small tests, a server on bare metal offers much more power, with additional CPUs, memory, and disk space. This is especially useful for growing businesses that need their systems available 24/7 without relying on one user’s computer to stay on.
To export a virtual machine in VMware Workstation to ESX/ESXi, we will be following a four-phase approach.
- Export the virtual machine
- Prepare the Server Storage
- Register and deploy the VM
Let us talk about them in detail.
1] Export the virtual machine
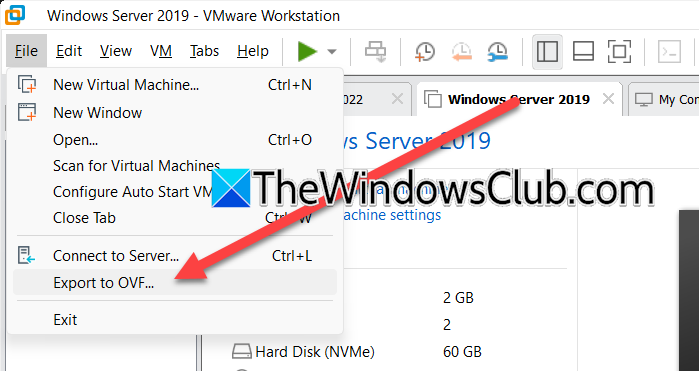
Our first phase includes creating an export backup of your current virtual machine. We will be creating an .OVF file for the import. To do so, follow the
steps mentioned below.
- Open VMware Workstation.
- Now, select the machine you want to export, and click on File > Export to an OVF.
- Save this file to an export directory or any folder you deem safe.
Once we have the OVF file, we will go ahead with the next phase of migration.
2] Prepare the Server Storage
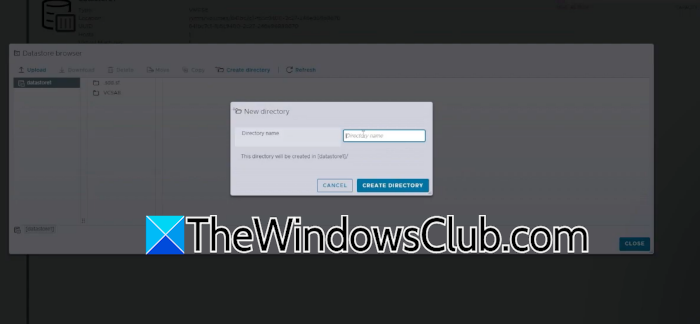
After completing the export, move the files to your physical server, also called a host. Before you do that, install VMware ESXi on the physical server by downloading the latest version from vmware.com. To access the management interface, type the server’s IP address into a web browser. The software is the same for all editions, like Essentials or Enterprise Plus; the license key simply unlocks or removes certain features, like High Availability.
Once the host is ready, you must move the OVF files to the server’s local storage.
- Access your server by typing its IP address into a web browser.
- In the management interface, navigate to Storage.
- Go to your data store > Datastore browser.
- Select Create a directory (for example, naming it import) to keep the migration files organized.
- Open that directory and use the Upload button to move all the files you exported from your workstation onto the server’s storage.
Now that we have imported our old virtual machines to an ESXi host, let’s go ahead and finish the configuration.
3] Register and deploy the VM
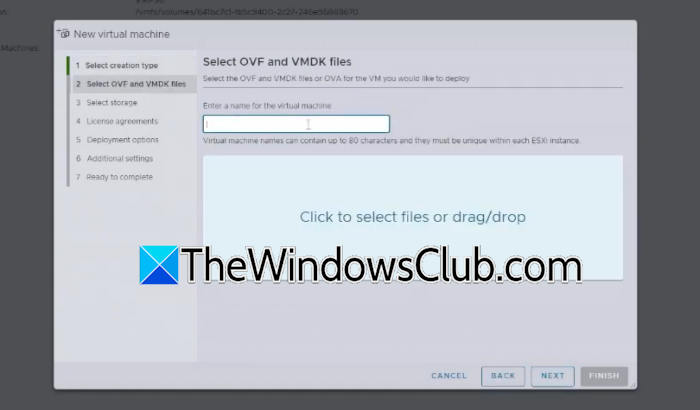
After the files are uploaded, you must formally register the VM so the server recognizes it. You can follow the steps mentioned below to do the same.
- Go to the Virtual Machines section.
- Right-click and select Create or Register.
- Select the option – Deploy a virtual machine from an OVA or OVF file. Select Next.
- Enter a name for the VM and select the files you uploaded.
- Click Next through the configuration screens, selecting your storage and preferred disk provisioning (such as thin provisioning).
- Click Finish to begin the transfer and registration.
Once the progress bar at the bottom reaches 100%, the VM is ready. You then have to select the VM from the virtual machines list. If you want to edit its settings, click the Edit button to adjust hardware allocations. To start your machine, right-click it, navigate to Power, and select Powering on. Alternatively, you can simply click the Start button at the top of the interface.
4] Post-Migration Cleanup and Troubleshooting
After successfully booting your migrated virtual machine on the ESXi host, it’s important to make a few adjustments to ensure everything runs smoothly. Start by updating VMware Tools in the guest operating system to align with the new ESXi hypervisor version. This update will install the appropriate drivers for graphics, networking, and storage. It’s also a good idea to remove any unnecessary virtual hardware that might have been included when the VM was originally set up, such as sound cards and USB controllers. This helps prevent boot errors and keeps resources clean.
Next, you should reconfigure the network interfaces, as the new host may cause the guest OS to reset its network settings. Log into the VM to input the correct IP addresses, VLAN tags, and gateway settings that are compatible with your network. By completing these steps after migration, you help ensure that your workload functions reliably in its new environment.
That’s it!
Read: How to migrate or import VMs from VMware ESXi to Proxmox
How to export a VM in ESXi?
To export a VM in ESXi, log into the vSphere Web Client, ensure the virtual machine is powered off, and select it from the inventory. Click Actions, navigate to Export, and select Export OVF Template. Choose your preferred settings, such as including BIOS images or extra files, and click OK. The browser will download the .ovf and .vmdk files directly to your local storage.
Read: How to Backup VMware ESXi Host Configuration
How to convert a VirtualBox VM to VMware ESXi?
Power off the VirtualBox VM and export it as an Open Virtual Machine Format (.ovf or .ova) file via File > Export Appliance. Next, log into your ESXi web interface, go to Virtual Machines, click Create or Register VM, and choose Deploy a virtual machine from an OVF or OVA file. Upload the exported file, complete the wizard setup, and boot your newly converted VM.
Also Read: Install VMWare ESXi Hypervisor in Hyper-V Virtual Machine.
