Time and Language Settings in Windows 10 consist of all the settings that allow you to set your date and time, time zone, country or region, preferred languages, and speech-language settings. You will also find other such Related settings to time and language, such as speech privacy settings, additional date, time and regional settings, etc.
We have looked at the Windows 10 Personalization Settings, Privacy Settings Network and Internet and the Update and Security settings. In this post, we will show you how to set or change the date and time, language and speech, Locale settings, manually on your Windows 10 PC.
Windows 11 user? Read: How to change Language, Region, Time and Date in Windows 11.
Change Date, Time, Region, Locale, Language in Windows 10
In this post, we will cover all the above-mentioned settings that are related to time and language. You can also change data formats and add additional clocks for different time zones in this section of the Windows 10 Settings.
Time and Language Settings in Windows 10
To open the Time and Language Settings on your Windows 10 PC, click on the Start menu > Windows Settings > Time & Language. The Time and Language Settings window will open and you will see four main categories –
- Date and Time,
- Region,
- Language, and
- Speech.
Let us now learn more about these settings.
1. Date and Time
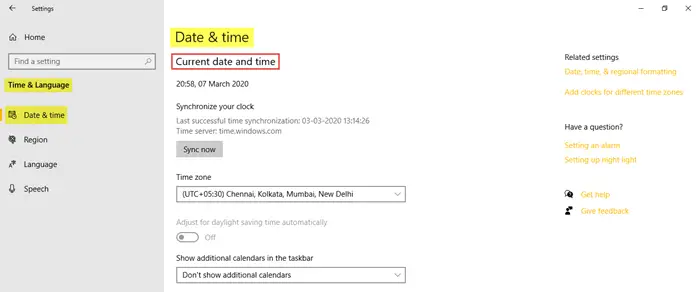
In this section, you will find the option to synchronize the clock and set the time zone. If you wish to show additional clocks in the Taskbar, you select Simplified Chinese (Lunar) or Traditional Chinese (Lunar); or you can choose to not show any additional calendars on the Taskbar. Under Related Settings, you will find the settings to date, time and regional formatting and to add clocks for different time zones.
You can turn on Adjust for Daylight Saving Time automatically. In most of Europe, local time is moved forward by 1 hour in Spring and moved backward by 1 hour in Autumn. This happens around March or April and ends in October or November. This practice is called Daylight Saving Time.
Turn off Set Time Automatically and you will be able to change the time and date manually, via the following setting box which opens, as soon as you set it to ‘Off’. However, setting it to set time automatically is always recommended.

Windows 10 lets you change the Date and Time Formats too. Scroll down and click on ‘Change Date and Time Formats’ and this is where you can select, which day your week will start, whether it will be Sunday, Monday or any other day in the week. It also lets you select the long or short date and time format.
Read: How to change Date and Time formats in Windows 11
2. Region
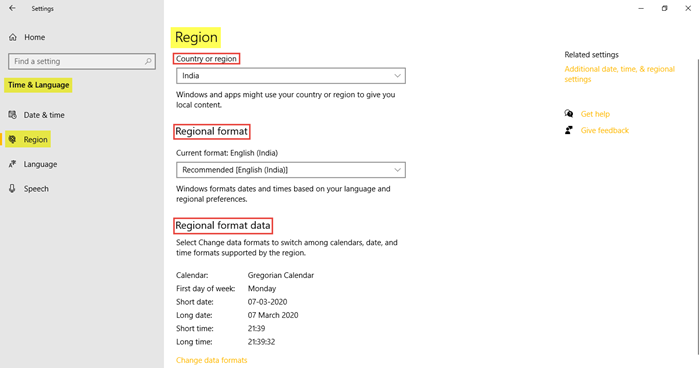
The Region tab lets you choose the country or region your currently live in. This helps the Windows and apps to give you all the local content. Next is to choose the Regional Format. Click on Change data formats to make changes to calendar, first day of week, short date, long date, short time, and long time supported by the region. Under Related settings, you will find the link to the Additional date, time, and regional settings.
3. Language
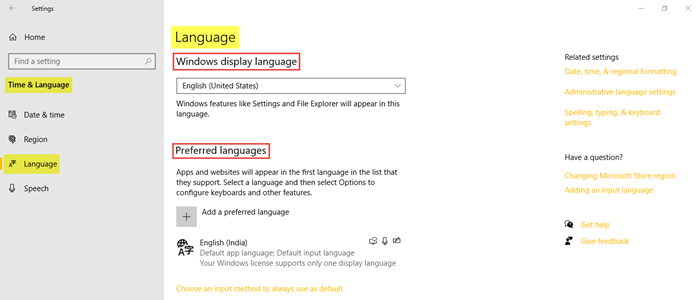
Choose the Windows display language in which you want the Windows features to appear. You can also add a preferred language by clicking on the option and installing the language you prefer. Click on choose an input method to always use as a default to access the advanced keyboard settings. Under Related settings, you will find the Date, time, and regional formatting, Administrative language settings, and Spelling, typing, and keyboard settings. This post shows in detail how to change the Language.
4. Speech
You can adjust the Speech settings of your PC. Choose the language your PC speaks, select the tempo (speed) of the speech and also select the default voice for your PC. Windows 10 offers Microsoft Mark Mobile (a male voice) and Microsoft Zira Mobile (a female voice).
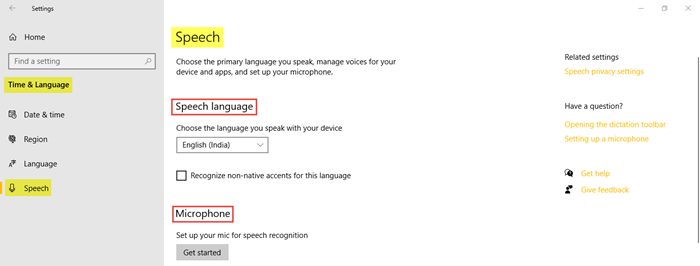
In the Speech section, you can choose the language you speak with your device. You can click on the check box if you wish to recognize the non-native accents for the selected speech language. Next is to click on Get started in order to set up your microphone for speech recognition.
The Microphone tab lets you check the Mic for speech recognition. 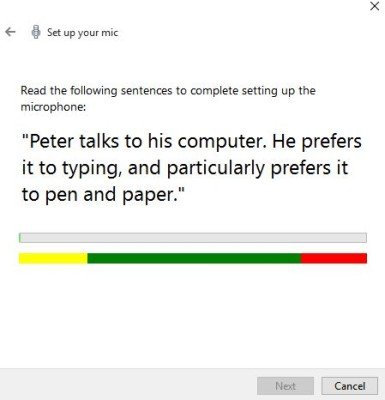
Just click on Get Started and follow the instructions to set up your Microphone.
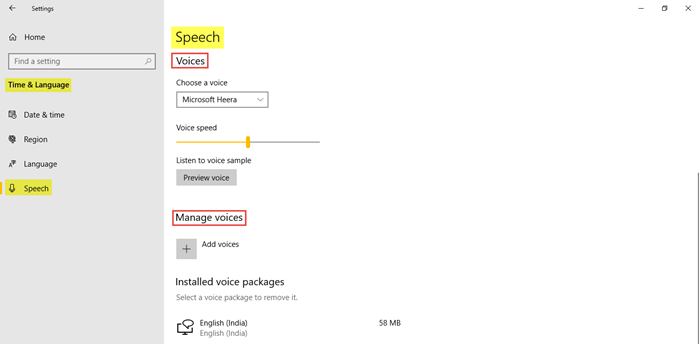
You can choose voice between Microsoft Ravi and Microsoft Heera in English (India) and set the voice speed as well. You can also add a voice package where you can install voices in the different selected languages. Under Related settings, you will find the link to the Speech privacy settings.
This covers all the Time and Language Settings in Windows 10.
We hope you find the post helpful.
Hello
when i click on the download in ( Basic typing) 12M it said ( something happened… we cant installing features) whats wrong any ideas please?
Thank you in advance
Run (press
Windows key and tap r key, let both go, then paste the
following) control.exe /name Microsoft.DateAndTime and hit OK.
Easier: Run (press
Windows key and tap r key, let both go, then paste the
following) control.exe /name Microsoft.DateAndTime and hit OK.
Love you!
I can’t change the date and time. When I hit ‘change’, nothing pops up. when I hit the clock, nothing pops up. Can someone please help me?