Windows Defender is a crucial security tool designed to protect your system from harmful files and malware in Windows 11/10. However, dealing with it can sometimes be frustrating, as it mistakenly flags safe files as threats and deletes them automatically. If you are facing the same issue as many others, don’t fret, as this can be easily managed. In this article, we will walk through the solutions to stop Windows Defender from deleting the files.
Does Windows Defender remove files?
Yes, Windows Defender can remove files that it identifies as threats by quarantining or deleting them. If you are facing this issue and need to recover the file, follow these step-by-step solutions to restore it.
How to stop Windows Defender from deleting files in Windows 11?
If Windows Defender is deleting files in Windows 11/10, execute the solutions mentioned below to stop Windows Defender from deleting files.
- Restore the file from quarantine
- Add an exclusion
- Temporarily disable Real-time protection
- Add Exclusion using Group Policy Editor
- Submit the file to Microsoft for analysis
Let’s get started with the troubleshooting guide.
1] Restore the file from quarantine
First and foremost, if Windows Defender deletes the file, check its quarantine. This is a secure holding area where Defender isolates potential threats before permanent deletion. We will recover files that were flagged by mistake, and here’s how you can do the same.
- Click the Search icon, search Windows Security, and select the app from the list.
- Click on the Virus and Threat protection tab, and navigate to the Current Threat section.
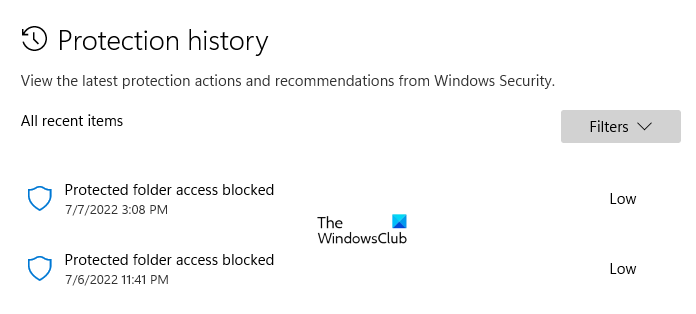
- Select the Protection History link. If you don’t see this immediately, click on the Scan option first, then use the back arrow to return to the main screen, where Protection History will be visible.
- A list of all recently deleted items will appear. Use the ‘Filters’ dropdown to select Quarantined items, scroll through the list to find the file you want to recover, and click on the item to expand its details.
- Click on the Actions button, and then select Restore options.
Windows Defender will immediately return the file to its original location. If the files are deleted again, see the next solution.
2] Add an exclusion

Adding an exclusion is the most effective solution to prevent Windows Defender from blocking or deleting a specific file. However, ensure to only exclude items that you are certain about.
- Click the Start Menu, type Windows Security, and open the app.
- Click on the Virus and Threat Protection tab, and select the Manage Settings option present under the Virus and Threat Protection settings Section.
- Scroll down until you find the Exclusion list, and click on the Add or remove exclusions link.
- Select the + Add an exclusion button, and select the option from the 4 available options in the drop-down list. However, use ‘File Type‘ with extreme caution as it excludes all files of that type.
The item will appear on the exclusion list now. If the issue persists after completing this step, proceed to the next troubleshooting solution.
3] Temporarily disable Real-time protection
In this solution, we will temporarily pause Windows Defender’s active scanning of the device while we install or run a file that was previously deleted.

- Go to the Start menu and open Windows Security.
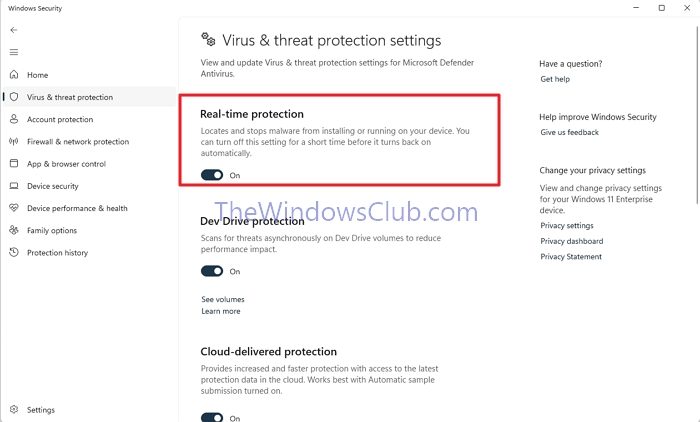
- Navigate to the Virus and Threat protection tab, and click on the Manage Settings link from the Virus and Threat protection section.
- Find the Real-Time protection option and click the toggle off to switch it off. Select Yes when the UAC prompt asks you to confirm the procedure.
The moment toggle is off, immediately install whatever was deleted. If it is deleted again, allow that program through Windows Defender.
4] Add Exclusion using Group Policy Editor
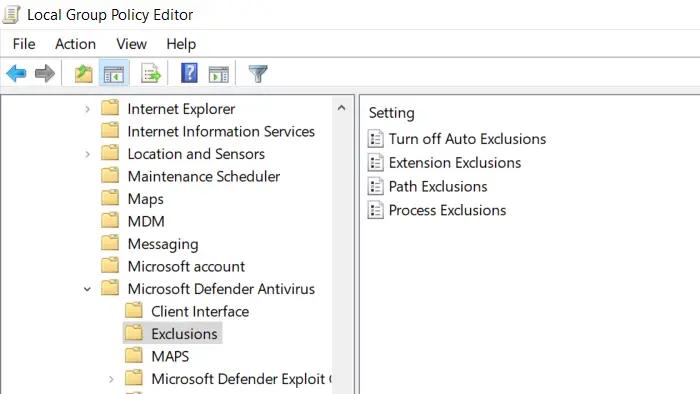
If you are a part of an organization or have configured policies prohibiting the presence of a certain type of file, check that policy and disable it. Additionally, you can add exclusion through policies. To do this, open the Group Policy Editor and then navigate to the following location.
Computer Configuration > Administrative Templates > Windows Components > Microsoft Defender Antivirus > Exclusions
Enable Path Exclusions or Extension Exclusions and list the items.
Finally, check if the issue is resolved.
Read: Allow Pings (ICMP Echo requests) through Windows Firewall
5] Submit the file to Microsoft for analysis
Last but not least, if you are 100 percent certain that the file is safe, we will report a false positive to Microsoft.
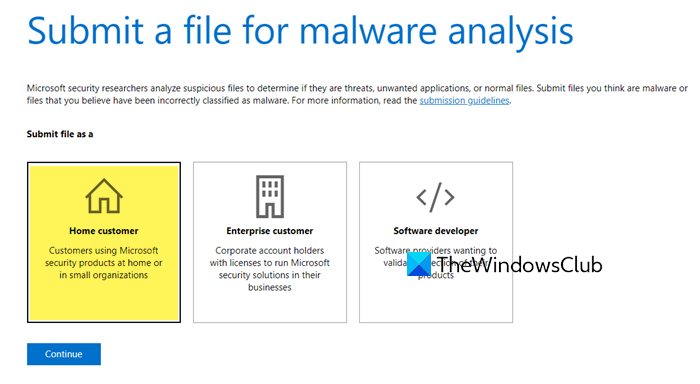
To do so, go to the Microsoft Security Portal and sign in with your Microsoft account. Select Submit a file for malware analysis, and select the file that Windows Defender flagged for deletion. Select I believe this file should not be detected as malware, provide a clear description, and click the Submit button. Wait for the analysis process to complete and check the status of the submission by visiting the Submission History page on the Microsoft Security Portal.
Hopefully, the file will be whitelisted and won’t be deleted from the system again.
Read: How to Block or Open a Port in Windows Firewall.
How to restore files deleted by Windows Defender?
To restore files deleted by Windows Defender, open Windows Security, go to Virus & threat protection, and click on Protection history. Find the quarantined file you want to recover, select it, and choose the Restore option. This will return the file to its original location.
Also Read: Add a File or Folder to the Antivirus Exception List.