
Is it possible to remove audio from videos using Windows 11/10? The answer to this question is Yes, and it is easier than you might think. In fact, we will discuss two ways you can get this done: using the Clipchamp app or VLC.
Remove Audio from Video in Windows 11
We should point out that Windows 11 includes a built-in feature that lets users easily remove audio from supported video files. The tool in question is the Clipchamp app, and from what we can tell, it works quite well, even better than what we were expecting, seeing as the features are primarily basic. The second option is VLC Media Player, so if you’re not too keen on using the default program in Windows 11/10, this third-party option should help a great deal. Plus, it is free to use and open source.
1] Remove soundtrack using the Clipchamp app
To remove audio from video using the Clipchamp app, do the following:
Open the Clipchamp app.
Click on Create a new video.
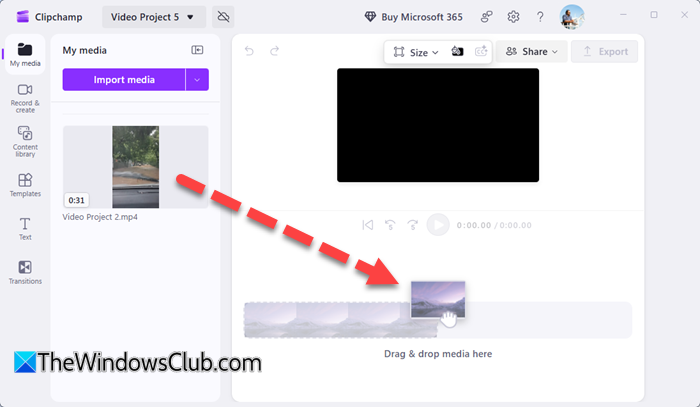
Click on Import media.
Drag and drop the video from the left to the right side
Click on the Volume button to mute the soundtrack
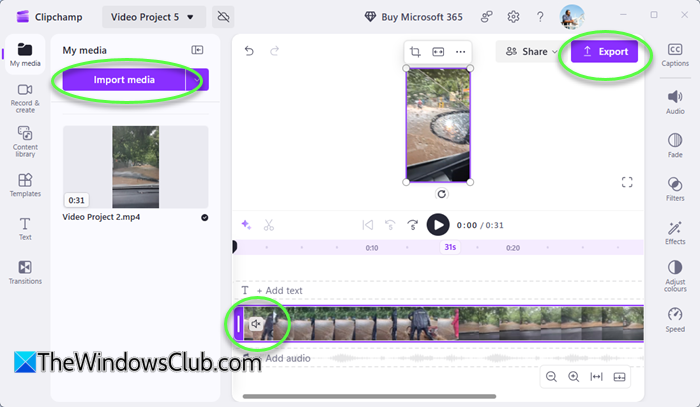
Next, click on the Export button
Give the muted video a name, select its quality and choose its Save location.
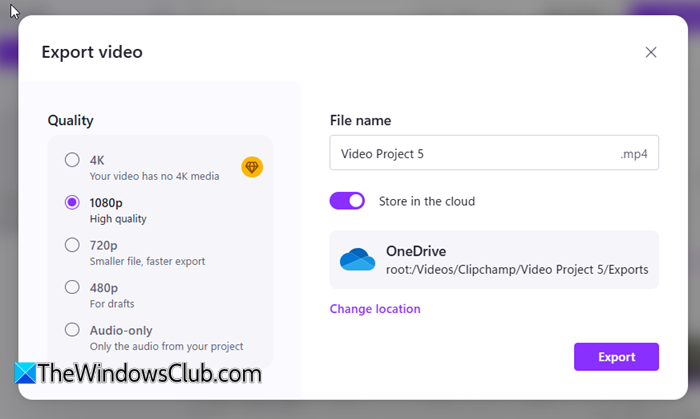
Click on the Export button once again
The video without the audio will be saved.
Read: How to add or remove Multiple Audio Tracks in a Video on Windows PC
2] Remove audio from video using VLC Media Player
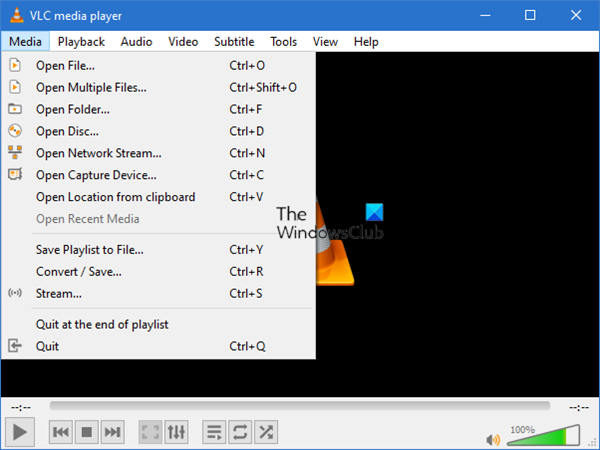
We can also use VLC Media Player to remove audio from videos, but it is not as straightforward though just as capable.
To do this, download VLC Media Player from the official website and install it on your computer. From there, open the tool, then navigate to Media > Convert/Save.
From the screen that appears, click on Add, then go to the section where the video is saved and select it.
Once the video is opened in VLC, you are required to navigate back to Convert/Save. A video conversation window should appear.
Under the section that reads, Profile, go on ahead and select the preferred Output mode, then click on Edit selected profile. From here, you should see the Encapsulation tab, and under it, a list of options to choose from.
Choose the Video container that best suits your needs, then move on to the Video codec tab. Tick the checkbox beside Keep original video track, then open the Audio codec tab.
Deselect the checkbox beside Audio, then hit the Save button below. The next step is to select the destination for the converted file by clicking on Browse. Be sure to add a file name, then hit Save.
Finally, hit Start and wait for VLC to convert your new video without audio.
Read: How to remove Audio or Video in Premiere Pro
BONUS: Using the legacy Video Editor app
If you still use the old Video Editor app of Windows, do this. Open it and then follow these steps.
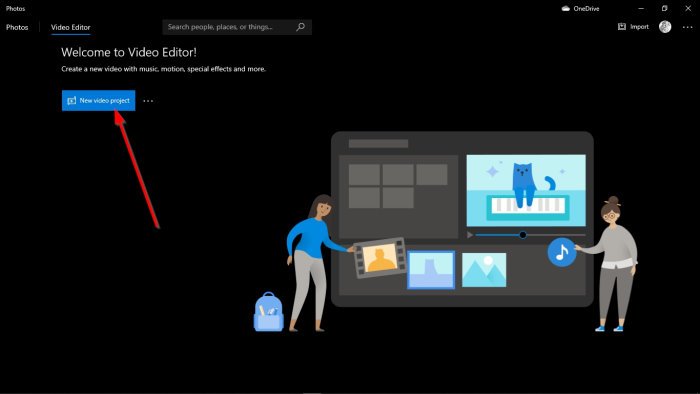
Once the tool is up and running, please look to the top for a button with the words, New Video Project. Please click on it in order to create a new project. If you do not see the button, then click on New Video > New Video Project to begin the process.
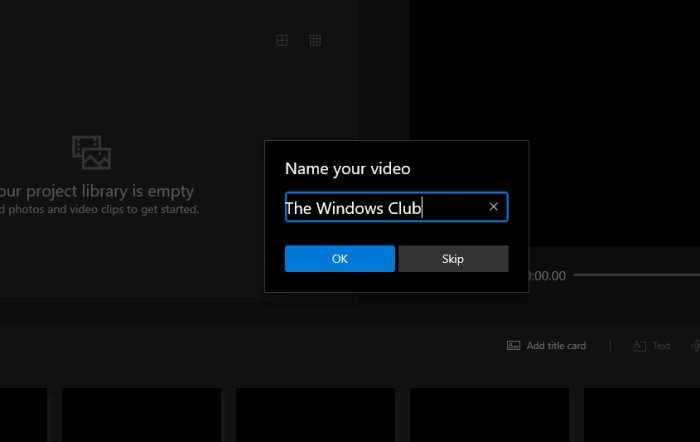
The next step is to add a name to your project. After typing the name, click the OK button, and right away, your project will be created.
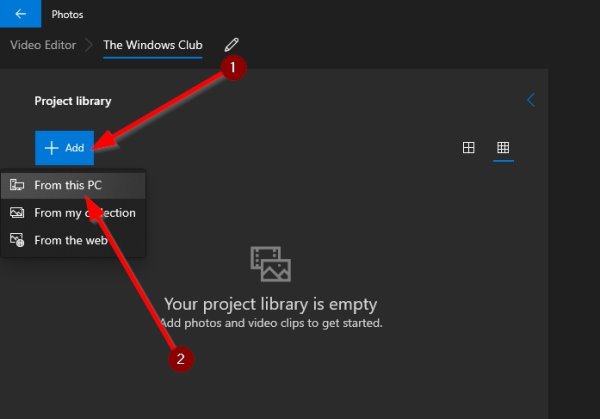
You should see a blue button called Add. Please click on it right away to reveal a dropdown menu. From here, select From This PC to add a video saved on your computer.
It is not possible to remove the audio from the video without attaching it to the Storyboard first. Do this by dragging the video to the Storyboard, or simply right-click on the video and select Place In Storyboard.
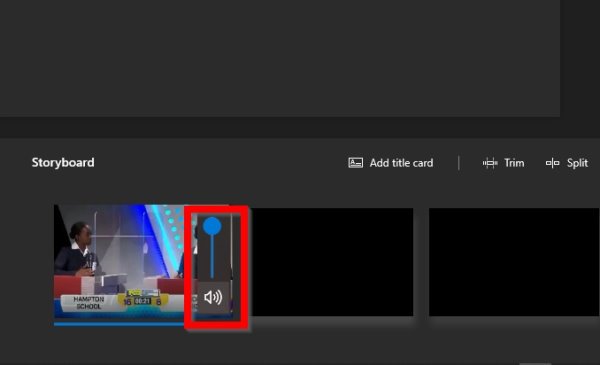
Removing the audio from the video you recently added is super easy. Just look at the video on your Storyboard and click on the audio icon. Clicking on it a second time should be enough to mute the video.
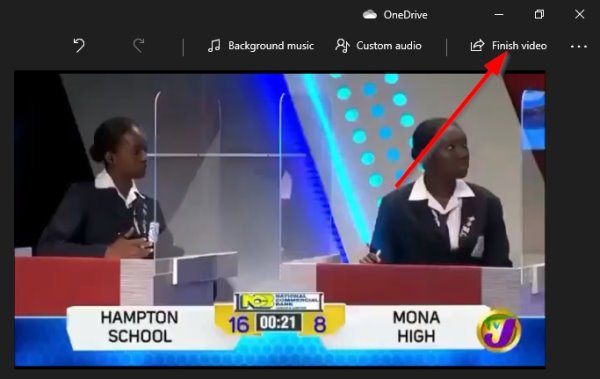
Choose the button to the top-right with the words Finish Video. You’ll be asked to select your preferred video quality. Do that, then click on the Export button right away. Save the file by selecting the Export button once more, then sit back and wait for the program to produce the content without audio.
The time it takes to complete depends on the video’s size and your machine’s power.
How to extract audio from video on Windows?
You can easily extract audio from a video by opening the file in Clipchamp, dragging it to the timeline, then right‑clicking and choosing Detach audio. This separates the audio from the video track. You can then delete the video track if you only want the audio. Finally, export the project as an audio file (MP3 or WAV) using the export options. If you prefer offline tools, free apps like Audacity or VLC Media Player also let you do this.
How do I remove sound from a video in Windows?
To remove sound from a video for free, use tools like Clipchamp or VLC Media Player or online services such as Kapwing. Upload your video, select the option to mute or remove audio, and process the file. These methods are quick and efficient and do not require any software purchases, making them ideal for users seeking cost-effective solutions.
