We expect the changes to stick when tweaking the LmCompatibilityLevel settings in Windows. However, sometimes, it keeps flipping back to the old value, and other times, it refuses to change at all. In this article, we will look at what causes this behaviour and how we can fix it.
What is LmCompatibilityLevel?
LmCompatibilityLevel is a Windows security setting that controls which authentication protocols, like LM, NTLM, NTLMv2, etc., are used for network logons. It determines how your computer responds to authentication requests and what level of security is enforced.
LmCompatibilityLevel Keeps changing or Not changing
If the LmCompatibility level keeps changing or does not change at all on a Windows Client or Server machine, execute the solution below.
- Identify the Controlling Group Policy
- Get detailed GPO information
- Check and configure Local Security Policy
- Contact the system administrator
- Create a startup script as a workaround
Let’s get started with the guide.
1] Identify the Controlling Group Policy

Before making any changes, we will confirm whether a Group Policy is the culprit. The Resultant Set of Policy (RSOP) tool is like a final report that shows all policies applied to the device and their winning settings.
- Click Win + R to open the Run dialogue box, type rsop.msc, and hit Enter to open the tool and query policy settings.
- Navigate to the following location:
Computer Configuration > Windows Settings > Security Settings > Local Policies > Security Options
- Scroll down to find the policy called Network Security: LAN Manager authentication level, and see if the Security Setting column is not set as Not defined.
If it is not defined, you need to set it according to your organization’s requirements.
2] Get detailed GPO information
If RSOP confirms a policy is applied, the next step is to identify which specific GPO is enforcing it and who created it. We are going to use the gpresult command to get a highly detailed report, which also includes the name of the winning GPO.
- Open the Run dialogue box, type cmd, and hit Ctrl + Shift + Enter to open with admin rights.
- Execute the following command to generate an HTML report:
gpresult /H %USERPROFILE%\Desktop\gp_report.html
- Go to the desktop, open the gp_report.html file, and search for LanManCompatibility Level. Now, search for the “Winning GPO” name to know which policy is applying the setting.
We now have the name of the specific GPO that is causing the override. There are two instances.
- If you are not an admin, contact the system administrator and provide them with this information.
- If you are the administrator, locate and modify this GPO directly.
3] Check and configure Local Security Policy
There might be a Local Security Policy that’s overriding the simple registry edit. Therefore, in this solution, we will ensure that the local policy is correctly set and defined.
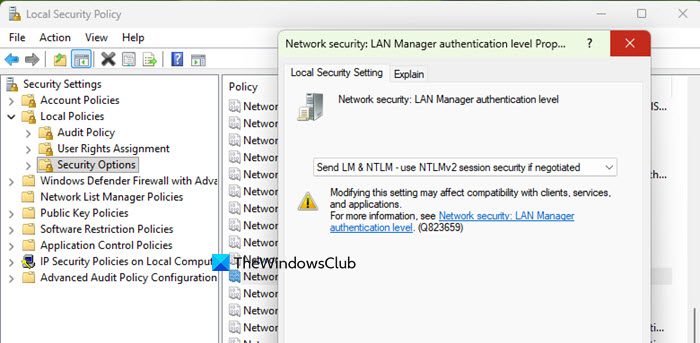
- Click Win + R to open the Run dialogue box, type secpol.msc, and hit Enter to open the Local Security Policy editor.
- Navigate to Security Settings > Local Policies > Security Options.
- Find and double-click the Network Security: LAN Manager Authentication Level, and select the desired level from the dropdown.
- Click Apply > OK.
This configures the setting at the correct local policy level. Restart the device, and check if the LncompatibilityLevel registry value now holds the desired setting.
4] Contact the system administrator
In a corporate environment, since we do not have admin access, the next step is to formally contact the system administrator or the IT help desk to request a policy change. Explain the specific failing business app or system, along with the reasons behind the request. They will examine the request and will either create an exception GPO for the specific computers or users affected or evaluate if the broader policy can be safely updated. If the request is approved and implemented, the new setting will be applied correctly and will persist without being overwritten.
5] Create a startup script as a workaround
If you have local admin rights but no control over the sporadic group policy or a conflicting app, then creating a startup script is the last resort to forcefully reapply the desired registry value.
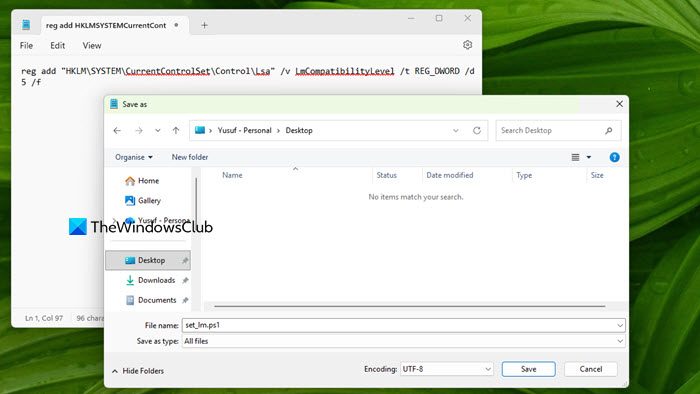
- Launch Notepad, and paste the following command:
reg add "HKLM\SYSTEM\CurrentControlSet\Control\Lsa" /v LmCompatibilityLevel /t REG_DWORD /d 5 /f
Note: Replace 5 with the desired level.
- Save the file to any lcation, let’s say Desktop, as set_lm.ps1, and ensure the file extension is .ps1. While saving, make sure that File type is set to All files.
- Next, launch the Run dialogue box, type gpedit.msc, and hit Enter to open the Local Group Policy editor.
- Navigate to Computer Configuration > Windows Settings> Scripts (Startup/ Shutdown).
- Double-click on Startup, select Add, and browse to select the .ps1 script. Click OK, and close the editor.
This script will run at every startup and set the registry value. However, this creates a tug-of-war with Group Policy, so it is advised to use it cautiously.
LmCompatibilityLevel value not changing on Windows Server
The LmCompatibilityLevel registry value in Windows Server is not being applied, even after editing the registry directly or via Group Policy. The changes always revert after a reboot or policy refresh, and new authentication rules do not take effect. If the LmCompatibilityLevel Value is not changing on Windows Server, execute the solutions mentioned below.
- Identify and modify the enforcing Group Policy
- Apply the setting via the secedit command
Let’s get started.
1] Identify and modify the enforcing Group Policy
First and foremost, we are going to find the central Group Policy that is forcing the setting to revert and change that policy directly.
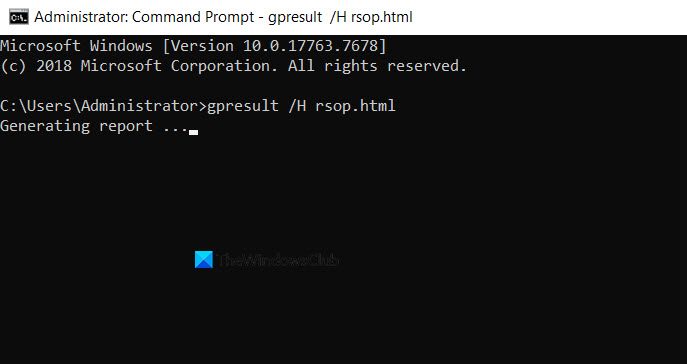
- On the affected server, open the Command Prompt as an administrator, and run gpresult /H rsop.html to generate a detailed Resultant Set of Policy report.
- Open the rsop.html, navigate to the Computer Configuration section, and browse to the following location.
Policies > Windows Settings > Security Settings > Local Policies > Security Options.
- There, look for Network Security: LAN Manager authentication level policy and see which GPO is supplying this value.
- Open the Group Policy Management Console on a domain controller or a management workstation, locate the GPO identified in the report, and edit it. Then, navigate to Computer Configuration> Policies> Windows Settings> Security Settings> Local Policies> Security Options.
- Now, double-click the Network Security: LAN Manager authentication level, configure the desired level, and hit OK.
- Navigate back to the affected server, run gpudate/force to apply the updated policy.
After the policy update, check the LmCompatibilityLevel registry value again. If it continues to revert, move on to the next solution.
2] Apply the setting via the secedit command
In this solution, we are going to use the secedit tool that works directly with the security database that Group Policy also uses. This changes the authoritative security policy at its source rather than modifying the temporary live registry.
- Open Command Prompt with admin rights, and execute the following command to create a folder:
cd /d %USERPROFILE%\Desktop
- Next, execute the following command to export the current policy to a text file:
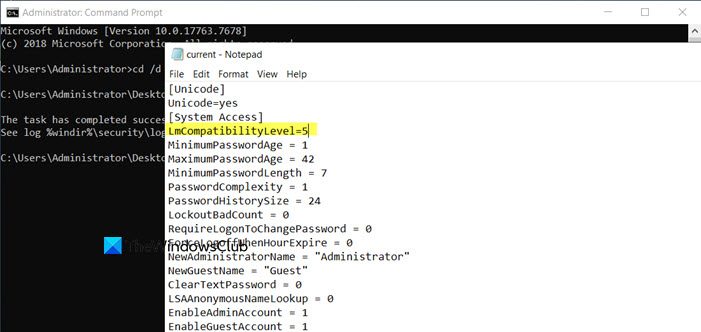
secedit /export /cfg current.txtThis creates a current.txt file on the desktop containing all the current security settings.
- Next, right-click the current.txt file and open it with Notepad. Look for a line that reads LmCompatibility Level = X under the System Access section.
- If the line exists, change the number to the desired level; however, if it does not exist, simply add a new line under the System Access section and type LmCompatibilityLevel=5 (write the desired value).
- In Notepad, save the file with the same name and in the same location.
- Navigate back to the elevated Command Prompt, and execute the following command to import changes back into the active security policy:
secedit /configure /db temp.sdb /cfg current.txt /log seclog.txt
- This command creates a temporary security database and applies the settings from the current.text file. The /log flag creates a log file to track the process.
- After the command completes, a seclog.txt file will be created on the desktop. A successful operation will typically show ‘Task Completed’ and ‘Operation completed successfully’ at the end of the log.
Wait a moment, then force a Group Policy update by running gpudate/ force in the Command Prompt, and check the LmCompatibilityLevel registry value again. Hopefully, the value should now reflect the configured setting.
That’s it!
Read: Windows machines fail to complete EAP-TLS authentication with ISE
What causes NTLM Authentication failure?
NTLM Authentication failures are commonly caused by incorrect policy settings, like LmCompatibilityLevel, which blocks weaker NTLM versions. Some other reasons are expired passwords, incorrect SPN configurations, or the service being explicitly disabled in favour of the more secure Kerberos protocol.
Read: How to Disable NTLM Authentication in Windows Domain
What is the default value of LmCompatibilityLevel in Windows 11?
The default value of LmCompatibilityLevel in Windows 11/10 is 3. This setting, ‘Send NTLMv2 response only,’ is part of the system default security configuration to enforce a more secure form of challenge-response authentication.
Also Read: Use Remote Desktop over LAN on Windows 11.