
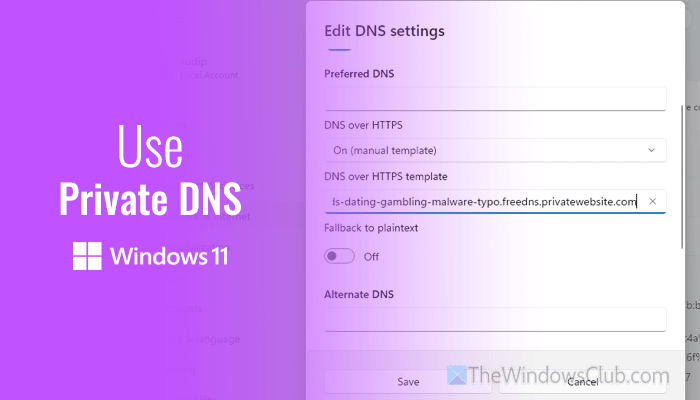
If you want to use Private DNS in Windows 11, this guide will help you set things up to meet your requirements and get the most benefits. Whether you want to use a free or paid Private DNS, here is everything you must know and do to get started with them.
What is Private DNS?
In simple terms, Private DNS helps you reroute your incoming and outgoing traffic from the default DNS of your internet service provider. By doing that, it lets you encrypt your connection and protect yourself from malicious websites, phishing websites, etc.
This feature is, nowadays, very common and widely used by almost any device user, including Windows, Linux, Android, iOS, etc. Whether you use Ethernet, Wi-Fi, or a mobile hotspot to connect to the internet on your computer, you can set things up as per your requirements and budget.
Benefits of using Private DNS
These are some of the most common benefits of using Private DNS:
- You can bypass your ISP’s restrictions even though it doesn’t work like a VPN.
- You will be using a secure network that you can set up only for yourself.
- Malicious, fake, phishing websites can be blocked.
- Trackers can be removed from your computer. However, it depends on how you set things up.
- Adult content can be removed so that you can freely hand over your computer to a toddler/kid without worrying about anything else.
- Your installed programs cannot replicate and send the DNS data to the owner.
- You will get a faster browsing experience while using a good Private DNS.
Difference between Public DNS and Private DNS
The main difference between Public DNS and Private DNS is the name itself. Having said that, Public DNS is for public use, and it cannot be set up as per your requirements. On the other hand, Private DNS is for private use only. In other words, you can set things up as per your requirements.
Traffic on Private DNS is much faster than Public DNS because it is an enclosed network that works like a private proxy or VPN. Another highlight of Private DNS is that you can block background trackers, but Public DNS lacks such a feature.
How to add and use Private DNS in Windows 11
Before getting started, you must opt for a Private DNS template that you can set up according to your needs. For your information, there are only a few Private DNS hosts that you can use, and ControlD and Adguard are some of them. Therefore, it is suggested that you visit their websites and set up the Private DNS you want to use.
Once you do that, you will come across a link something like this:
no-ads-dating-gambling-malware-typo.freedns.privatewebsite.com
For your information, you must copy the DNS-over-HTTPS/3 link, which looks something like the aforementioned link.
Once done, you can go through the following steps to set up Private DNS in Windows 11:
- Open the Windows Settings panel.
- Go to Network & internet and click on the type of internet you are using.
- Click the Edit button for DNS server assignment.
- Choose the Manual option.
- Toggle the IPv4 button to turn it ON.
- Select Manual Template from the DNS over HTTPS option.
- Paste the template you copied earlier.
- Click the Save button.
To learn more about these steps, continue reading.
To get started, press Win+I to open the Windows Settings panel first. Then, go to Network & internet and select the type of internet source you are using. If you use Wi-Fi, choose the Wi-Fi option. However, if you use Ethernet or USB tethering, choose the Ethernet option. Here you can find your internet source name. Click on the name and find the DNS server assignment option. Click on the respective Edit button.
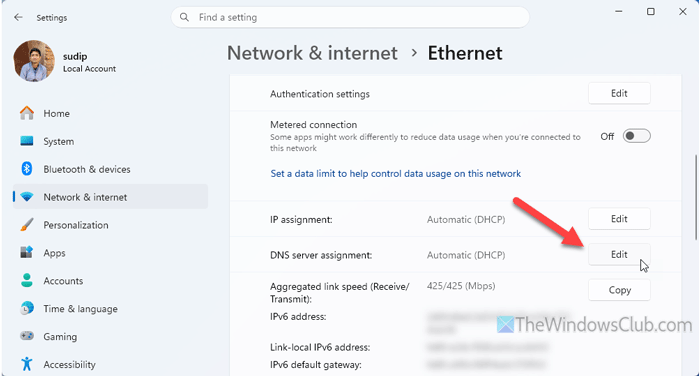
By default, the Automatic (DHCP) option will be enabled. Expand the drop-down menu and choose the Manual option.
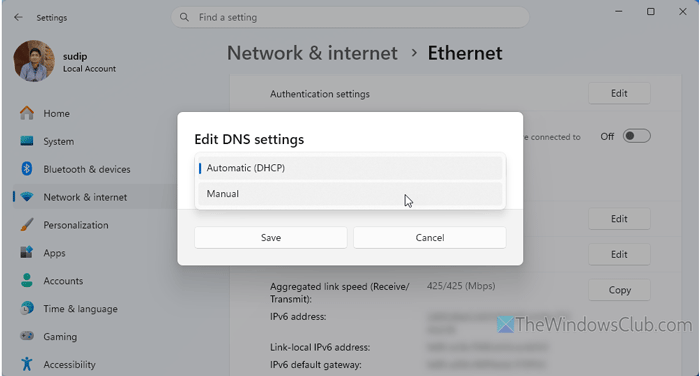
Once done, toggle the IPv4 option to turn it ON. Then, head to the Preferred DNS section, expand the DNS over HTTPS option, and choose the Manual template option.
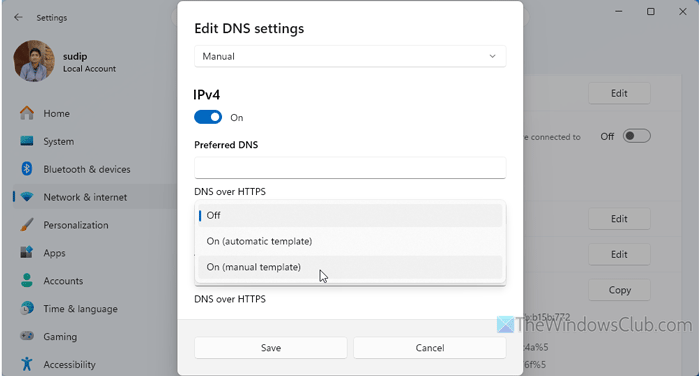
Next, paste the link you have copied earlier. Once done, click the Save button to apply the change.
If you want to remove the template, you can simply head to the corresponding setting as mentioned earlier and choose the Automatic option from the drop-down menu.
How to change Private DNS in Windows 11?
To change Private DNS in Windows 11, open the same Network & internet settings you opened earlier. From there, click on the Edit button of DNS server assignment and find the DNS over HTTPS box. Next, paste the new link and click the Save button to apply the new template.
What to do if Private DNS doesn’t work in Windows 11?
If you have gone through all the aforementioned steps correctly, it must be working. However, if it doesn’t work, these could be the reasons and solutions:
- Your Private DNS provider is down. Check the status of their servers.
- You are using a proxy or VPN. For your information, these two things do not go together. They are rather supplementary to each other.
- You are using a different internet source. You must set it up according to your internet source. If you have multiple connections, you must set it up accordingly.
- If you are using a Wi-Fi router provided by your ISP, this feature might be blocked by them. You must replace the router if possible.
- It might be blocked due to a glitch or bug in Windows. In that case, you can simply update your computer to get the job done.
Read: Cannot change Static IP address & DNS server on Windows 11
Is private DNS safe or not?
Private DNS is 100% safer than Public DNS. Because it offers more flexibility and advantages, it is recommended to use Private DNS over Public DNS.
Is private DNS better than VPN?
Private DNS and VPN are different in terms of background technology and workflow. VPN helps you mask your location by changing the IP address, but Private DNS provides a secure layer over your existing DNS.
Read: What is a DNS Leak and how to Stop DNS Leak.
