Most PC users are looking for ways to enhance their computer privacy. Dynamic IP addresses and private DNS servers are a great way to do that. But some PC users, for one reason or the other cannot change the Static IP address & DNS server on their Windows 11/10 device. In this post, we will outline a couple of ways affected users can resolve this issue.
Cannot change Static IP address or DNS server
Many privacy-concerned users understand why changing their IP address and DNS servers on Windows 11/10 operating systems is critical. It’s problematic when that’s not possible.
If you encounter this issue, you can try any of the methods below to change Static IP address & DNS server in Windows 11/10.
- Set fixed or static IP or DNS using Windows Settings
- Reset your IP address using CMD
- Set static IP address using PowerShell
- Change your DNS server using PowerShell
- Set DHCP IP assignment
- Use a VPN service.
Before you begin, clear the DNS cache, reset Winsock, and release TCP/IP.
1] Set fixed or static IP or DNS using Windows Settings
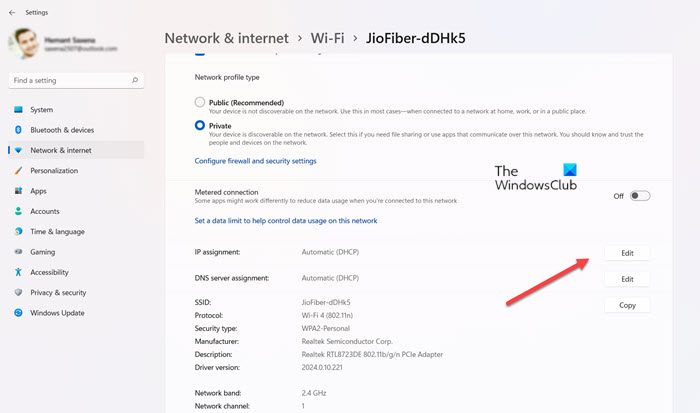
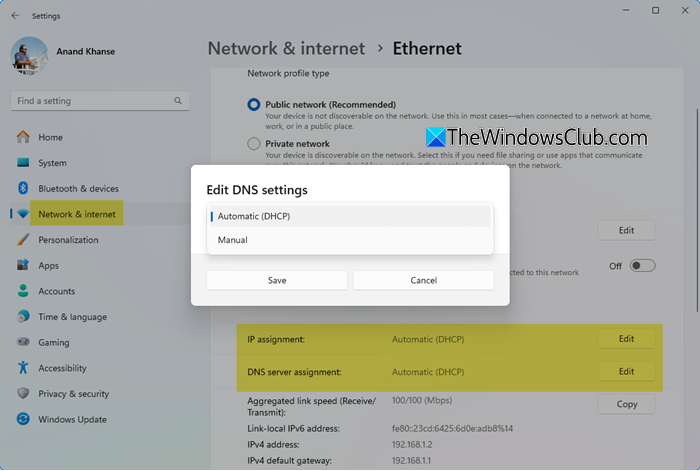
To set a Static IP Address or DNS Server in Windows 11, open Windows Settings > Network & Internet > Wi-Fi and locate your WiFi (or Ethernet) Network. Click open its Properties and you will see two settings:
- IP assignment
- DNS server assignment
Click on the Edit button against then and from the popup select Manual instead of Automatic, and then fill in the required details like IPv4, IPv6, etc.
Restart your computer.
2] Reset your IP address using CMD
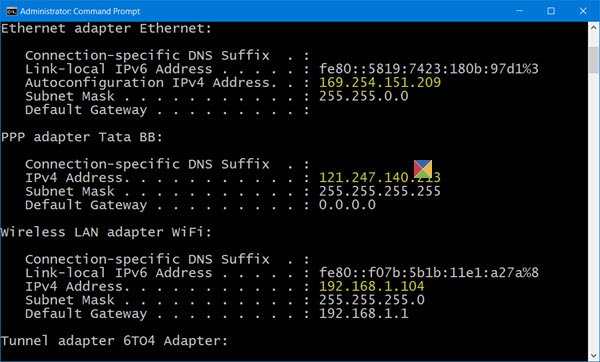
You can find out, reset, renew, configure, and change the IP address in order to use a static IP on your Windows computer.
3] Set static IP address using PowerShell
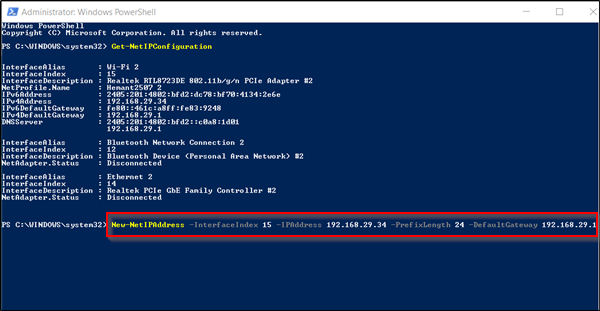
You can set a static IP address on your Windows device using PowerShell and other 3 methods.

4] Change your DNS server using PowerShell
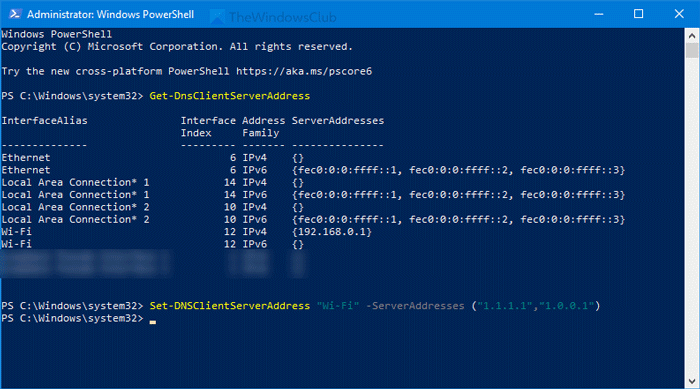
Instead of opening the Network Connections window, you can go through this step-by-step guide and change your DNS server on your Windows device using Command Prompt or PowerShell.
5] Set DHCP IP assignment

To set DHCP IP assignment on your Windows 11/10 device, do the following:
- Press the Windows key + I to open Settings.
- Tap or click Network & Internet.
- If you’re using Wi-Fi, on the left pane, select Wi-Fi > Manage known networks. Then, pick your network and click the Properties button.
- For Ethernet, on the left pane, select Ethernet and then your network.
- Scroll down to IP settings, click Edit under IP assignment.
- Select Automatic (DHCP).
- Click Save.
If you use automatic DHCP settings, it will be easier to configure TCP/IP settings on your Windows PC.
6] Use a VPN service
Last but not the least, if you wish to change your IP address and protect your DNS queries regularly, you can opt for a VPN service and easily configure a VPN connection on your Windows device. Connecting to a VPN IP address will hide your true IP and location and encrypt all data traffic to secure your network.
I hope you find this post helpful.
How to set a fixed or static DNS server in Windows 11?
To set a static or fixedDNS Server in Windows 11, open Windows Settings > Network & Internet > Wi-Fi and locate your WiFi (or Ethernet) Network. Click open its Properties and you will see DNS server assignment.
Click on the Edit button against it and from the popup select Manual instead of Automatic, and then fill in the required details like IPv4, IPv6, etc.
How do I fix DNS Server is unavailable in Windows?
If you see a Your DNS Server might be unavailable error on your Windows 11/10 computer, then flush the DNS cache, and renew the IP address (if needed). If that doesn’t work, then temporarily disable your antivirus tool or Windows Firewall, and see if your problem is gone. Disabling the Proxy and resetting the TCP/IP can also be helpful.
Read: How to change IP address without VPN in Windows
How do I fix unable to resolve DNS?
If you find that there is some issue with your DNS server, then you can resolve the DNS issue on a Windows 11/10 computer using some simple solutions. First, you should power-cycle your router, modem, and computer. If this doesn’t resolve your DNS issue, then flush the DNS cache and reset Winsock. Also, update your network drivers and turn on the Microsoft LLPD Protocol Driver by accessing the Wi-Fi Properties.