Configuring TCP/IP settings in Windows is a fundamental skill for anyone looking to troubleshoot network issues. It could come in handy when you are trying to set up a home server or want more control over your internet connection. However, there are many who aren’t aware of how to configure TCP/IP settings in Windows 11/10.
If the same goes for you, then this post will walk you through a step-by-step process to help you configure TCP/IP settings.
How to configure TCP/IP settings in Windows 11/10
There are two ways to configure TPC/IP settings in a Windows PC
- Automatic configuration (DHCP)
- Manual configuration (Static IP)
1] Automatic configuration (DHCP)
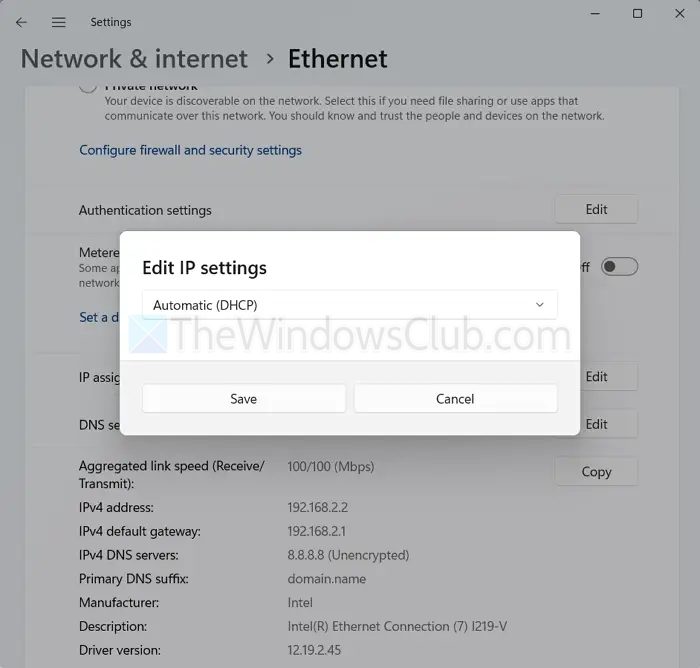
Automatic configuration or DHCP (Dynamic Host Configuration Protocol) is the easiest way to configure TCP/IP settings, as it gets its IP address and other network settings from a DHCP server (your router).
- Press Windows Key + I to open Settings.
- Go to Network & internet.
- Select your network – WiFi or Ethernet connection.
- Look for the IP Assignment option and click on the Edit button.
- From the dropdown menu, select Automatic (DHCP) and click Save.
That’s it. This setup will automatically fetch details like IP address, subnet mask, gateway, and DNS settings.
Read: How to change DNS settings in Windows
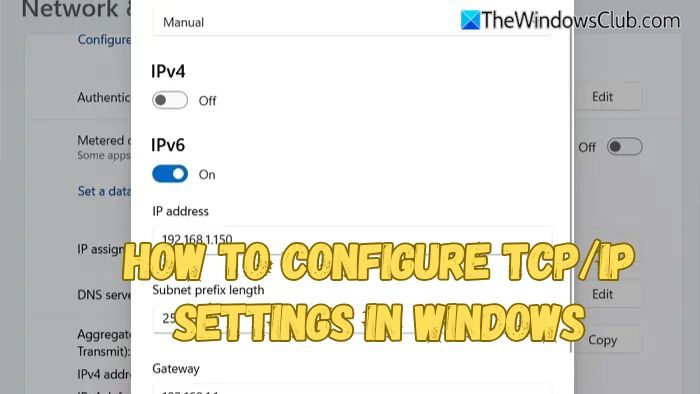
2] Manual configuration (Static IP)
Apart from the automatic method, you might want to go for manual configuration if you want your device to have the same IP address instead of it changing randomly with automatic (DHCP) settings.
Manual configuration is useful for port forwarding (like if you are hosting a server), for network devices like printers, etc.
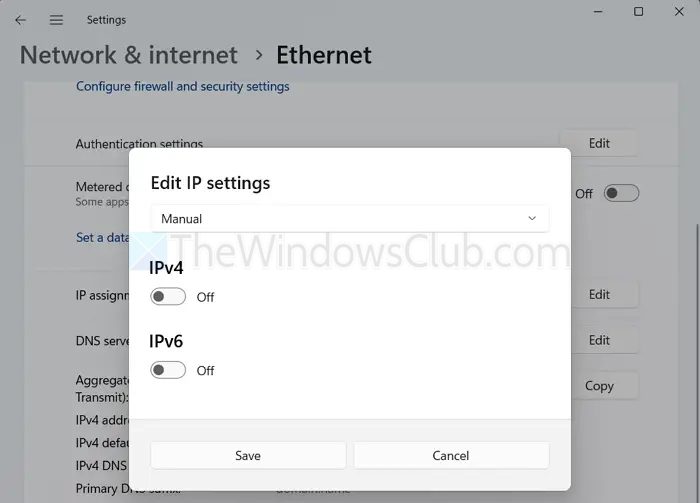
- From Windows settings, go to Network & internet.
- Select your network and Edit IP Assignment.
- From the dropdown menu, select Manual.
- Then turn on either IPv4 or IPv6, depending on your network requirements.
- Next, enter details like IP addresses, subnet prefix length, gateway, preferred DNS, and alternate DNS in their respective fields.

- Finally, save your settings.
However, you might wonder, How do I get the IP address details for manual configuration?
For this, you can use your current DHCP settings as a reference. For example, open terminal and type ipconfig /all. Then, look for details like IPv4 Address, Subnet Mask, Default Gateway, and DNS Servers, and make a note of that.
Note: You can use the same values for everything except the IP address—just change it slightly (e.g., use 192.168.1.150 instead of .105) to avoid conflicts.
Additionally, the same information can be accessed by logging into your router’s dashboard. Or, alternatively, you can use third-party DNS services like Google DNS, Cloudflare DNS, or OpenDNS.
So, those were two straightforward methods to configure TCP/IP settings in Windows. Depending on your needs, you will need to choose one of the methods. For example, go for automatic if you want a no-brain setup, or go for manual if you want a fixed IP for port forwarding, servers, or custom DNS.
Read: Troubleshoot TCP/IP connectivity & configuration issues in Windows.
What should I do if I manually assign an IP address and there is a conflict with another device?
If you manually assign an IP address that is already in use by another device on the network, you will experience IP conflicts, which can cause connectivity issues. To resolve this:
Choose an IP address outside the DHCP range set by your router (you can check this in your router’s settings) or, configure your router to reserve the IP address specifically for your device (this is called a DHCP reservation).
Can I switch between DHCP and Static IP without restarting my computer?
Yes, you can switch between DHCP (automatic) and Static IP (manual) without restarting your computer. However, after changing the setting, it’s a good idea to:
Disable and re-enable the network adapter, or Run ipconfig /release and ipconfig /renew in Command Prompt for DHCP, or disconnect and reconnect to the network for a manual IP. This ensures that the new settings are applied immediately without a full reboot.