To promote your server as a DNS Server, you are required to configure DNS Forward and Reverse Lookup Zones. The Forward Lookup Zone will resolve hostnames to IP addresses, whereas the Reverse Lookup Zone will resolve IP addresses to hostnames. In this post, we are going to see how you can configure both on a DNS Server with a step-by-step guide.

Configure DNS Forward and Reverse Lookup Zones on Windows Server
A Forward Lookup Zone is like a phone book for computers, converting domain names into IP addresses. When you type a website name like “example.com,” the zone helps your device find the server hosting it. This process uses records called A (Address) records to make the connection happen. It’s essential for browsing the web, as computers rely on IP addresses to communicate effectively.
On the other hand, Reverse Lookup Zone is like flipping through a phone book to find a name using a phone number. Instead of converting domain names to IP addresses, IP addresses are turned back into domain names. This process uses PTR (Pointer) records to identify which hostname is linked to a specific IP. It’s useful for tracing IPs or ensuring devices on a network are properly recognized.
Before we create a Forward or Reverse Lookup Zone, you need to check a few things. First of all, you need to go through your organization’s requirements first. Every organization has its own set of protocols that need to be followed, and as you go forward in this tutorial, you will stumble upon a lot of options that need to adhere to their demands, be it the naming convention or IP selection. Once you have the idea, you can go ahead and create the zones.
If you want to configure DNS Forward and Reverse Lookup Zones on Windows Server, go to their respective guides.
Configure Forward Lookup Zone

Let us first go ahead and configure the Forward Lookup Zone. You can do that using the steps mentioned below.
- Launch the Server Manager and click on Tools > DNS.
- Right-click on your server and select New Zone.
- Once the wizard appears, click on Next.
- Select the Primary zone and click on Next.
- You need to check the Forward Lookup Zone option and click on Next.
- Now, enter a Zone name, and click on Next.
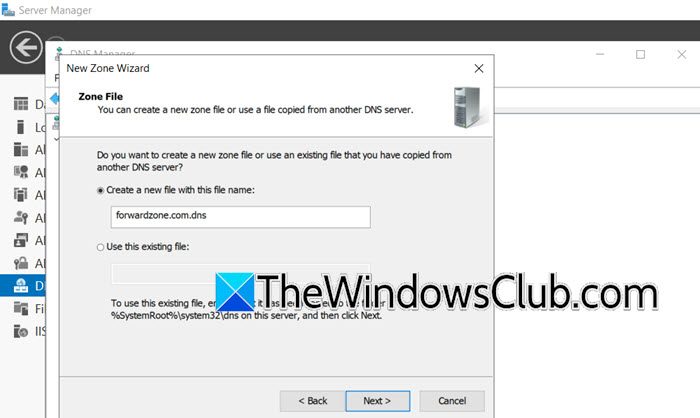
- Since we are setting things up, we need to check Create a new file with this file name option, enter a name, and click on Next. Give the file a “.dns” extension.
- On the Dynamic updates page, select an option and click Next.
- Now, go through the summary and click on Finish.
This will create a forward zone. To check it, you can expand Forward Lookup Zones, and you will see the newly created zone there.
Configure Reverse Lookup Zone
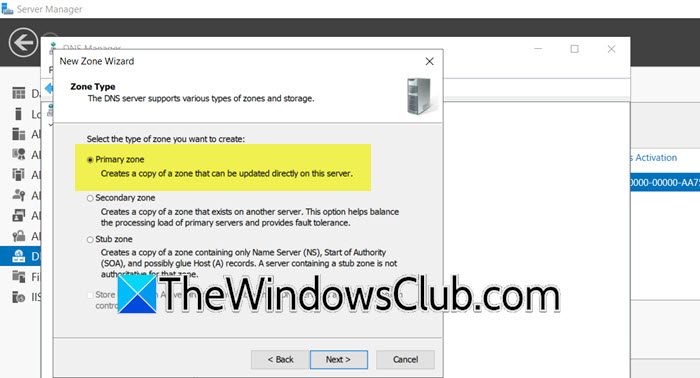
Before creating a Reverse Lookup Zone, you need to check what kind of zone it is going to be. Even though we have already created a Primary Zone earlier, this doesn’t mean that we can not create another one. Both Forward Lookup Zones and Reverse Lookup Zones can be configured as Primary Zones on the same DNS server. A primary zone is the authoritative source for its DNS records, allowing you to create, modify, and manage entries directly. Each zone operates independently but complements the other, ensuring seamless hostname-to-IP and IP-to-hostname resolutions.
A lot of users tend to make the Reverse Lookup Zone secondary, as they are not aware of the prospect of zones. Once that confusion is out of the way, let us go ahead and create a Reverse Lookup Zone.
- In the Server Manager, open the DNS wizard.
- Right-click on your server name and select New Zone.
- Now, you need to click on Next to continue.
- Select the Primary zone (if there is no compliance), and click on Next.
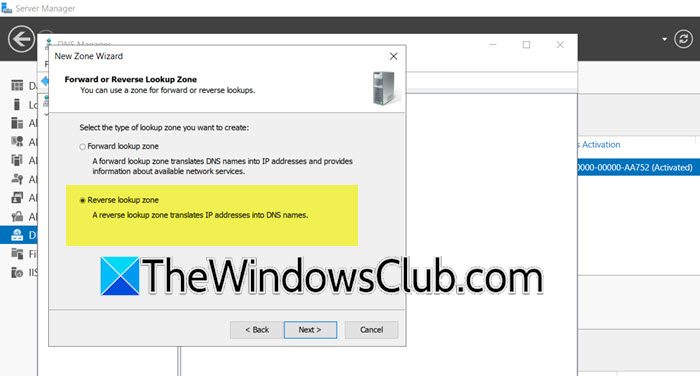
- Then, you have to select the Reverse lookup zone and click on Next.
- Choose either IPv4 Reverse Lookup Zone or IPv6 Reverse Lookup Zone. If your network uses both IPv4 and IPv6 protocols, you need to create both.
- You need to populate either of the two options mentioned below and click on Next.
- Network ID: The part of the IP address that identifies the network segment, used to define the range of addresses in the reverse lookup zone.
- Reverse lookup zone name: The DNS name format for the reverse zone, typically written in reverse IP order
- Enter the zone name and click on Next.
- Select the dynamic update schedule and click Next.
- Finally, finish the setup.
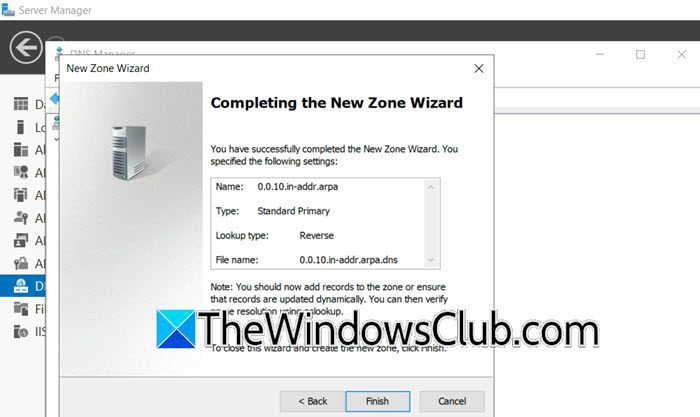
Check the newly created zone below the Reverse Lookup Zones directory.
That’s it!
Read: How to change DNS server with Command Prompt or PowerShell
How to configure DNS forward and reverse lookup zone?
If you want to configure DNS forward and reverse lookup zones, you first need to configure DNS on your server. Once you are done with that, follow the steps mentioned in this post to configure Forward and Reverse Lookup Zones. Hopefully, you will be able to do it with ease.
Read: Windows client does not register in DNS.
How to do Reverse DNS lookup on Windows?
To do a reverse DNS lookup on your Windows computer, we can use nslookup. Open the Command Prompt, and then run nslookup <ip-address>. Make sure to replace the placeholder <ip-address> with the actual IP. The command will return the hostname linked to that IP address.
Also Read: Enable and Configure DNS Aging & Scavenging in Windows Server.