Domain Name System Security Extensions or DNSSEC is a collection of extensions to secure the DNS protocol. It is one of the methods to protect the DNS Server, along with DNS Cache Locking and DNS Socket Pool. It uses cryptographic signatures to validate DNS responses in order to protect your system. In this post, we are going to see how you can configure DNSSEC on Windows Server
Configure DNSSEC on Windows Server
DNSSEC enhances the security of DNS by using cryptographic signatures to validate DNS responses, ensuring their authenticity and integrity. It protects against common threats like DNS spoofing and cache tampering, making the DNS infrastructure more reliable. By signing DNS zones, DNSSEC adds a layer of validation without altering the basic query-response mechanism. This ensures that DNS data remains secure during transmission, providing a trustworthy environment for users and organizations. Since our primary goal is to secure your DNS Server, we are going to configure not just DNSSEC, but also DNS Socket Pool and DNS Cache Locking.
To configure DNSSEC, DNS Socket Pool, and DNS Cache Locking, you can follow the steps mentioned below.
- Configure DNSSEC
- Configure Group Policy
- DNS Socket Pool
- DNS Cache Locking
Let us talk about them in detail.
1] Configure DNSSEC

Let us first start by setting up DNSSEC in our domain controller. To do so, you need to follow the steps mentioned below.
- Open the Server Manager.
- Then, go to Tools > DNS.
- Expand the server, then Forward Lookup Zone, right-click on the domain controller, and select DNSSEC > Sign the zone.
- Once the Zone signing wizard appears, click on Next.
- Select Customize zone signing parameters and click on Next.
- If you are on the Key Master window, tick The DNS server CLOUD-SERVER is selected as the Key Master, and click on Next.
- When you are on the Key Signing Key (KSK) interface, click on Add.
- Go through the options, and you need to fill in all the fields correctly. You need to fill this out according to your organization’s requirements and then add the key.
- Once added, click on Next.
- After you reach the Zone Signing Key (ZSK) option, click on Add, fill in the form, and save. Click on Next.
- On the Next Secure (NSEC) screen, fill in the details. NSEC (Next Secure) is a DNSSEC record used to prove the non-existence of a domain name by providing the names that come before and after it in the DNS zone, ensuring the response is authenticated and tamper-proof.
- When you are on the TA screen, tick Enable the distribution of trust anchors for this zone check and Enable automatic update of trust anchors on key rollover checkboxes. Click on Next.
- On the Signing and Polling Parameters screen, enter the DS details, and click on Next.
- Finally, go through the summary and click on Next.
- Once you get the successful message, click on Finish.

After configuring the zone, you need to go to Trust point > ae > domain name in the DNS Manager to confirm.
2] Configure Group Policy
After configuring the zone, we need to make some changes to our domain policy using the Group Policy Management utility. To do so, follow the steps mentioned below.
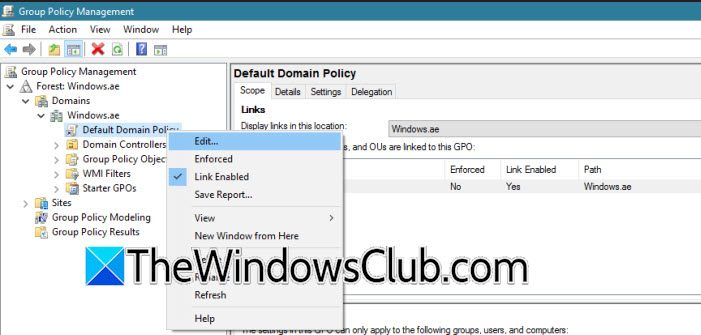
- Open the Group Policy Management program.
- Now, you need to go to Forest: Windows.ae > Domains > Windows.ae > right-click on Default Domain Policy, and select Edit.
- Navigate to Computer Configuration > Policies > Windows Settings > click on Name Resolution Policy in the Group Policy Management Editor.
- In the right pane, under Create Rules, enter Windows.ae in the Suffix box to apply the rule to the namespace suffix.
- Check both Enable DNSSEC in this rule and Require DNS clients to validate name and address data boxes, then click Create to finalize the rule.
That’s how you can configure DNSSEC. However, our job is not done. To secure our server, we should configure the DNS Socket Pool and DNS Cache Locking
3] DNS Socket Pool
DNS Socket Pool enhances DNS security by making the source ports random for outgoing queries, making it harder for attackers to predict and exploit transactions. You need to open PowerShell as an admin and run the following command.
Get-DNSServer
OR
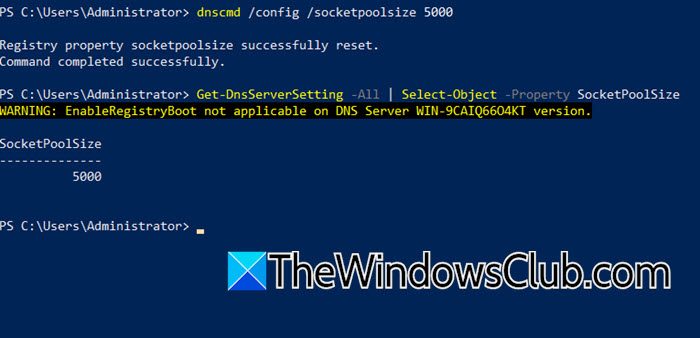
Get-DnsServerSetting -All | Select-Object -Property SocketPoolSize
You need to check SocketPoolSize to know the current size of the pool.
Our goal is to increase the size of the socket; the larger the value, the better the protection. To do so, you need to run the following command.
dnscmd /config /socketpoolsize 5000
Note: The value can only be between 0 – 10000.
Restart your DNS Server, and you will be good to go.
4] DNS Cache Locking
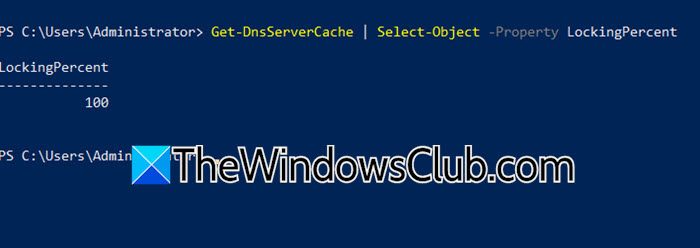
DNS locking prevents cached DNS records from being overwritten during their TTL, ensuring data integrity and protection against cache poisoning. We need to run the following command to check the value.
Get-DnsServerCache | Select-Object -Property LockingPercent
It should be 100; if it’s not, run the command mentioned below to set it to 100.
Set-DnsServerCache –LockingPercent 100
If you take these measures, your DNS Server will be secure.
Read: How to change DNS server with Command Prompt or PowerShell
Does Windows Server support DNSSEC?
Yes, Windows Server supports DNSSEC and allows you to configure it to secure DNS zones. It uses digital signatures to validate DNS responses and prevent attacks like spoofing. You can enable DNSSEC through the DNS Manager or PowerShell commands.
Read: Enable and Configure DNS Aging & Scavenging in Windows Server
How do I configure DNS for Windows Server?
To configure DNS on Windows Server, we need to install the DNS Server Role first. Once done, we need to assign a static IP address and configure the DNS entry. We recommend you check our guide on how to install and configure DNS on Windows Server.
Also Read: Change DNS settings in Windows 11 easily.