
There is a plethora of AI tools at the disposal of a developer, but Cursor AI is where the magic happens. In this tutorial, we will show you how to install and use the Cursor AI Code Editor on Windows, though most steps are the same regardless of your platform.
How to install and use Cursor AI Code Editor
Cursor is a free, open‑source code editor based on Visual Studio Code. It integrates large language models directly into your workflow, giving you AI‑powered autocomplete, inline code generation, a built‑in chat assistant, and the ability to refactor or debug code with natural language commands. If you already use VS Code, you’ll feel right at home.
If you want to install and use the Cursor AI Code Editor, follow the steps mentioned below.
- Match the system requirements
- Download and install
- Set up Cursor
- Use Cursor AI features
Let us talk about them in detail.
1] Match the system requirements
Before proceeding with the installation, ensure your system meets the following configuration requirements.
- OS: Windows 11/Windows 10 (version 2004 or later)
- Memory: 4 GB RAM (8 GB recommended)
- Storage: 200 MB free disk space (plus space for projects)
You also need an Internet connection for AI features.
2] Download and install

To download the Code Editor, go to cursor.com and click Download for Windows. Once downloaded, run CursorSetup.exe. Accept the default install location or choose your own, then click Install. Finally, launch Cursor.
3] Set up Cursor
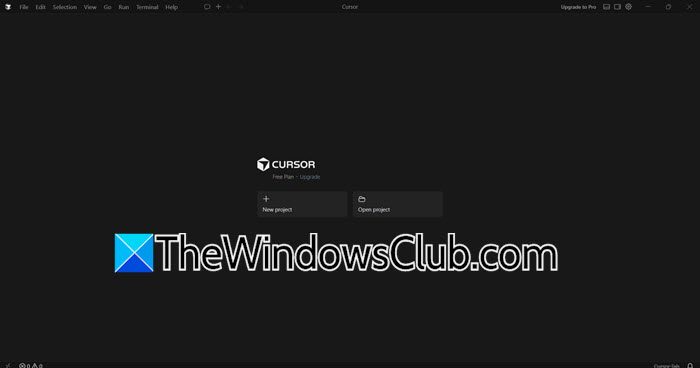
Since this is our first time using Cursor, it’s crucial to set it up correctly. You can sign in to your account; it is optional but recommended. To do so, click the bottom-left avatar and use GitHub or Google to sync settings and unlock the free AI tier.
You can even Import VS Code settings. Cursor will ask if you want to bring over your extensions, themes, and keybindings; choose Yes for a seamless transition.
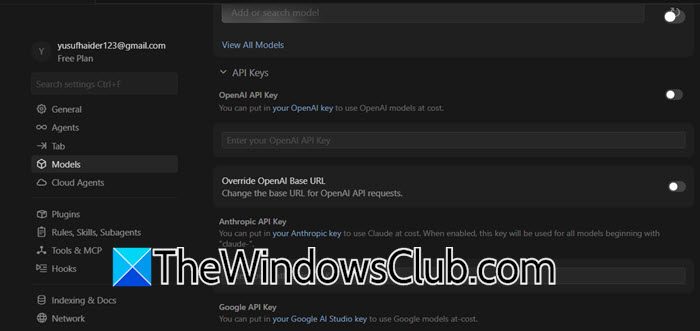
Cursor uses cloud‑based AI models by default. If you have your own API key (for example, from OpenAI), you can also use it by following the steps below.
- Click on the Gear icon in the top-right corner and then click on Settings.
- Navigate to the Models tab.
- Expand the API Keys section.
- Toggle on your provider (OpenAI, Google, etc.).
- Paste your API key and click Verify.
For most users, the built‑in free tier (with a limited number of monthly AI requests) works perfectly well to start.
4] Use Cursor AI features
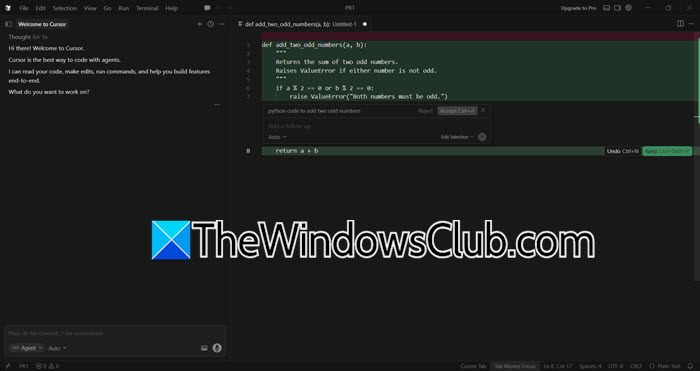
Now that we have an AI Code Editor at our disposal, it is crucial to learn some of its features. We have listed some below. Go through them to start using Cursor.
- AI Chat (Ctrl + L): Open the chat panel to ask questions about code, get explanations, or troubleshoot errors. Highlight any piece of code, and the AI will see it. The best part, no copy‑pasting is needed.
- Inline Code Generation (Ctrl + K): Place your cursor where you want code, or select existing code, press Ctrl+K, and describe what you need in plain English. Cursor writes or rewrites the code instantly.
- Smart Autocomplete: As you type, Cursor suggests entire lines or blocks. Press Tab to accept. The suggestions adapt to your codebase, comments, and recent edits. This post will help you if Cursor Autocomplete or Code Suggestions are not working.
- Codebase Understanding: Cursor indexes your project files. Ask the chat, “Where is the login function?” or “What does this module do?” and it will answer using your actual code.
To get the most out of Cursor, use comments to guide the AI, write a detailed comment, then hit Ctrl+K to turn it into working code.
You can also leverage the integrated terminal: start a line with # followed by a question, and the AI will help with shell commands or scripts.
If you ever need to tweak the AI behavior, head to File > Preferences > Settings and search for “cursor” to adjust autocomplete frequency or switch AI models. These small habits transform Cursor from a simple editor into a true pair‑programming partner.
Hopefully, with the help of this guide, you will be able to use Cursor to make your programming journey a bit more efficient.
Read: Claude Code vs OpenAI Codex: Which AI Coding Assistant is better
How to use AI in Cursor editor?
Press Ctrl+K to generate or edit code inline. You need to just describe what you need. Use Ctrl+L to open the AI chat for questions, explanations, or debugging; highlight code to give the AI context. You’ll also get smart autocomplete suggestions as you type, hit Tab to accept.
Read: How to run Claude Code Locally for free on PC
Is Cursor AI code editor free?
Yes, Cursor offers a generous free tier that includes AI completions, chat, and inline generation with a monthly limit on advanced model usage. For higher limits and team features, paid plans are available, but the free version is fully functional for most developers.
