
If you want a professional email address like [email protected], you can set up Zoho Mail with your custom domain. Zoho Mail offers secure, ad-free email hosting for businesses and individuals. In this guide, we will show you how to set up Zoho Mail with your domain step by step, on a PC.
Is Zoho domain mail free?
Zoho previously offered a Free plan that was visible in the pricing section. While the free plan option is no longer prominently listed in the UI, it is still available when signing up directly from the landing page. Zoho has indicated changes to its free plan availability in the future, but no official timeline has been announced. If you wish to use the free plan, check availability during sign-up.
How to set up Zoho Mail with domain
To set up Zoho Mail with a domain for a professional email address like [email protected], follow these steps:
- Sign up for Zoho Mail
- Add your domain
- Verify domain ownership
- Add Users and Groups
- Configure email delivery
- Migrate existing emails
- Access Zoho Mail
Before you start setting up Zoho Mail with your domain, make sure you have the following:
- A registered domain name (purchased from GoDaddy, Cloudflare, BigRock, etc.)
- Access to your domain’s DNS management panel
- Stable internet connection on your Windows 11/10 PC
Let’s go through each step in detail.
1] Sign up for Zoho Mail
Open your web browser and visit the official Zoho Mail website using this link. Click on the Sign Up button.
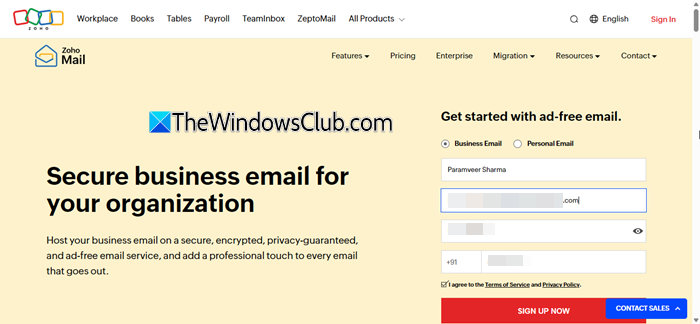
Scroll down and choose a suitable plan based on your requirements. Enter your name, contact email (for notification purposes), a secure password, and mobile number.
Agree to the terms and conditions and then click SIGN UP NOW. Complete the verification process and finish account registration.
2] Add your domain
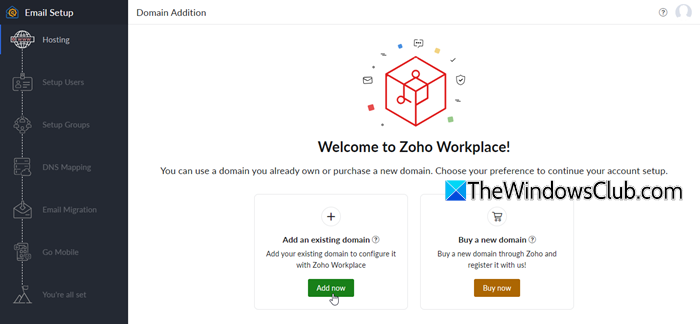
Next, you’ll be taken to the Zoho Mail hosting page. You can use a domain you already own or purchase a new domain. Choose your preference to continue your account setup.
For example, click Add now to use an existing domain.
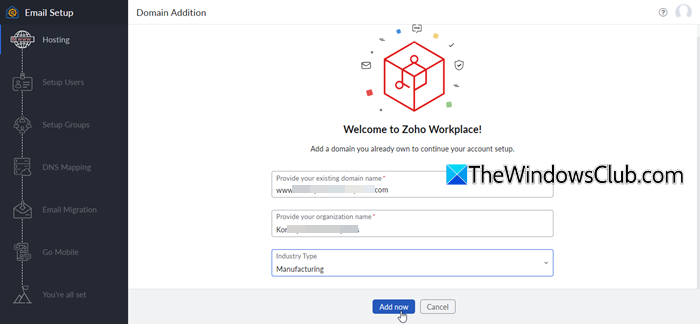
On the next screen, enter your domain name, organization name, and select the Industry Type. Click the Add now button.
If you selected a paid plan during sign-up, Zoho will prompt you to complete the purchase before proceeding with domain verification. In that case, click Proceed to payment, complete the transaction, and then continue with the domain setup process.
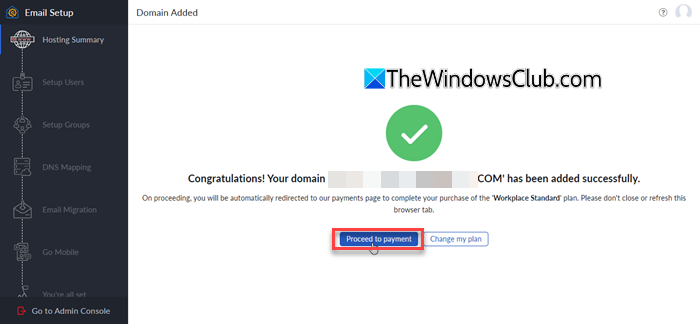
3] Verify domain ownership
After adding your domain, you must verify that you own it. Zoho allows multiple verification methods, but the most common and recommended option is TXT record verification.
In the Zoho Mail Admin Console, select the TXT verification method. Copy the TXT record value provided by Zoho.
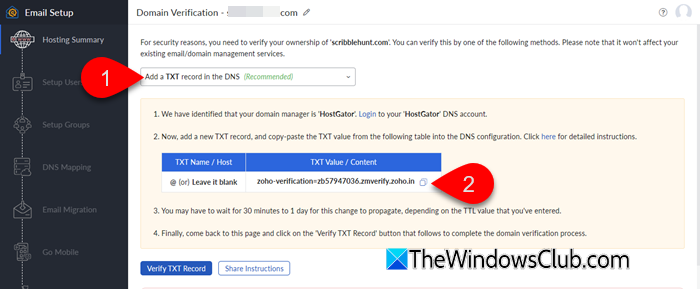
Next, open a new tab and log in to your domain registrar account.
Open the DNS Management or Advanced DNS section. Add a new TXT record and paste the value provided by Zoho. Save the changes.
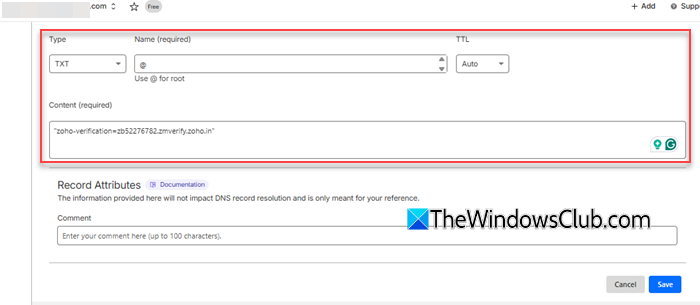
After adding the TXT record, wait for DNS propagation. This may take a few minutes, but in some cases, it can take up to 24 hours, depending on the TTL (Time To Live) value configured for the DNS record.
Once the record is active, go back to your Zoho domain verification page and click Verify TXT Record.
4] Add Users and Groups
Once done, create your super admin email address, then start adding users to your organization.
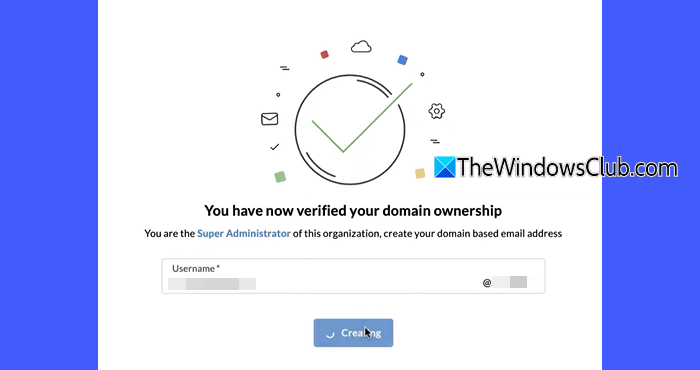
Enter the user’s first name, last name, desired email address, and password. Click Add to finish.
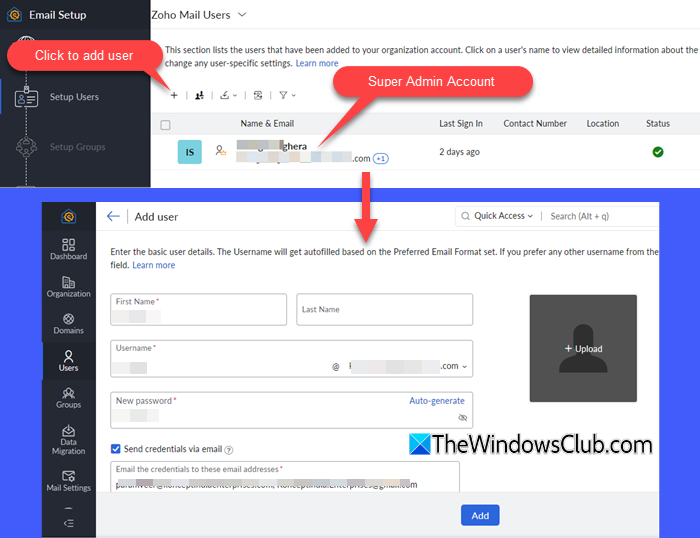
Repeat these steps to create additional email accounts as needed. You can create up to 5 user mailboxes (including the super admin) under the free plan.
After adding the users, set up group email addresses to distribute common emails to a group of users. Click Proceed To Setup Groups.
Enter the group name, email address, and other details, then click Proceed.
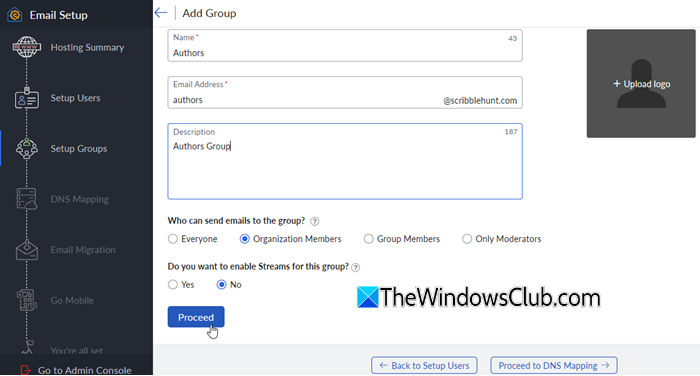
Next, add the members who should receive emails from this group. Click Create to finish.
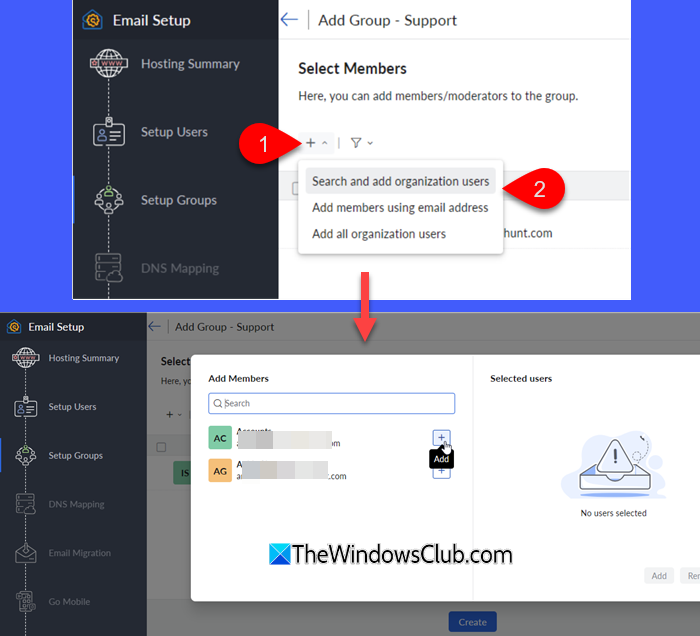
5] Configure email delivery
After creating users and groups, you must configure DNS records to ensure emails are delivered correctly. This involves adding MX, SPF, and DKIM records in your domain’s DNS settings.
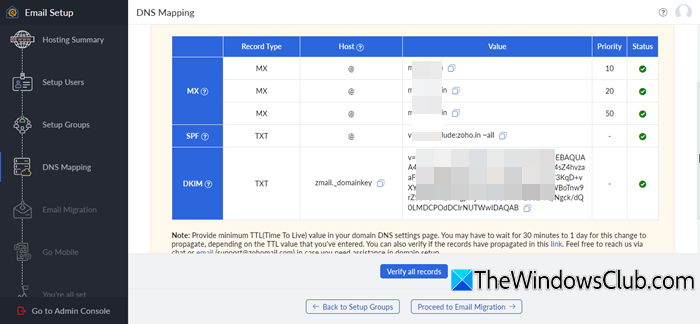
- Add MX records (Mail Exchange): MX records tell the internet where to deliver emails sent to your domain. Log in to your domain registrar. Open the DNS Management section. Delete any existing MX records (if your domain was previously connected to another email provider). Add the three MX records, enter the correct Priority values, and save the changes.
- Add SPF record: SPF (Sender Policy Framework) helps prevent email spoofing and improves deliverability. In your DNS settings, add a new TXT record. Enter the hostname and paste the SPF value provided by Zoho. Save the record.
- Add DKIM: DKIM (DomainKeys Identified Mail) adds a digital signature to your outgoing emails. Add a new TXT record in your DNS panel. Enter the hostname and paste the full DKIM value provided by Zoho. Save the record.
After adding the records, return to the Zoho Mail DNS Mapping page and click Verify all records. DNS changes may take some time to propagate, depending on your TTL settings.
If everything is configured correctly, the status column will show a green check mark.
Read: How to Automatically Forward Email in Outlook.
6] Migrate existing emails
If you are switching from another email provider, Zoho Mail allows you to migrate your existing emails to avoid losing important data.
Click Proceed to Email Migration. Select your previous email provider (such as G Suite, Office 365, or other IMAP/POP services). Enter the required server details. Provide the login credentials of the old email account.
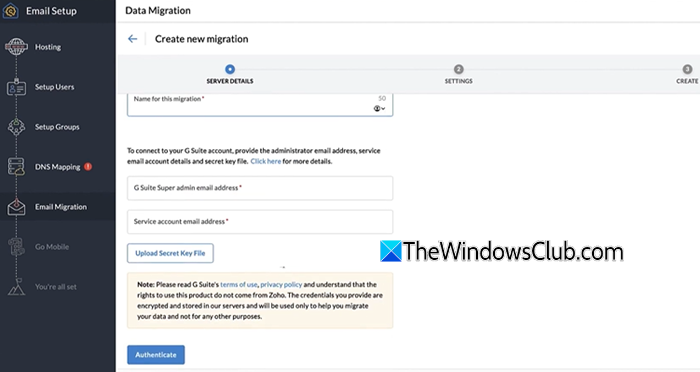
Choose the users whose mailboxes you want to migrate and start the migration process.
Depending on the mailbox size, the process may take several minutes to several hours. You can monitor the migration status from the Admin Console.
Read: How to forward Zoho emails to Gmail even on Zoho free accounts.
7] Access Zoho Mail
After completing the setup process, you can access your Zoho Mail account through the web or mobile app.
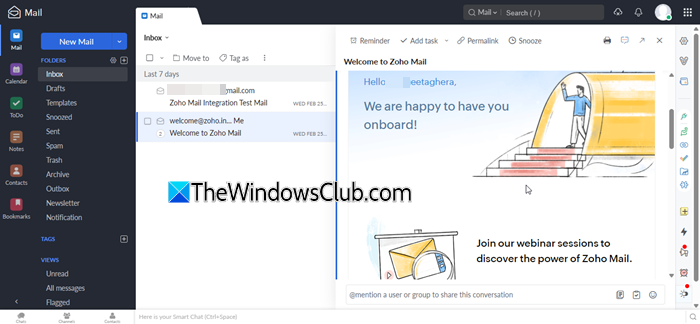
Open your browser and sign in to Zoho Mail using your custom domain email address and password. You can also download the Zoho Mail mobile app from the Google Play Store or Apple App Store and sign in with the same credentials to manage your emails on the go.
Your domain-based email is now ready to use.
Similar: Create custom Email ID with domain name with Zoho Mail, free
Can I use Zoho Mail with my domain name?
Yes, you can use Zoho Mail with your domain name. Zoho allows you to host custom domain email addresses, such as [email protected], by verifying domain ownership and updating DNS records. Once configured, you can send and receive emails using your domain through Zoho’s web interface or mobile app.
Also read: ManageEngine OpManager Plus from Zoho demonstrates how modern monitoring software can help address common challenges in Windows service monitoring.
