
This post shows how to set up a Vertical Taskbar in Windows 11 using the built-in options. Starting with Windows 11 version 25H2 (build 26300.8493), we can now move the Taskbar to any edge of the screen (Left, Bottom (default), Right, or Top) without any third-party tools. We will show you how to do it using Windows Settings, Registry or a free tool called StartAllBack.
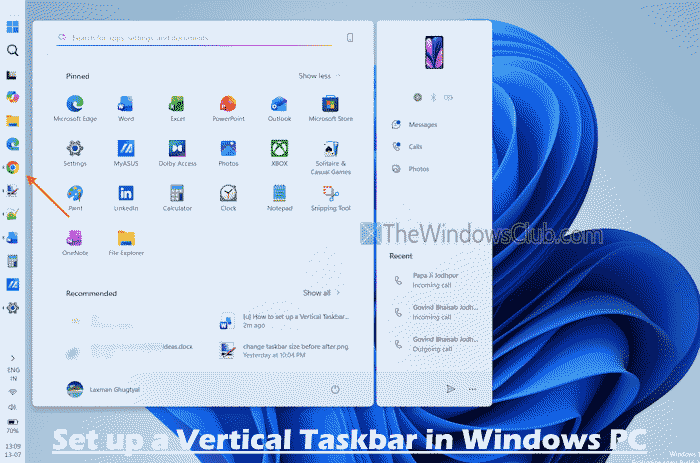
How to set a Vertical Taskbar in Windows 11
There are two native ways to move the Taskbar to the top or set up a vertical taskbar in Windows 11:
- Change the Taskbar position using the Settings app
- Change the Taskbar position using the Registry Editor.
Let’s check both options.
1] Change the Taskbar position using the Settings app
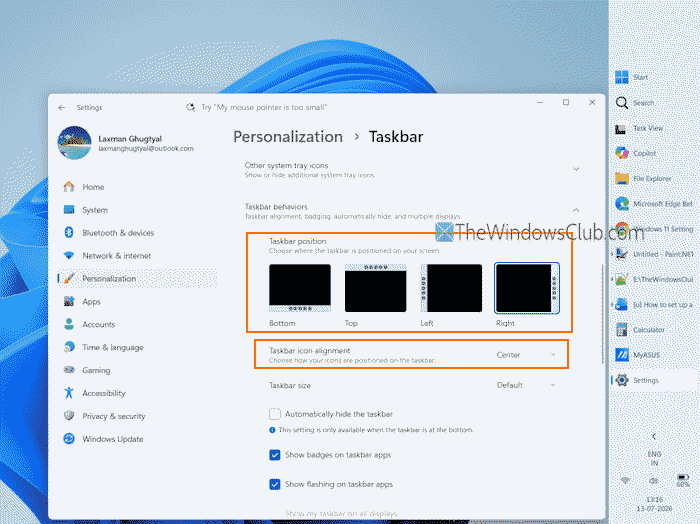
The steps to change the Taskbar position using the Settings app in Windows 11 are as follows:
- Open the Windows 11 Settings app using the Win+I shortcut key
- Select the Personalization category
- Open the Taskbar page
- Scroll down to the Taskbar behaviors section and expand it
- You will see a new Taskbar position menu with Bottom, Top, Left, and Right options. For each option, a thumbnail preview is also given
- Select a taskbar position, and the Taskbar will move to that position on the screen immediately.
You can also set the Taskbar icon alignment for each Taskbar position. For example, when the Taskbar is positioned to the left or right, Taskbar icon alignment can be set to Top or Center. And when the Taskbar is moved to the top or bottom, the Taskbar icon alignment can be set to Center or Left.
Related: How to change Taskbar size on Windows PC
2] Change the Taskbar position using the Registry Editor
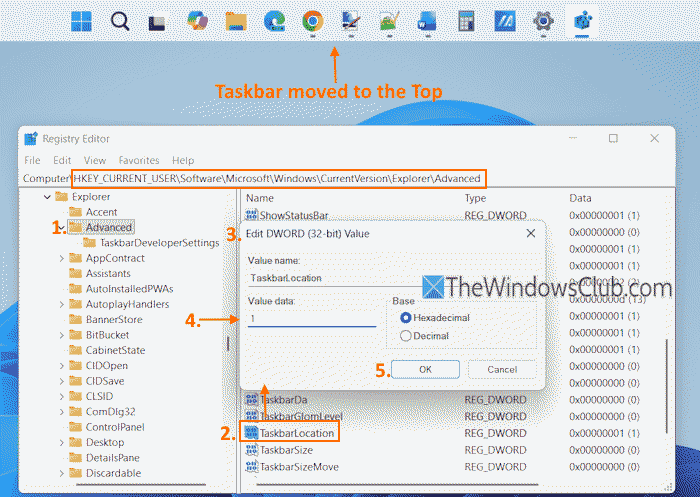
First, take a backup of the Windows Registry. After that, use the following steps to change the Taskbar position using the Registry Editor in your Windows 11 PC:
- Type regedit in the Search box
- Press Enter to open the Registry Editor window
- Navigate to the Advanced Registry key using the following path:
HKEY_CURRENT_USER\Software\Microsoft\Windows\CurrentVersion\Explorer\Advanced
- On the right side, look for TaskbarLocation DWORD (32-bit) Value and double-click on it
- An Edit DWORD (32-bit) Value box will open. In the Value data field, you will see 3, which indicates that the Taskbar position is set to Bottom (default)
- To move the Taskbar to the top, add 1 in the Value data field and press OK
- To set up a vertical Taskbar on the left edge, add 0 in the Value data field, and
- If you need to change the Taskbar position to the right edge on your screen, add 2 in the Value data field
- Press OK.
Taskbar icon alignment can’t be set using the Registry Editor. For that, you need to use the Settings app of Windows 11.
Move Taskbar to Vertical position in Windows 11 using StartAllBack
In versions prior to Windows 11 version 25H2 you had to follow these steps. You can also use this StartAllBack tool in current versions however, if you wish.
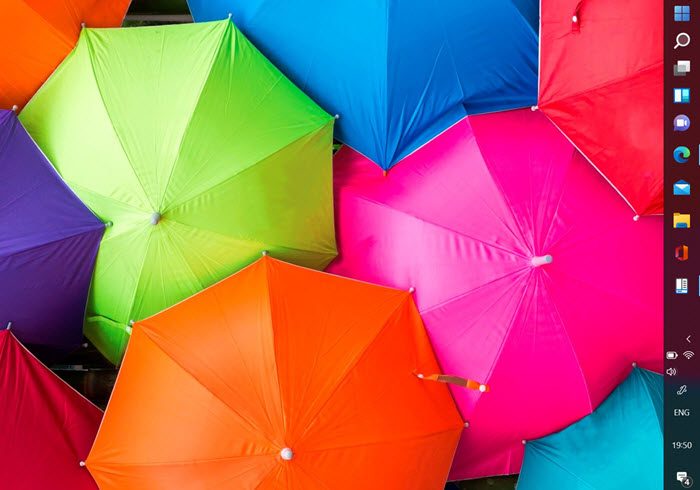
Download and install the StartAllBack app
Open the browser and visit the official download page of StartAllBack.
Click the download button. Wait for the download to complete once you are on the download page.
Once the download is complete, double-click the StartAllBack executable file. Click on Install for everyone or Install for me.
At the user account control, click on Yes and wait until the installation is complete.
Configuring StartAllBack app
Once the utility is installed, you need to configure it. You can do it from the StartAllBack configuration wizard. You need to choose from three different themes – Proper 11, Kinda 10, and Remastered 7.
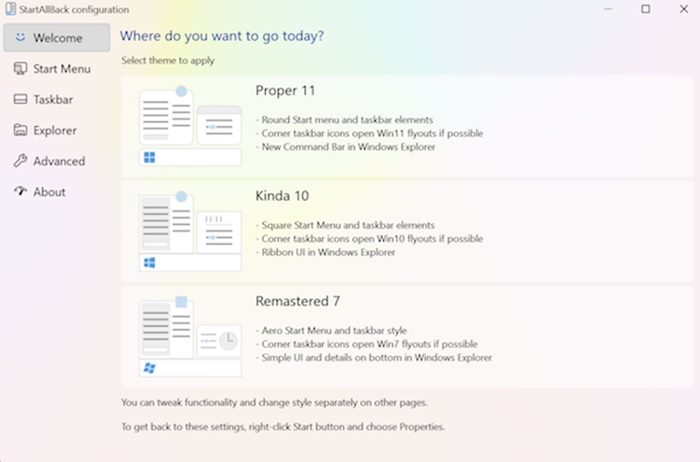
In the wizard window, click Taskbar in the vertical menu on the left.
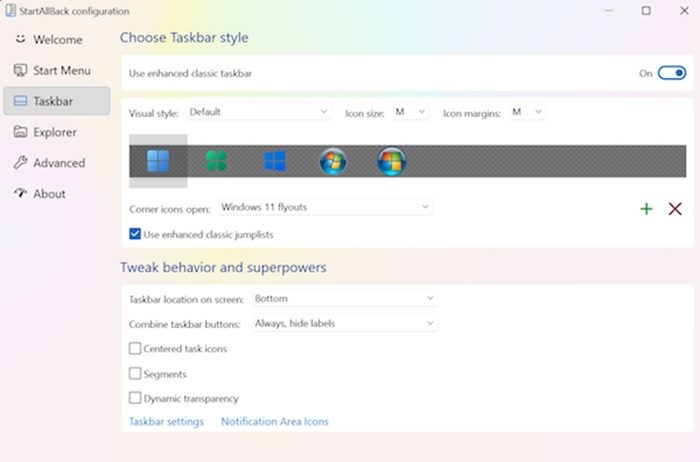
Tweaking the behavior of the taskbar
Once the Taskbar menu is selected, you should go to the right-hand pane, go to Tweak behavior and superpowers and change the Combine taskbar buttons and On secondary taskbars to Never.
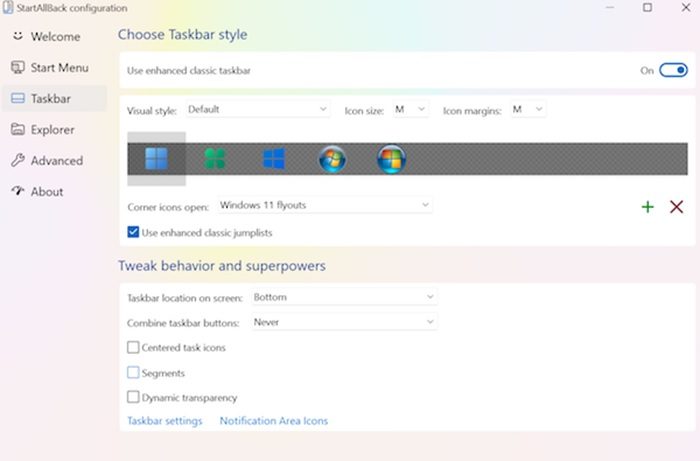
You can then right-click on the taskbar and click on lock all taskbars to unlock it.
Once you have completed all instructions, you can successfully unlock the Windows 11 taskbar.
How to move the Taskbar to the top in Windows 11?
Windows 11 users need to use the Registry Editor to move Taskbar to the top. To move the Taskbar to the Top on Windows 11 you need to tweak the Registry as follows:
- Press Win+R to open the Run dialog.
- Type regedit and press the Enter button.
- Click on the Yes option.
- Go to MMStuckRects3 in HKKCU.
- Double-click on the Settings REG_BINARY value.
- Set the Value data of 00000008 in the FE column to 01.
- Click the OK button.
- Restart Explorer.
HOT TIP: Windows 11 Repair and Recovery Tool is available FREE for now; go get it while you can as you never know when you may need it!
Why does the taskbar move by itself?
The taskbar normally resides on the bottom of the screen, but it sometimes moves to a position that may be off-center like the left side. It may be because you dragged the taskbar and it ended up doing something else instead. A bug that has landed on your monitor can also affect the taskbar’s movement. You must lock the taskbar once it is moved back to its original position so it won’t move again accidentally.
Why does the taskbar freeze?
If your Windows 11 taskbar fails, it can cause the following behaviors: no response when you click the taskbar, icons not appearing on the taskbar, or keyboard shortcuts not working. The taskbar may freeze for the following reasons: an incomplete operating system update, a bug in the update, corrupted files on your device or in your accounts, or an issue with Windows Explorer.
How to hide the Windows taskbar in full screen?
To hide the taskbar, you should enable Automatically hide the taskbar in desktop mode in Settings. If it is still visible in the full-screen mode, there may be some apps running in the background preventing the taskbar from going in the full-screen mode.
Why is the taskbar not working?
You can restart to clear some hiccups like when the taskbar is unresponsive or frozen. Press Ctrl + Shift + Esc to launch the Task Manager, go to the Processes tab, and locate Windows Explorer. Right-click on it and choose Restart.
