There are many third party services which run on top of popular email services like Outlook. Also called as email helper service, they improve both in terms of experience, and productivity. Boxbe specifically provides an auto answering service if you are under email overload. In this guide, we will share how to remove Boxbe Waiting List from Microsoft Outlook.
What is Boxbe Waiting List
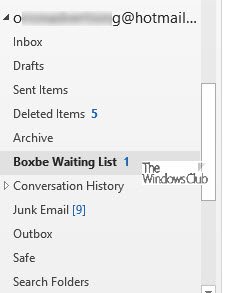
Since Boxbe acts as a middleman between your email provider and you, all the emails sent to you get into a waiting list. Once you approve those emails, they finally are available to be answered. These emails are put under a list called as Boxbe Waiting List. Usually, they create a folder or a label where all these emails are kept. This makes sure that your Inbox has only relevant emails.

If you have received an email as a reply to your sent email saying that you are in the Boxbe Waiting list, its because the receiver is using their service. The image above shows how it may look like in your Mail client.
How to remove Boxbe Waiting List from Outlook
Assuming you have used their service once, and then skipped it, the folder or the label still remains. In this age of the internet where emails flood our inbox one way or the either, its no surprise if you have forgotten about it. While you can always right-click on it and select Delete folder, to get rid of it completely, you have to take two steps:
1] Remove Boxbe Rule from Outlook.com

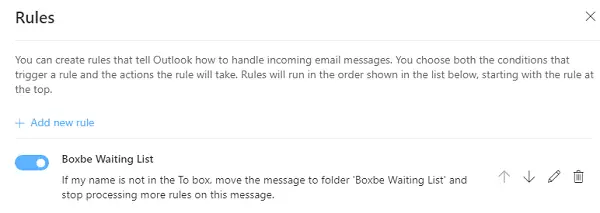
When you connected Boxbe with your Outlook account, it created a Rule. Any incoming email which did not match the rule gets into this rule and the folder Boxbe Waiting List.
- Go to Outlook.com and sign-in with your account.
- Click on the COG icon on top right and select Mail > Rules.
- Look for a rule with the name “Boxbe Waiting List”.
- Delete it.
2] Revoke access of Boxbe from Microsoft Dashboard

- In Outlook.com, click on your profile icon, and select View account.
- Next, click on Privacy or just follow this link to go to Microsoft Account Privacy.
- Select View and Clear Apps and Services Activity and look for Boxbe in the list.
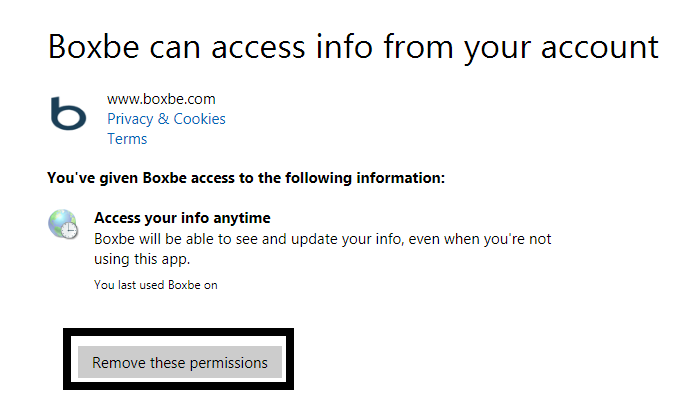
- Click on Edit. This will reveal details of the access by Boxbe with your account.
- Then click on Remove these permissions to get rid of Boxbe.
After this, the label will no longer be there, and Boxbe will not be able to access your emails through your Microsoft Account. Now you should see all the emails in your inbox.