Administrator Protection is a feature in Windows 11 that protects free-floating admin rights for Administrator users. This article shows how to enable Administrator Protection in Windows 11 for a more secure experience.

How to enable Administrator Protection in Windows 11
You can enable Administrator Protection in Windows 11 for a more secure experience via the following methods:
- Windows Security
- Local Security Policy
- Local Group Policy Editor
- Registry Editor
- Microsoft Intune.
We will show you both of these methods here.
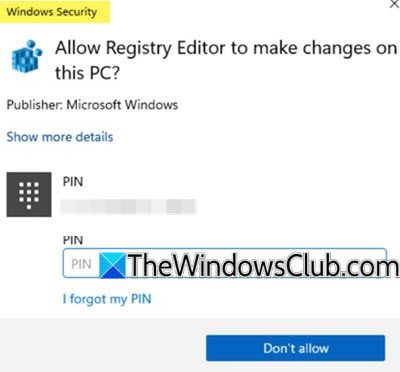
UAC stands for User Accounts Control. You all are aware of this built-in security feature of Windows 11. Whenever you launch an app with administrator rights, Windows 11 displays the UAC prompt with Yes and No options. Local Administrators can allow that app to make changes simply by clicking the Yes button. However, with the Administrator Protection feature enabled, the UAC screen will be replaced with Windows Security. Hence, this feature will become more secure.
1] Turn on Administrator Protection using Windows Security

Windows Security is a built-in app in Windows 11 that includes Virus & threat protection, Smart App Control, Device security, and other crucial features. The Administrator Protection feature can also be enabled using Windows Security. Currently, this feature is available in Windows Insider builds, but it will also be available in the stable release. Here are the steps:
- Open the Windows Security app
- Select the Account protection category using the Navigation pane
- Select the Administrator protection settings option in the Administrator protection section
- Turn on the button for the Enable just-in-time access for actions requiring administrator privileges option. This will enable the Administrator Protection feature
- Restart your Windows 11 PC to apply the changes.
2] Using Local Security Policy

The Local Security Policy (to manage security settings) method is similar to the Local Group Policy Editor and is available in Windows 11 Pro, Education, and Enterprise editions. Here are the steps to enable the Administrator Protection feature using the Local Security Policy method:
- Use the Win+R hotkey to open the Run Command box
- Type secpol.msc in the text field and hit the Enter key. This will open the Local Security Policy window
- Expand the Local Policies section
- Select the Security Options folder
- Open the User Account Control: Configure type of Admin Approval Mode policy by double-clicking on it. A separate window will open
- In the window, select the Admin Approval Mode with Administrator protection option using the drop-down menu
- Press the Apply button and the OK button
- Restart PC if needed.
3] Local Group Policy Editor
To enable the Administrator Protection feature through Local Group Policy Editor, you need to modify a policy setting. Windows 11 Home users can skip this method, as the Local Group Policy Editor is not available on Windows 11 Home edition.

Open the Local Group Policy Editor and go to the following path:
Computer Configuration > Windows Settings > Security Settings > Local Policies > Security Options


Now, scroll down and double-click on the “User Account Control: Configure type of Admin Approval Mode” option. Select the Admin Approval Mode with Administrator protection option in the drop-down. Click Apply and then click OK.
Exit the Local Group Policy Editor and restart your computer.
4] Registry Editor
Registry Editor is available on all editions of Windows, therefore, Windows 11 Home users can also use this method. Before you proceed, we recommend you create a system restore point and backup your Registry, so you can restore your system if any problem occurs.
Open the Registry Editor, copy the following path, and paste it into the address bar of the Registry Editor. Hit Enter after that.
Computer\HKEY_LOCAL_MACHINE\SOFTWARE\Microsoft\Windows\CurrentVersion\Policies\System

Make sure that you have selected the System key on the left side. Now, look for the TypeOfAdminApprovalMode entry on the right side. If the entry does not exist, create it manually.
Right-click in the empty space on the right side and select New > DWORD (32-bit) Value. Give the name TypeOfAdminApprovalMode to this newly created value. Now, double-click on this value and enter 2 in its Value data. Restart your computer for the changes to take effect.
If you want to revert changes, change the Value data of TypeOfAdminApprovalMode from 2 to 1 in Registry and save the changes.
5] Deploy Administrator Protection using Microsoft Intune

This option is suitable for IT admins. The steps to deploy Administrator protection using Microsoft Intune are as follows:
- Create your security group and then enroll users there. You need to create a Device Configuration profile (select Windows 10 and later as platform)
- Set up your Administrator protection policy. For this, access the Settings catalog
- Search for Local Policies Security Options
- Set the User Account Control Behavior Of The Elevation Prompt For Administrator Protection setting to Prompt for credentials on the secure desktop using the available drop-down menu
- After that, set the User Account Control Type Of Admin Approval Mode setting to Admin Approval Mode with Administrator protection
- Include your security group in that protection policy
- Now, Intune will sync at regular intervals to apply the protection policy.
That’s all. Hope this is helpful.
How do I always give administrator permission in Windows 11?
To open an application as an administrator in Windows 11/10, right-click on it and select Run as Administrator. You need to do this every time you want to launch the application as an administrator. However, an alternate option for this is to make that application always Run as administrator without selecting the respective option in the right-click context menu.
How to enable an admin account?
In Windows 11/10, you can create different types of accounts, including a local account, an administrator account, etc. In addition to these accounts, Windows 11/10 also has a hidden super administrator account. This account is usually used to troubleshoot and fix issues. You can enable the built-in Administrator account through the Command Prompt.
Read next: How to set up a Passwordless User Account on Windows.