In simple terms, the term Hardware Acceleration means using the computer’s hardware to perform a certain task and function faster than would be possible using the software. This also allows for smooth rendering of graphics. In most processors, instructions are executed sequentially, i.e., one by one, but you can perform them faster if you modify the same process a bit using some technique. The idea is to move all graphics and text rendering from the Central Processing Unit to the Graphics Processing Unit, thereby getting better performance.
Sometimes loosely called as graphics accelerators or floating-point accelerators, hardware accelerators can improve the performance of an application significantly. The term Hardware Accelerator has now been loosely replaced by more common and less descriptive terms such as graphics cards and video cards.
While the settings are best left at their default values in Windows, you can, if you wish to, turn off or disable Hardware Graphics Acceleration or reduce Hardware Acceleration – especially if you see Graphics error in your software. Turning off the Hardware Acceleration completely will run the application in software rendering mode.
Before you proceed, you should know that not all computer systems support this. Most new computers using NVIDIA or AMD/ATI graphics cards will not have the ability to change the amount of acceleration. These options are available on older systems and those which use the onboard video.
UPDATE: AMD and NVIDIA now allow you to enable or disable hardware acceleration in Windows 10 v2004 and later.
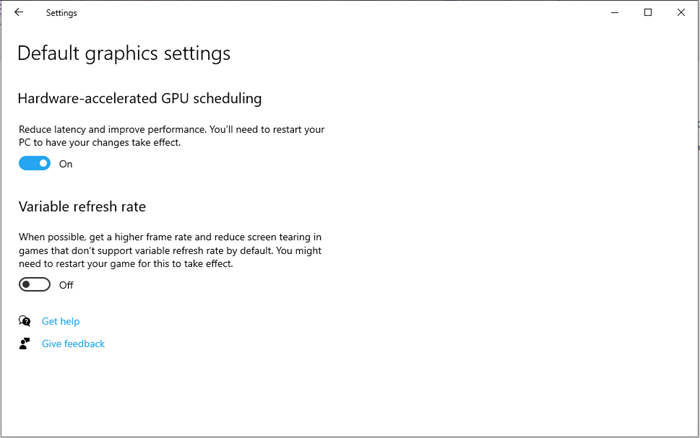
You need to toggle Hardware-accelerated GPU scheduling On or Off.
Disable Hardware Acceleration in Windows 11/10
To disable hardware acceleration in Windows 11/10, follow these steps:
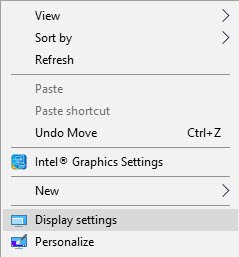
- Right-click on the Desktop and select the Display settings option.
- Click the Advanced display settings option.
- Select the Display adapter.
- Switch to the Troubleshoot tab.
- Click the Change settings button.
- Click the bar and move it to the None.
- Click the OK button.
Let’s check out these steps in detail.
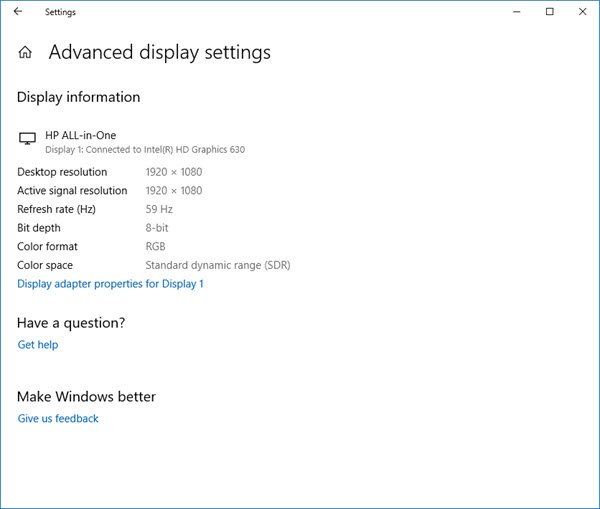
The Hardware Acceleration tab in Windows allows you to specify the performance of the graphics hardware present on your PC. In Windows 11/10 right-click on the desktop, select Display settings.
The Display Settings will open. Scroll down a bit, and you will see Advanced display settings.
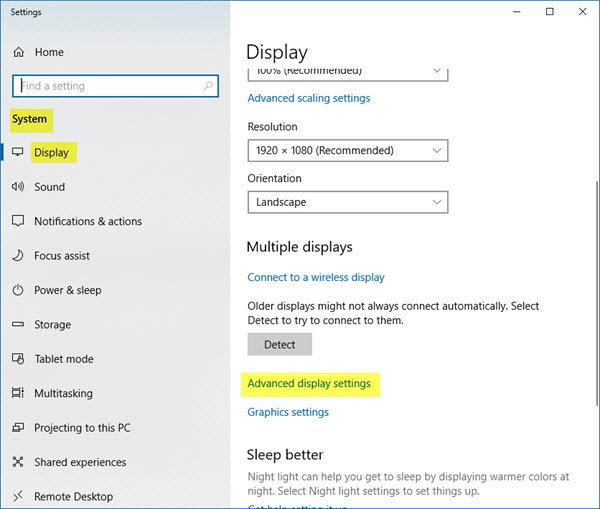
Click on Display adapter properties link.
This will open the Graphics Properties box. Now open the ‘Troubleshoot’ tab. If your current display driver does not allow you to change the settings, you will see the Change settings button grayed out, and you will not be able to change the settings. If you do not see this tab, update your graphics driver and see.

If your current display driver allows you to change the settings, you will be able to see the Change settings button. Click on it.

Now, the Display Adapter Troubleshooter will appear on your computer screen. Move the pointer to the extreme left to disable or reduce the hardware acceleration and click on OK. If you are having problems with your graphics hardware, these settings can help you troubleshoot display-related problems.

That’s it!
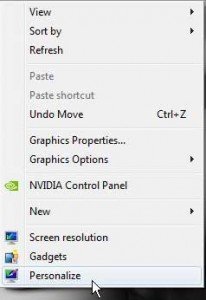
To disable or reduce Hardware Acceleration in Windows 8/7, first, right-click on the Desktop and from the context menu, choose the Personalization option.
Then, select Display from the left panel of the window and click on ‘Change display settings’.
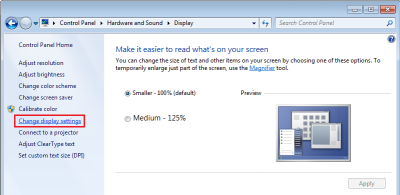
Next, click on ‘Advanced settings’.

This will open your Monitor and Graphics Properties box. You can then follow the latter part of the instructions given above via its Troubleshoot tab.
This is how you can enable, disable, or change the level of hardware acceleration in Windows 11/10/8/7.
Disable hardware acceleration button greyed out
If you find that the option is grayed out, check if your hardware permits it and ensure that you have updated drivers. You may also see if DWORD DisableHWAcceleration exists in the following registry key and that it has a value of 0.
HKEY_CURRENT_USER\SOFTWARE\Microsoft\Avalon.Graphics\
If it does not exist, create a new DWORD DisableHWAcceleration. A value of 1 disables hardware acceleration. A value of 0 enables hardware acceleration, provided the system meets hardware acceleration requirements.
You can use the above Registry method to disable hardware acceleration in Windows 10.
The new settings could not be saved to registry
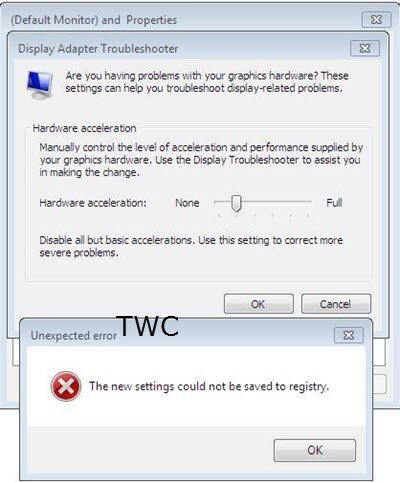
If you receive an Unexpected error, The new settings could not be saved to registry message box; then you may try the following:
- Visit the manufacturer’s website to download and install the latest drivers
- Run Display Quality Troubleshooter
- Run Hardware and Devices Troubleshooter.
How do I disable hardware acceleration?
To disable hardware acceleration in Windows 11/10, you need to follow the guide mentioned above. In other words, you need to open the Advanced display settings Windows Settings panel, go to the Display adapter section and switch to the Troubleshoot tab. Then, click the Change settings button, and move the bar to the None section.
Does Windows 11/10 have hardware acceleration?
Yes, Windows 11 and Windows 10 have hardware acceleration that you can enable or disable easily. Whether it is about the sound or video card, you can turn on or off the hardware acceleration in Windows 11/10 using the guide, as mentioned above.
Should I disable hardware graphics acceleration?
It depends on the situation you are in. Hardware acceleration is supposed to help you get a better user experience. However, if you find any crash or lag issue while using a certain application on your computer, turning off the hardware acceleration might be handy for you.
Related reads: