Microsoft has introduced a new interesting feature in Windows that is named Hardware-accelerated GPU Scheduling. This feature is part of the WDDM 2.7, which effectively reduces latency and increases video playback performance. It allows the computer’s graphics card to manage its own video memory rather than the operating system.
What is Hardware-accelerated GPU Scheduling
Hardware-accelerated GPU Scheduling enables more efficient GPU scheduling between applications. The GPU manages its own VRAM, rather than having it managed by Windows OS. This reduces latency & increases video playback performance.
If you want to use this feature, you first need to enable it through Windows Settings or the Registry Editor. But before that, make sure you are using the updated version of Windows and NVIDIA drivers. If you are using the AMD graphics driver, then you probably might have to wait for a while until the driver supports this feature.
In this guide, we will show you how to enable Hardware-accelerated GPU scheduling in Windows 11/10.
Enable Hardware-accelerated GPU Scheduling in Windows 11/10
To enable hardware-accelerated GPU scheduling using Windows 11/10 Settings, follow this procedure:
- Open Settings
- Select System > Display tab.
- Locate Multiple displays
- Click on Graphics Settings.
- Select the Change Default Graphics Settings option.
- To enable the feature, toggle ON the button next to the Hardware-accelerated GPU scheduling.
- Reboot your Windows device to apply the changes.
Before you begin, make sure that your user account has administrative privileges. Now, let’s see this in detail.
In order to enable this feature, you first need to open the Windows Settings using the Win+I keyboard shortcut.
Once it opens, select the System > Display tab.
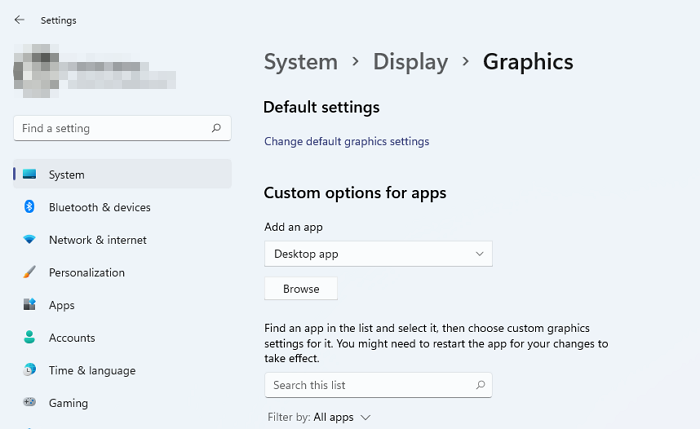
The following is the Windows 11 screenshot:

The following is the Windows 10 screenshot:
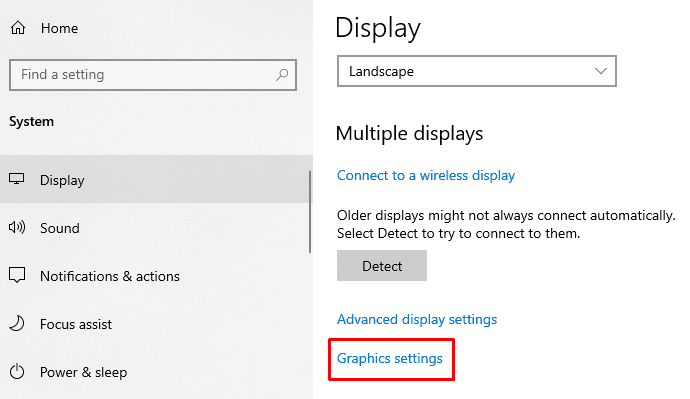
On the next page, move to the right pane and scroll a bit down.
Here you will find Multiple displays > click on the link called Graphics Settings.
Then select the Change Default Graphics Settings option.
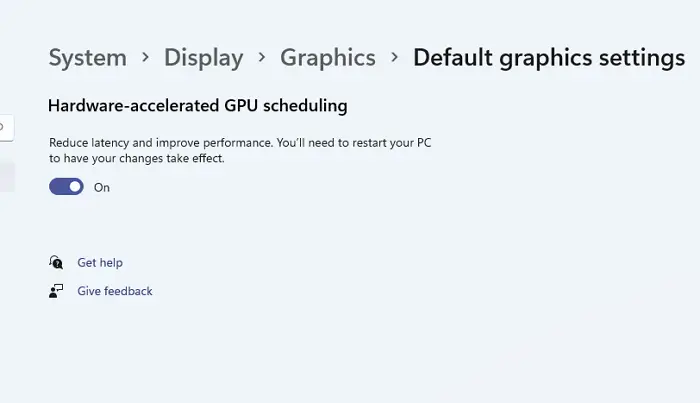
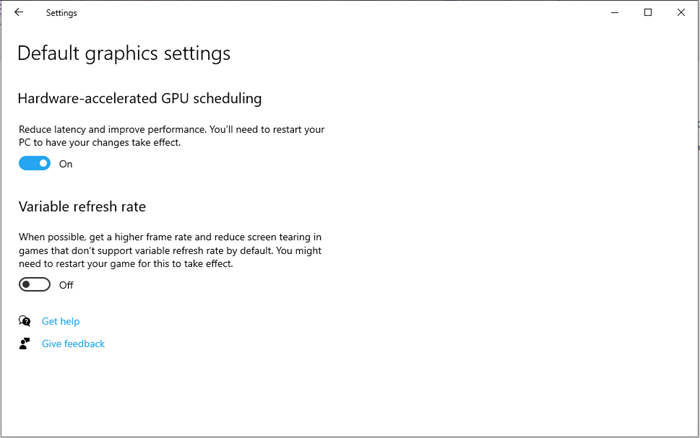
To enable the feature, toggle ON the button next to the Hardware-accelerated GPU scheduling.
The following is the Windows 11 screenshot:
The following is the Windows 10 screenshot:
Now reboot your Windows device to apply the changes.
If you ever need to disable this feature on your Windows 11/10 PC then just turn OFF the same toggle button.
Related Post: How to disable Hardware Acceleration.
Using Windows Registry Editor
You can also use your Registry Editor to enable Enable Hardware-accelerated GPU scheduling on your Windows 11/10 device.

To do so, open Registry Editor in Windows PC.
In the Registry Editor window, navigate to the following path –
HKEY_LOCAL_MACHINE\SYSTEM\CurrentControlSet\Control\GraphicsDrivers
On the following page, go to the right pane and right-click on HwSchMode. Now, from the menu list, select the Modify option to edit it.
In the pop-up menu, set the Value data 2 and click on the OK button.
Once you do this, restart your Windows device to apply the changes.
If you want to disable this feature, set the Value data 1, and then save it.
Hardware-accelerated GPU Scheduling missing
The new GPU scheduler will be supported on recent GPUs that have the necessary hardware, combined with a WDDMv2.7 driver that exposes this support to Windows, says Microsoft. While some GPUs have the necessary hardware, the associated driver exposing this support will only be released once it has gone through a significant amount of testing.
So if you do not see this feature, maybe your hardware does not support it yet. You need to wait.
Should I enable hardware-accelerated GPU scheduling?
If your PC hardware supports hardware-accelerated GPU scheduling, then yes you should. It has been noticed that it improves performance in all cases. On average, there is a gain of 1-2 frames per second, depending on the game’s resolution.
What does hardware acceleration GPU Scheduling do?
The feature allows the GPU to manage its VRAM or Video Memory instead of letting OS does the job. As the GPU process will be more innovative compared to OS, it works out better in the end.
How do I enable hardware acceleration in my browser?
Depending on the browser, the settings are available on the System tab like in the Edge Browser. Enabling them helps you get a better experience with watching videos, loading pictures, etc.