
Affinity, which offers great alternatives to Adobe Photoshop, Illustrator, and Lightroom, is popular for its one-time payment for a lifetime, as opposed to monthly recurring payments for Adobe programs. Affinity Photo and Affinity Designer are widely used by designers worldwide. Canva acquired Affinity in 2024. Recently, Canva bundled its Affinity programs and relaunched them as Affinity, available for free use forever without any limits. In this guide, we show you how to use the Affinity app for free on Windows PC forever.
What is Affinity by Canva?
Affinity by Canva is a free-to-use designer app that allows you to edit photos, design vectors, and graphics on your Windows PC without requiring a subscription, such as Adobe Photoshop or Illustrator, or even Canva Premium. All you need is an email to create an account and start using it.
Canva made it clear in its announcement that Affinity will be free forever, and they will not use the data gained from Affinity to train their AI models to offer better products on their Canva Premium version. Let’s explore how we can utilize Affinity for designing, photo editing, and illustrations.
How to use Affinity Designer app for free on Windows PC
Follow the instructions below to start using the Affinity app and create designs, edit photos, and design vectors.
- Install the Affinity app on a Windows PC
- Create a new document in Affinity
- Features on Affinity
- Use the Vector, Pixel, and Layout tabs on Affinity
- Export designs from Affinity
Let’s delve into the details of how we can create our designs using Affinity.
1] Install the Affinity app on a Windows PC
To use Affinity and its features, we need to download it from the official website and install it on the PC. Open a web browser on your PC and visit the Affinity.studio website. Click the Get Affinity button on the homepage and then click on Sign up to download on the page that appears.
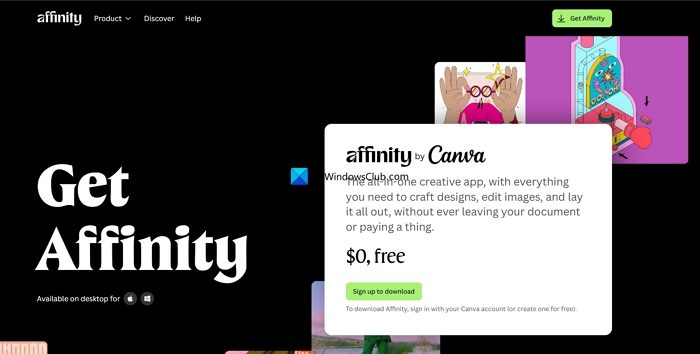
Use your Canva account or a Google account to sign up and download the Affinity app. After a successful sign-up, it will redirect you to the download page. Click the Download for Windows button and select the version that suits your Windows PC. You can find out the version of your PC in the Settings app.
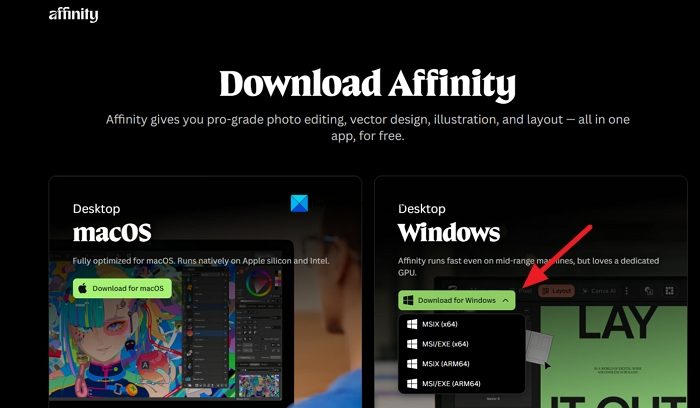
Install the downloaded Affinity program and open it. If prompted, sign in with the account you have used to download it.
2] Create a new document in Affinity
Open the Affinity app, which is installed on your Windows PC. On the homepage, click the green + button to create a new document. When you click on it, a tab appears below to customize various aspects of the new document, including resolution, margins, and more.
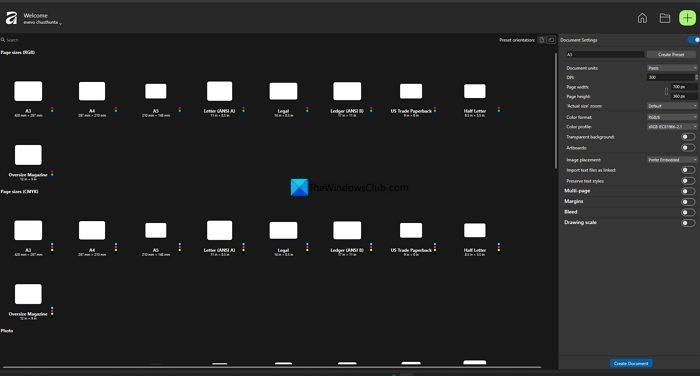
Customize your document and click the Create Document button at the bottom. If you want to open existing documents created in earlier Affinity apps, you can click the folder icon beside the + icon and browse the documents to select them for opening.
3] Features on Affinity
The learning curve on Affinity is too short if you already have experience with Photoshop or other similar programs. Even if you are a beginner, you can get used to the features and various tools in a short span of time.
The Affinity app comes primarily with four main features or tabs. They are Vector, Pixel, Layout, and Canva AI.
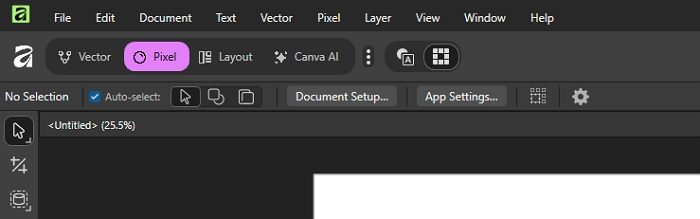
Canva AI is unavailable if you are not a Canva Pro or premium user. You can ignore that. Instead of Canva AI, you can use other AI image generation tools for free and import them into the Affinity app.
The Vector tab helps you create illustrations and graphic designs that you can create in Adobe Illustrator or InkSpace. The use cases include logo design, illustrative marketing materials, etc.
The Pixel tab is where you can edit photos, enhance their appearance, adjust colors, and brightness, and more. This tab can help you achieve what you can do on Adobe Photoshop. Although it is not as feature-rich or powerful as Photoshop, you can perform most basic image editing and manipulation tasks.
The Layout tab helps you create pages for publishing books, brochures, or any other project where you work with typography and images that blend to convey information or a story.
Each tab comes with its own set of tools to carry out tasks for which it is best suited.
4] Use the Vector, Pixel, and Layout tabs on Affinity
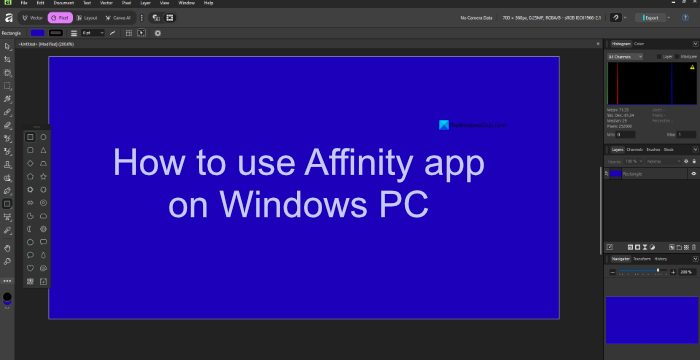
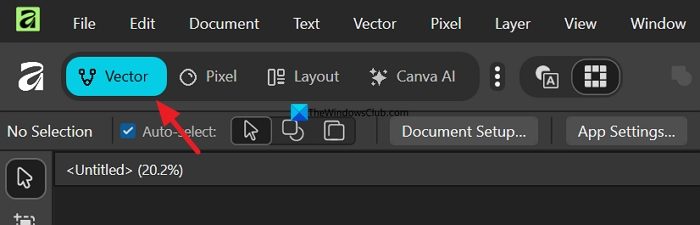
Create a new document on the Affinity app on your Windows PC. By default, it is set to the Pixel tab. Change it to the Vector or Pixel or Layout tab by clicking on it.
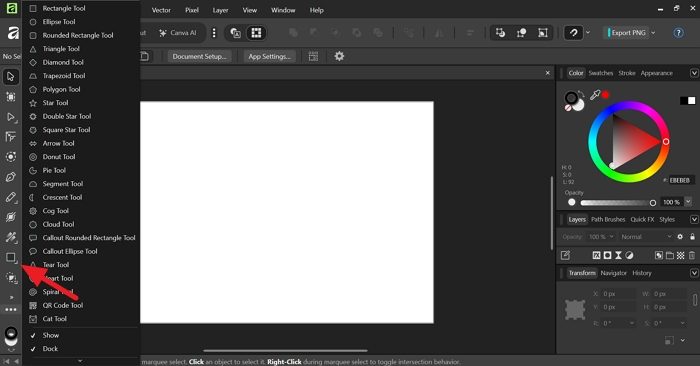
To draw a shape, click on the Rectangle tool on the toolbar on the left side and select the shape you want to draw on your document. Select any item from the existing collection and draw it.
Similarly, you can use all the tools on the sidebar and make your illustration as you like. If you have a hand-drawn illustration and want to place it in Affinity to create a digital version, similar to what you would do in Adobe Illustrator, click File in the menu bar, select Place, and then browse for the document.
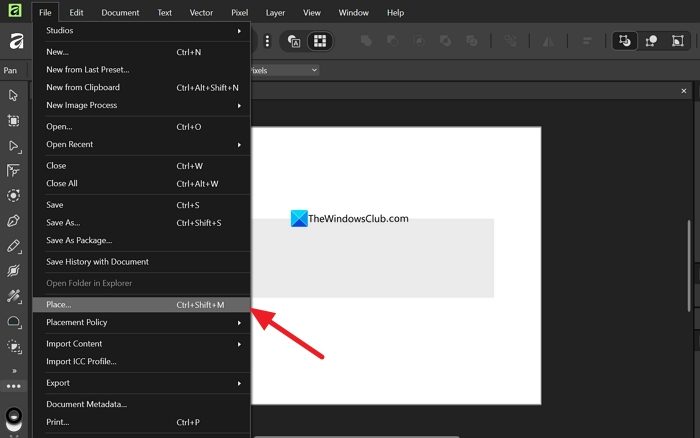
It will automatically be placed on your document. Adjust the sizes as you like. Then, draw shapes to create the illustration. If you do not understand a tool or icon, hover over it to know more about it.
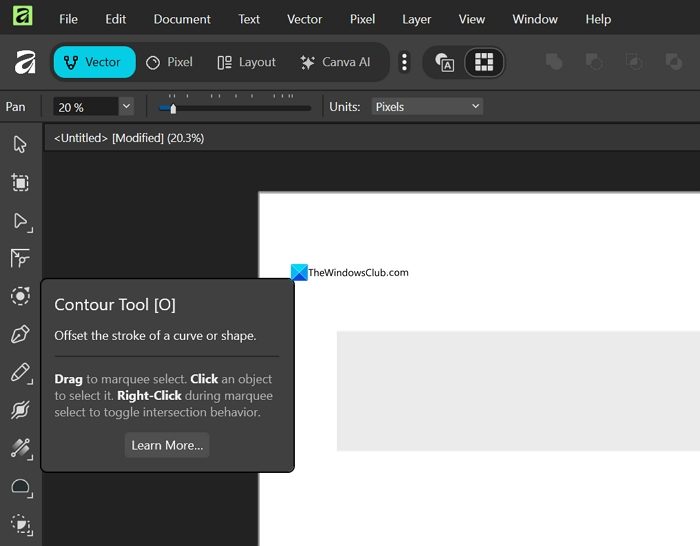
If you do not understand it, click the Learn More.. button and learn more about the tool.
Similarly, both the Pixel and Layout tabs work with different sets of tools. Hover over them if you don’t understand any of them and learn more about them.
5] Export designs from Affinity
After you have designed or carried out your task on Affinity, you can save it in an editable format for future use by using the Ctrl+S keyboard shortcut. If you want to create the design in image format, you have to export it.
To export a design from Affinity, click on File in the menu bar, hover over Export, and select Export.
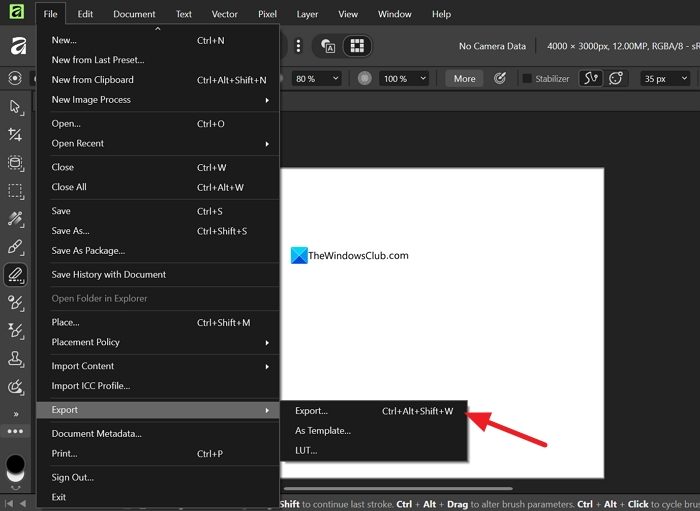
It opens the export options window. Select the image format and the quality you desire. Then, click the Export button and save it on your PC.
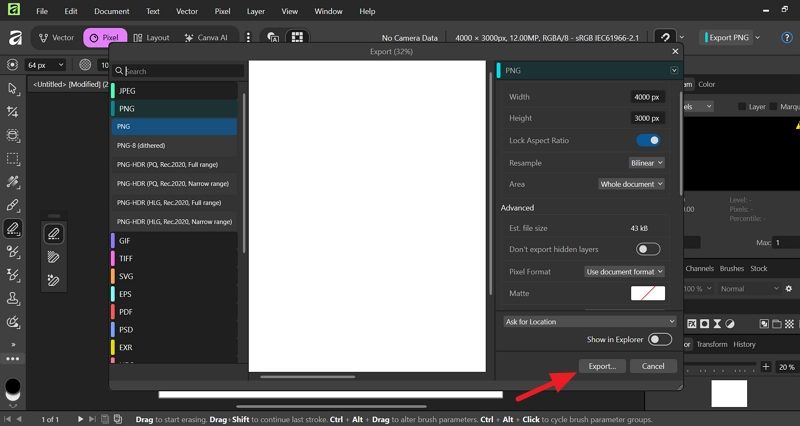
The image size and quality depend on the format and quality you select during export.
Also read: How to use AI in Canva
Do professional designers use Affinity?
Yes, Affinity is a professional-grade image editing, designing, and layout program. Earlier, there were Affinity Photo, Affinity Designer, and Affinity Publisher programs. Canva bought Affinity and merged the three apps, making them available for free use.
Related read: Best Free Online Photo Editors and Image Editing Tools.
