If you are unable to install Hyper-V in a Windows Server virtual machine, here is how you can fix the issue. Whether you are trying to install Hyper-V using Server Manager, PowerShell, or DISM, you may encounter an error that prevents you from completing the installation. If so, you can explore these solutions to resolve the issue.

Unable to install Hyper-V in Windows Server virtual machine
Follow these instructions if you are unable to install Hyper-V in a Windows Server virtual machine:
- Enable nested virtualization
- Assign 4 cores to virtual machine
- Disable other virtual machine software
- Verify SLAT
- Ensure virtualization in BIOS.
To know more about these solutions, continue reading.
1] Enable nested virtualization
It is the very first thing you need to do in order to install Hyper-V in Windows Server virtual machines.
Your Windows Server must have nested virtualization. Since it is not enabled by default in any virtual machine software, you must enable it manually. Follow these steps to enable nested virtualization.
Hyper-V:
Make sure that the virtual machine is turned OFF. If so, open Windows PowerShell with administrator privileges and enter this command:
Set-VMProcessor -VMName <VMName> -ExposeVirtualizationExtensions $true
Don’t forget to replace VMName with the original virtual machine name.
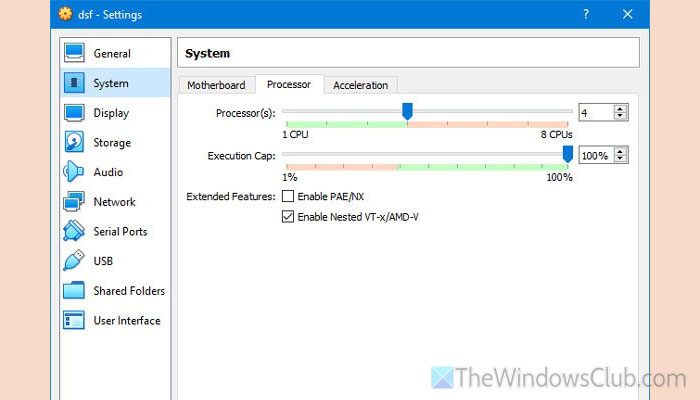
VirtualBox:
Open VirtualBox and select the virtual machine. Then, click on the Settings and go to System > Processor.
Tick the Enable Nested VT-x/AMD-V checkbox and click the OK button.
VMware Workstation:
Open VMware Workstation and click on the virtual machine. Then, select the Edit virtual machine settings and go to the Processors section.
Next, tick the Virtualize Intel VT-x/EPT or AMD-V/RVI checkbox.
Finally, click the OK button to save the change.
Read: How to install Hyper-V in Windows Server
2] Assign 4 cores to virtual machine
If you are trying to install virtual machine software inside a virtual machine, you must have an adequate number of cores assigned to the processor. In other words, if you do not allow at least 4 cores, you may not be able to install or start the virtual machine software, whether it is Hyper-V, VirtualBox, or any other.
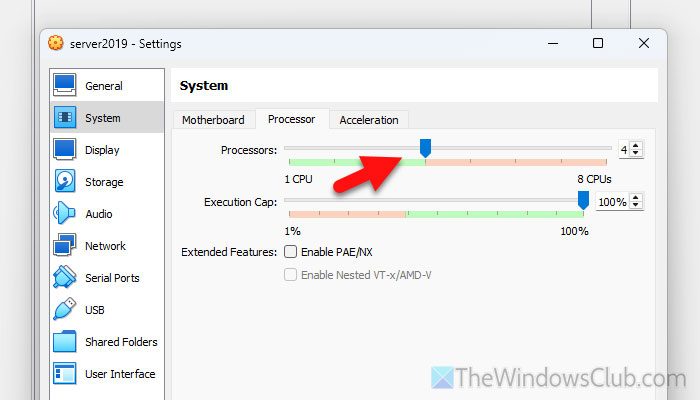
To check that setting, you need to open VirtualBox and go to Settings > System > Processor.
From here, you can adjust the number of cores according to your requirements. Do not set anything less than 4.
Finally, click the OK button to save the change.
Read: How to enable all CPU Cores on Windows 11
3] Disable other virtual machine software
Suppose you want to install Hyper-V or Hyper-V integrated services or tools. In that case, we recommend disabling other third-party virtual machine software, such as VirtualBox, VMware Workstation, and VMware Player. These tools may create conflicts when you attempt to install Hyper-V using Service Manager, DISM, or PowerShell.
Read: How to disable Hyper-V on Windows 11
4] Verify SLAT
SLAT or Second Level Address Translation is mandatory when you want to install another virtual machine inside a virtual OS. In this case, if you want to install Hyper-V in a virtual Windows Server, your processor must have the SLAT mechanism.
To verify whether your processor supports SLAT or not, download Coreinfo from the official Microsoft.com website.
Then, extract the ZIP file and place the folder on your desktop. Next, open the Command Prompt with administrator privileges and enter this command:
cd C:\Users\your_username\Desktop\Coreinfo
Next, use this command:
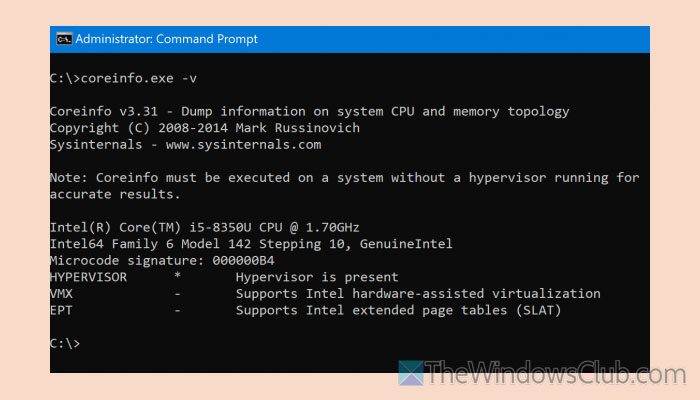
coreinfo.exe -v
Check the EPT. If it says as in the image, you are good to go.
5] Ensure virtualization in BIOS
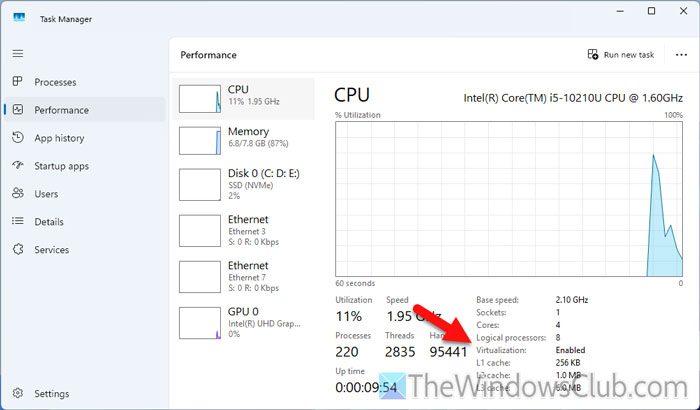
To ensure if your virtual OS has virtualization, open the Task Manager on your computer and go to the Performance tab. Here you can find a tag called Virtualization. If it says Enabled, you can go through the normal installation process. However, if it says Disabled, you need to enable nested virtualization first.
Read: Windows Sandbox cannot be installed, Virtualization support is disabled in the firmware
Can I install Hyper-V on Windows Server?
Yes, you can install Hyper-V on Windows Server. You can use Server Manager, DISM, or PowerShell to install Hyper-V on Windows Server. However, if the Windows Server is installed on a virtual machine, you must enable nested virtualization.
How to install Hyper-V tools on VM?
To install Hyper-V tools on virtual machines, open the PowerShell and use this command: Get-VMIntegrationService -VMName "VM-name". To enable the Guest Service Interface, execute this command: Enable-VMIntegrationService -VMName "VM-name" -Name "Guest Service Interface". You can verify the installation or integration in the Registry Editor by navigating to HKLM\Software\Microsoft\Virtual Machine\Auto.
Read: How to enable Windows Sandbox in VirtualBox guest OS.