If you want to install Hyper-V in Windows Server, this detailed step-by-step guide will help you. You can enable and use Hyper-V in any Windows Server without any additional permissions.

For your information, here are multiple ways to install Hyper-V in Windows Server 2025/2022. You can use Server Manager, which is one of the best ways to install it. Following that, you can use Windows PowerShell, as well as DISM, or the Deployment Image Servicing and Management (DISM) tool. Here, we have listed all the methods so that you can install Hyper-V according to your requirements.
Hyper-V server requirements
- 64-bit processor is mandatory.
- The processor must have SLAT or Second-level Address Translation.
- Minimum 4GB of Memory or RAM.
- Nested virtualization support for Virtual Machine.
- Windows Server 2025/2022.
- Intel Virtualization Technology (Intel VT) or AMD Virtualization (AMD-V).
How to install Hyper-V in Windows Server using PowerShell
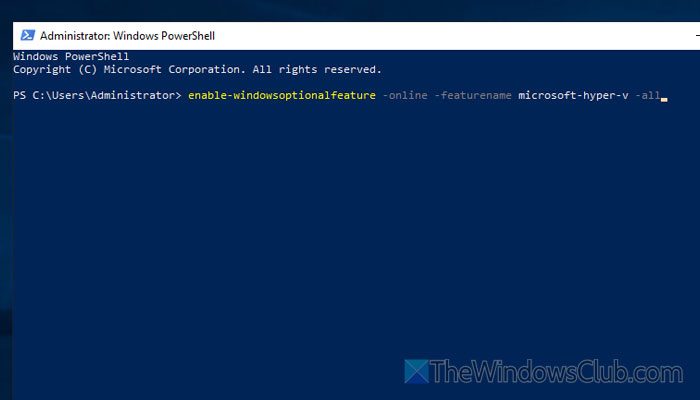
To install Hyper-V in Windows Server, open PowerShell. For that, you can either search for it or you can open the Start Menu and navigate to Windows PowerShell.
Once it is opened, enter this command:
Enable-WindowsOptionalFeature -Online -FeatureName Microsoft-Hyper-V -All
After that, let the process finish. Then, restart your server.
For your information, the -All parameter helps you install all required dependencies.
Once done, you can use the following command to verify the installation:
Get-WindowsOptionalFeature -Online -FeatureName Microsoft-Hyper-V-All
How to install Hyper-V in Windows Server using DISM
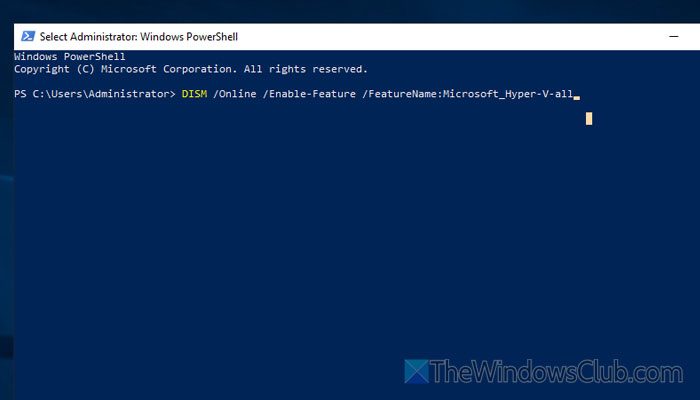
To install Hyper-V in Windows Server using DISM, open the Command Prompt or Windows PowerShell with administrator privileges. Following that, you can execute the following command:
DISM /Online /Enable-Feature /FeatureName:Microsoft-Hyper-V-All
Do not close the window and let the process finish. Once done, restart your server.
How to install Hyper-V in Windows Server using Server Manager
To install Hyper-V in Windows Server using Server Manager, follow these steps:
- Open the Server Manager.
- Go to Manage > Add Roles and Features.
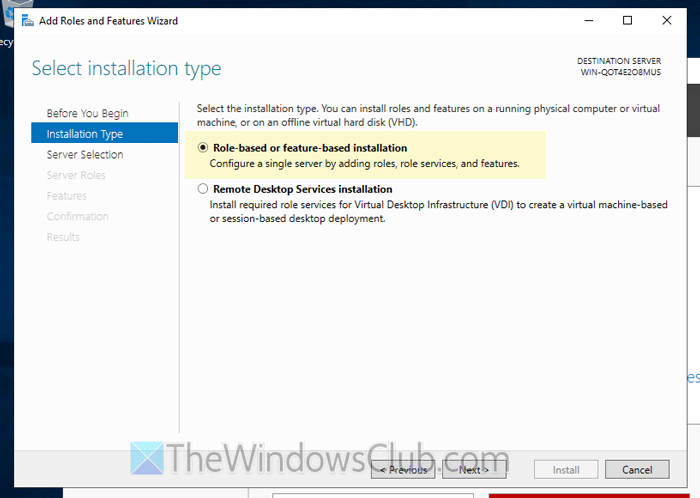
- Choose Role-based or feature-based installation in the Installation Type tab.
- In the Server Selection tab, choose your server and click Next.
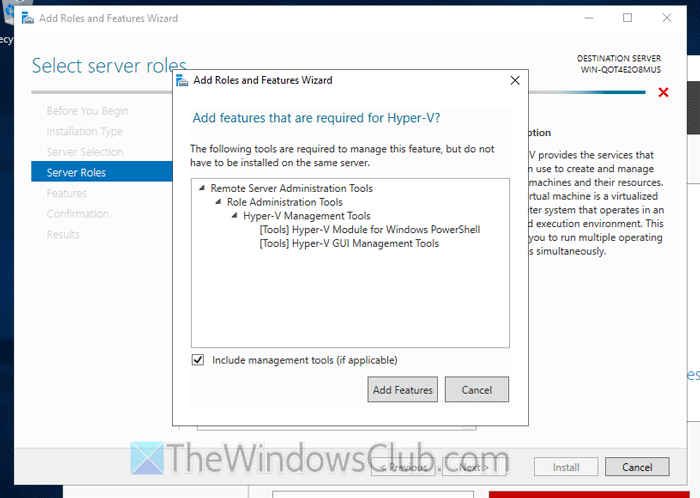
- Tick the Hyper-V checkbox.
- Click on the Add Features button.
- Do not choose anything in the Features tab and click on Next.
- Configure the virtual switch as per your requirements.
- Click the Browse button in the Features Stores tab and choose a path.
- Tick the Restart the destination server automatically if required checkbox.
- Click the Install button.
Let’s delve into these steps in detail.
To get started, open the Server Manager on your server and go to Manage > Add Roles and Features option.
Then, choose the Role-based or feature-based installation option in the Installation Type tab and click on the Next button.
Next, you need to select your server, if there are multiple servers available. For that, go to the Server Selection tab and choose the server as per your requirements. Finally, click the Next button.
Following that, you need to tick the Hyper-V checkbox.
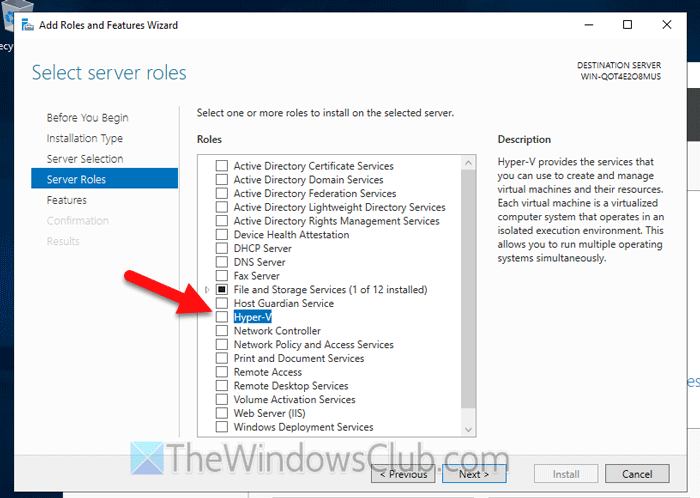
Once you do that, a pop-up window will appear, listing all the features that will be included. You need to click on the Add Features button.
Then, you will be redirected to the Features tab, where you do not need to choose anything. You can click on the Next button to set up the Virtual Switches and Default Stores.
In the Virtual Switches tab, select the internet connection that will be used for the Hyper-V virtual machine. Following that, go to the Default Stores tab, click on the Browse button, and choose a path where you want to store all the files.
Finally, go to the Confirmation tab, tick the Restart the destination server automatically if required checkbox, and click the Install button.
Please note that the process may take a few moments to complete. Once done, your server will be restarted automatically.
This post will help you if you are unable to install Hyper-V in Windows Server virtual machine.
Read: How to install Hyper-V on Windows 11 Home
How do I enable Hyper-V on my server?
To enable Hyper-V on your server, you need to use Server Manager, PowerShell, or the DISM tool. In the DISM panel, you need to execute the following command: DISM /Online /Enable-Feature /FeatureName:Microsoft-Hyper-V-All.
Is Hyper-V included in Windows Server?
Yes, Hyper-V is included in Windows Server. You can find Hyper-V in Windows Server 2025, 2022, 2019, 2016, and earlier versions. However, you need to manually install Hyper-V, as it is not pre-installed like Windows 11 or Windows 10.
Read: How to Enable Hyper-V in Windows 11